Plan, Section, Elevation: Which Drawing Answers Your Question?
Use a plan to understand where things sit, a section to understand what happens through a space, and an elevation to understand a face of it. Before choosing a view, write down the question you need answered. A desk can fit on a floor plan while the sloping ceiling above its chair makes the arrangement awkward.
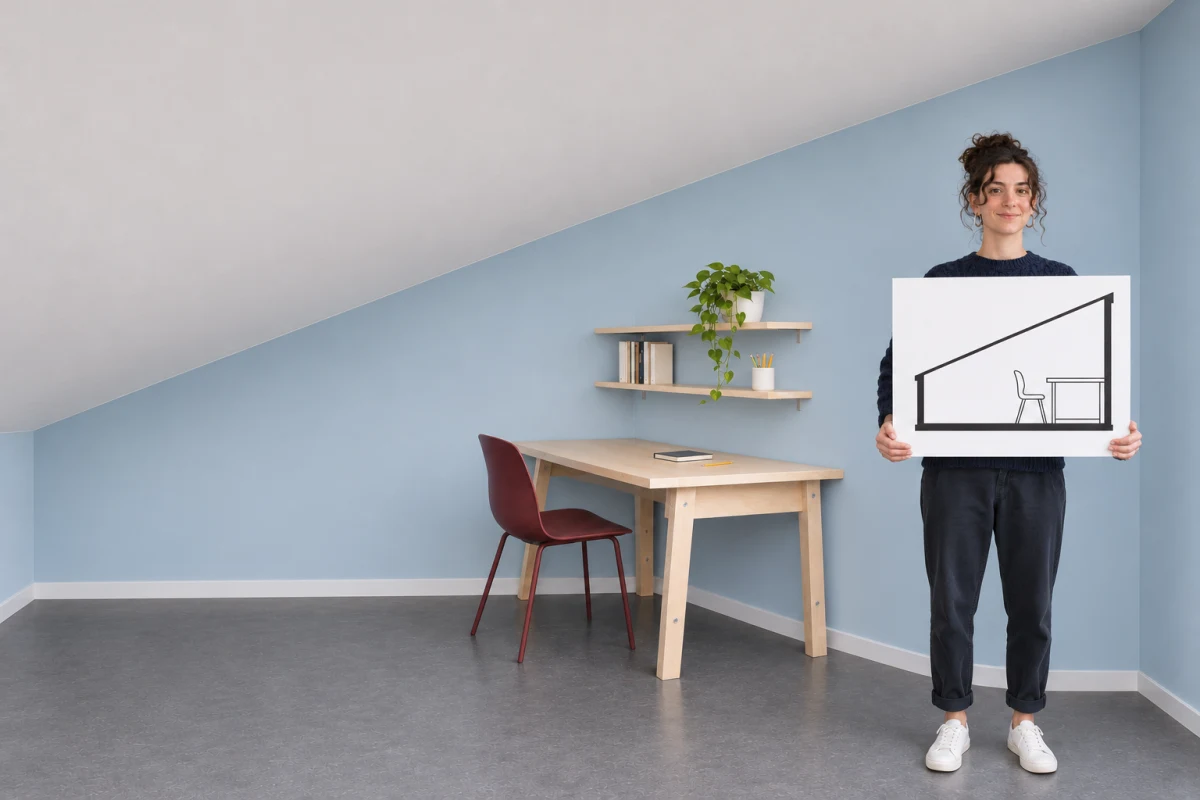
Start with a question, not a favourite view
Imagine you are a junior designer preparing a small study beneath a sloping roof. You need a desk, a chair and shelves. Three questions lead to different drawings: where can the furniture go, what space is available above the person using it, and how should the shelves sit on the wall?
These are questions about representation, not a complete loft-conversion assessment. The example does not establish suitable headroom, structural capacity, access, fire safety or permission to change the building. Those need project-specific information and appropriate professional checks.
The plan: arrangement seen from above
A floor plan is normally drawn as a horizontal cut through a building, looking down. It shows the arrangement at that level: walls, openings and the relevant objects below the cut. It is not simply a photograph taken from the ceiling. Features above the cut may be indicated using a different line convention; check the drawing's legend rather than guessing.
For the study, use the plan to place the desk footprint, pull the chair away from it and follow the route into the room. It helps you compare positions across the floor. But a furniture rectangle does not tell you how much space is above a person's head. A roof plan answers another question again: it shows the roof from above, not the room beneath it.
The section: choose the cut that exposes the problem
A section shows an imagined vertical cut through the building. You see the parts cut by that plane and selected things beyond it. Cut edges are often drawn more strongly than surfaces seen behind them. The section line on the plan locates the cut; its arrows indicate which way you look. Read its reference to find the corresponding drawing.
For our study, take a section through the chair and desk, in the direction in which the ceiling height changes. Now the floor, worktop and sloping ceiling can be read together. A section elsewhere in the room might miss the chair entirely. A neatly drawn section is only useful if it passes through the relationship you are checking.
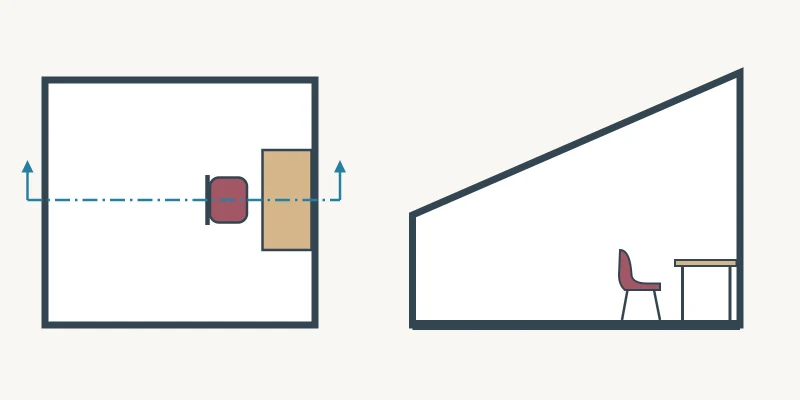
The plan at left locates the cut through the chair and desk; the section at right exposes the ceiling above them. These simplified teaching drawings omit dimensions and construction details.
If the intended position does not work, compare moving the desk towards the taller part of the room, rotating the arrangement, or placing low storage under the slope. Each choice changes something else: circulation, daylight, wall space or storage capacity. Recheck the plan after changing the section. The drawing helps you ask and test the question; it does not supply a universal acceptable height.
The elevation: look straight at a face
An elevation represents a vertical face without perspective convergence. An exterior elevation shows one side of a building: for example, the arrangement of openings and the roof outline. It does not normally reveal the room layout hidden behind that face.
An interior elevation looks straight at a wall inside a room. For the study, it helps arrange the shelves and desk across that wall and see their heights relative to one another. Unlike the section through the chair, it is not a cut through the furniture and roof. Depths and concealed fixings need other information.
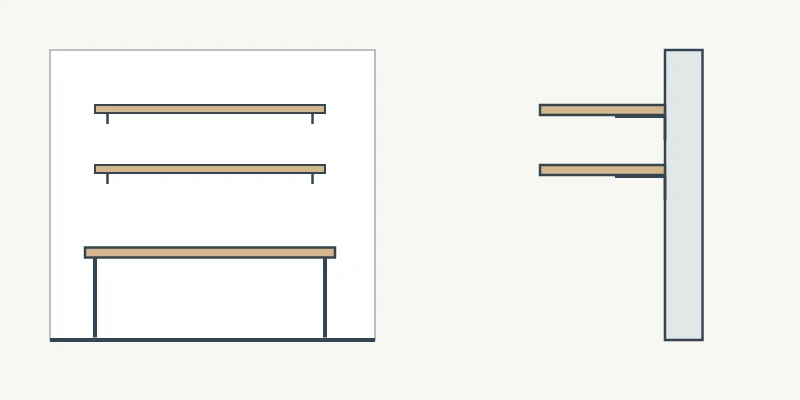
At left, the interior elevation shows the shelves across the wall. At right, a separate close section shows their projection from it. A front view alone does not establish depth or a fixing design.
Read the views as a connected explanation
Start by checking the drawing title, level, viewing direction and revision. Then follow one recognisable object through the relevant views. In this example, find the same desk in plan, check the cut through its chair, and locate the wall carrying the shelves. Do not assume that two adjacent drawings look in the same direction or are drawn at the same scale.
A perspective view can make the room easier to recognise, especially for someone new to drawings. Keep it beside the measured information when useful. It does not replace the selected cut, dimensions or notes needed to resolve a precise question. Likewise, an attractive elevation cannot prove that a person can stand comfortably under a roof behind it.
Before sharing the study, try three short explanations: “This plan shows the arrangement”; “this section checks the space above the chair”; “this interior elevation shows the shelf positions.” If you cannot point to the evidence for one of those statements, choose a better view or add the missing information before asking someone to decide.