Moving a Small Practice From 2D CAD to a Model-Based Workflow
Test the move from separate drawings to a maintained model on one familiar project. Define the model’s job, rehearse a change and check the delivery before expanding.
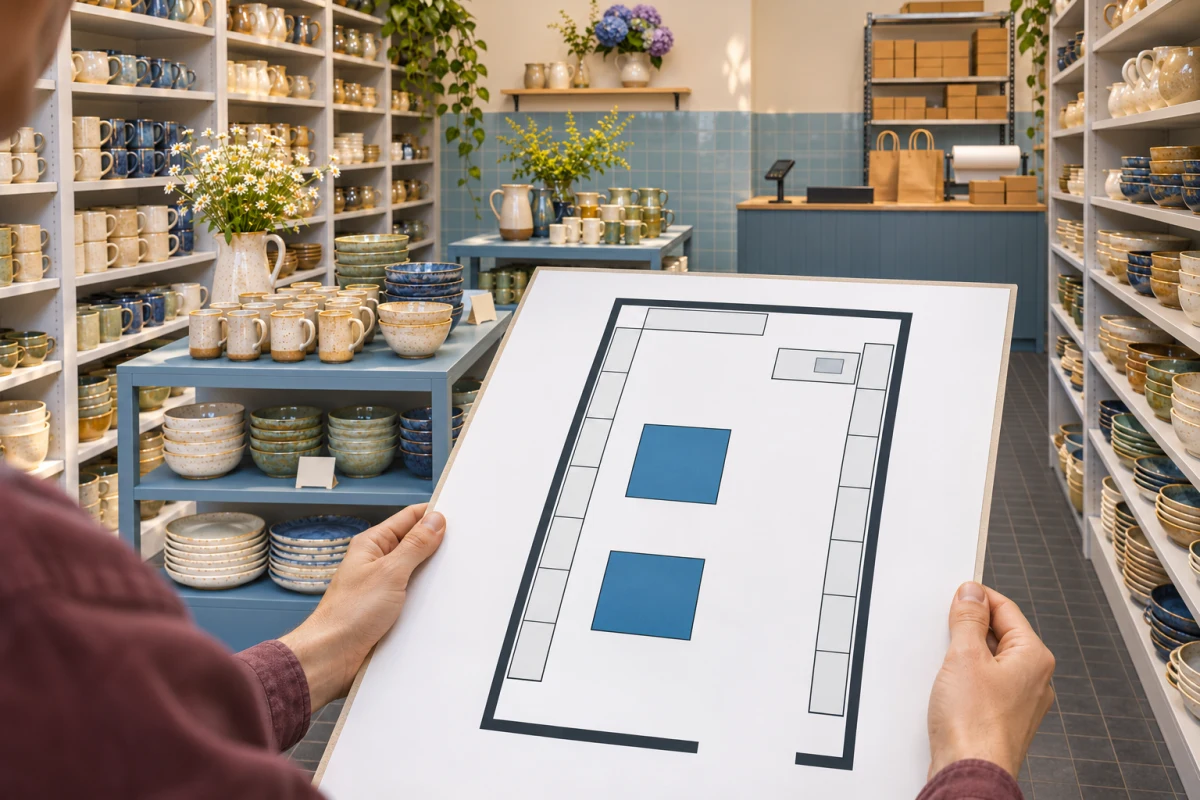
Generated illustration: a printed layout makes the shop’s two display islands and wall shelving easy to compare with the space. The simplified drawing is not a construction document.
Start with one familiar project and take it through a drawing issue, a change and a second checked issue. Agree which information comes from the model, who maintains it and which details stay in 2D. Expand only when another person can follow that process without repairing the drawings by guesswork.
Buying software does not settle those decisions. A practice can have a convincing model and still spend evenings correcting separate plans and elevations. The useful test is whether the team can make a change, find its consequences and deliver consistent information.
Choose a pilot you can finish
Imagine a small practice designing a ceramics-shop fit-out. The shell is surveyed, the main work is a display island and wall shelving, and the team knows this kind of commission. Use it as an illustrative pilot: a bounded project with a real output, rather than a difficult live commission chosen only because it starts next.
Name the first delivery before modelling: for example, a layout plan and interior elevations for a client review. This is an example package, not a complete construction set. Confirm the actual scope, recipient, file format and review date for your project. If an editable model exchange is required, test it with the recipient before committing the pilot to that route.
Reserve time for setup, practice and checking. A completed project can provide a rehearsal when no live project has enough room in its programme. Keep that exercise separate from issued project information. There is no universal number of days in which a practice becomes ready.
Give every drawing a source
For the shop, keep the shell, island size and island position in the model. Agree where each output gets its information and where corrections belong. If the plan is generated from model geometry, correct that geometry at its source; do not independently redraw the island on an exported plan and leave the model behind.
Record the exceptions. A separately drawn shelf junction can remain in 2D, with a named author and an explicit link to the item it describes. A hybrid workflow can be sensible when the boundary is clear. Maintaining two competing versions of the same layout creates a different problem.
Choose one person to maintain the pilot model and another to review the output. Teach both the specific tasks they will do: opening the project, finding the agreed information, making or checking a change, and preparing the required delivery. Keep short notes so the process does not depend on one person's memory.
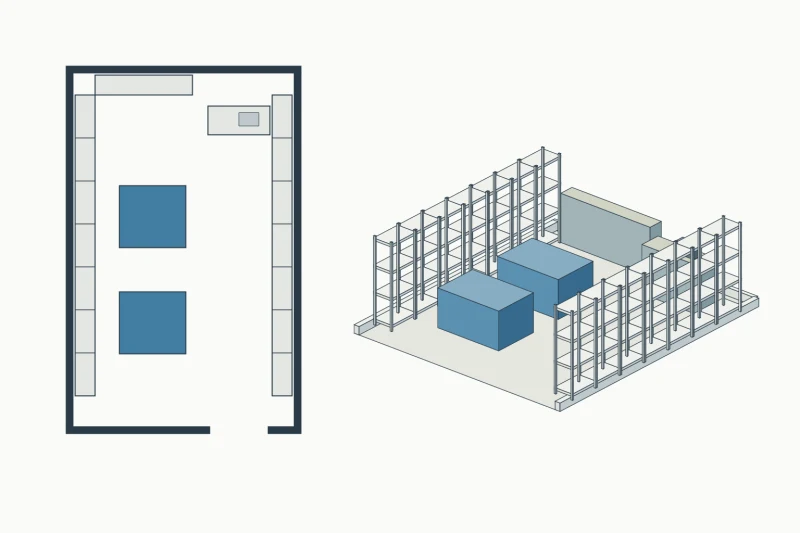
Left: the 2D layout. Right: an axonometric view built from the same illustrative geometry. The blue footprints match the island volumes; stock, upper walls and construction details are omitted. These are explanatory drawings, not software screenshots.
Build a small working template
Prepare only what the pilot needs: units and level references, a few checked element types, view names, drawing scales, sheet layout and a consistent way to identify revisions. Check how the chosen software handles these things; a name in an office standard does not guarantee a matching feature.
Make one sample sheet early. Read its dimensions, linework and notes at the intended output size, then open the exported file independently. Correct the template before multiplying its mistakes across the set. Keep useful existing 2D details, but check their assumptions against this project rather than importing an entire library untouched.
Rehearse one change all the way through
In the shop example, the client asks to shift the display island towards the back wall. This is a revision exercise, not a recommendation for a particular clearance. Check the resulting routes and working space against the actual users, project requirements and applicable local rules.
Change the island in its agreed source. Then inspect every affected output: its position and dimensions on the plan, its relationship to the wall shelving, any interior elevation that shows it, and the notes or details that refer to it. Refresh or regenerate outputs where the tool requires it. A correct 3D view alone is not a checked drawing issue.
Have the reviewer open the delivery files without relying on the author's working screen. Can they identify the revision and find the same arrangement throughout? Put superseded deliveries in the practice's archive and clearly identify the current issue. This is an office process, not a promise that every modelling tool provides version history or automatic coordination.
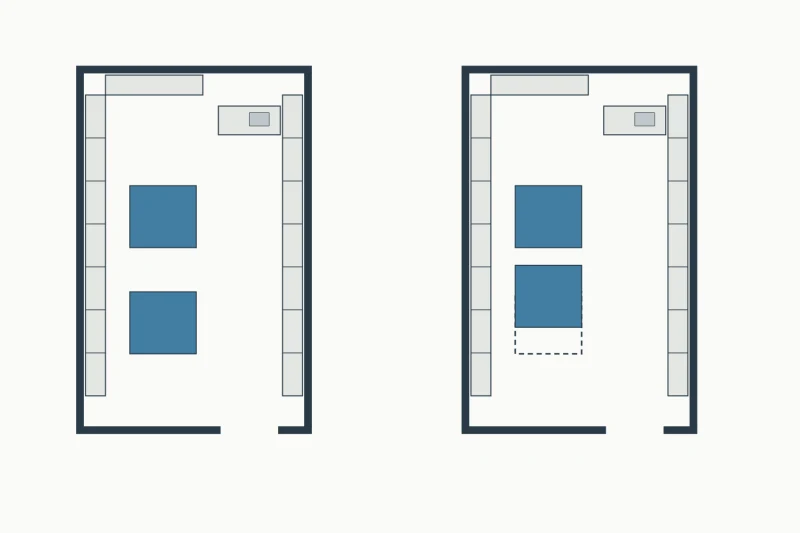
Left: the initial layout. Right: the front island has moved towards the back wall; the dashed outline marks its previous position. The walls and other fixtures stay fixed. This illustrates a revision to check across outputs, not a recommended clearance.
Keep the detail boundary visible
A simple island volume can answer where it stands and how much space it occupies. It does not, by itself, specify shelf joints, fixings, finishes or load capacity. Decide which of those questions need drawings, specifications, manufacturer information or a specialist's design. Do not model hidden screws merely to make the model look complete.
The same distinction applies to approval: a coordinated model does not establish structural adequacy, regulatory compliance or permission to build. The information required still depends on the commission and its location.
Decide what the next project may reuse
Record setup and training time separately from production, checking and correction time. Note where the trial removed repeat work and where it added work. One pilot is evidence about your process, not proof of a guaranteed saving or a software payback period.
Before expanding, write a short pilot record:
The project and delivery the trial covered.
The model's responsibilities and the details maintained elsewhere.
The author, reviewer and route for unresolved questions.
The change tested and the outputs checked afterwards.
The reusable template items, remaining problems and next decision.
Proceed to a similar project if the delivery was consistent and the team can repeat the process. Narrow the model's scope if some work is better maintained separately. Pause expansion if required exchanges fail or drawings still need unexplained manual repairs; resolve that failure before putting more commissions through it.
If the unresolved question is how much to model in the first place, see when modelling is worth the effort on a small project. The first transition succeeds when the practice knows what it can reliably issue and revise—not when every existing drawing has been rebuilt in 3D.