
Select 3D above the viewport to inspect the model's form. Camera navigation changes your view; selected-object grips change the model. Begin a camera gesture away from a grip when you want to look around without moving an object.
Choose projection and direction
Isometry uses an orthographic projection, keeping parallel lines parallel. Perspective shows depth with perspective convergence. Then choose a camera preset: Iso, Top, Bottom, Front, Left or Right. Selecting a preset restores a useful direction after free navigation. The camera flies there in about a second and a half, so you can follow where you now look from; with reduced motion turned on in your system settings it changes at once.
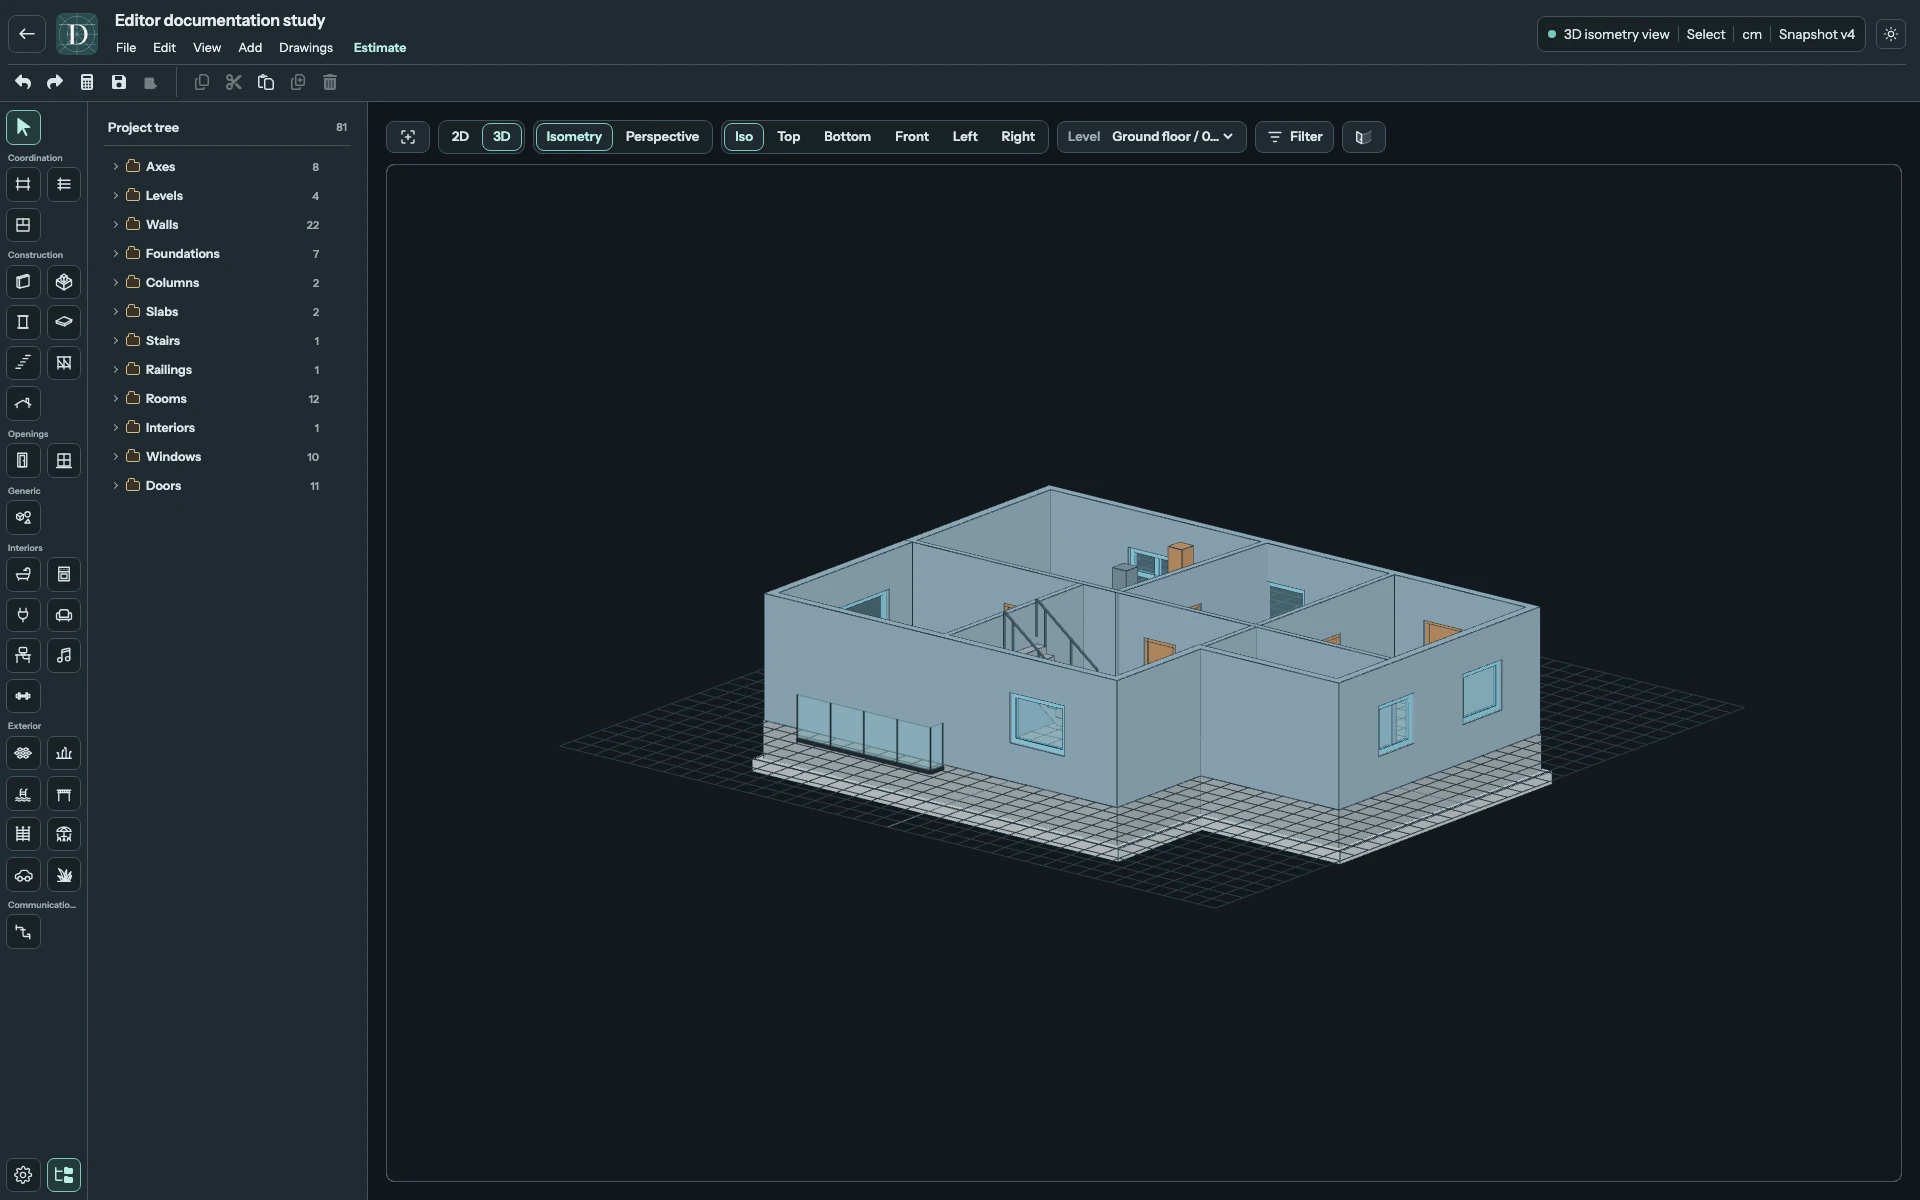
View the full-size main 3D screenshot.
Use the toolbar Fit viewport to content to frame the visible model in 3D. The menu command View → Fit the drawing to the window is available in 2D; use the toolbar button in 3D. Camera presets, zoom and pan provide further adjustment.
Orbit, pan and zoom
Orbit works from every preset in both projections. If Pipe authoring is active, switch to Select before dragging. Top, Bottom, Front, Left and Right are fixed directions: once you orbit away from one, the preset control returns to Iso, the free camera, and the view stays where you turned it. Panning and zooming keep the fixed preset.
| Input | Camera action |
|---|---|
| Left-button drag away from a grip | Orbit around the model. |
| Right-button drag | Pan the view. |
| Scroll wheel | Zoom toward or away from the pointer. |
| Middle-button drag | Dolly or zoom. |
| Ctrl/Command or Shift with left drag | Pan instead of orbit. |
| One-finger touch drag | Orbit. |
| Two-finger touch gesture | Pan and pinch to zoom. |
The orbit center adjusts to visible model geometry around the center of the view. When inspecting a close detail, place it near the center before orbiting. Empty space does not supply a new model point. A preset is useful if repeated orbiting leaves the view difficult to interpret.
Supported move and rotation grips remain editing controls in main 3D. A move grip works in the object's horizontal base plane; use its Level or offset properties for height changes. See move, rotate and resize.
Use the live preview beside 2D
On a wide layout, return to 2D and select Mini 3D. The preview shows the same live model while 2D remains your main working view. Select Mini 3D again to hide it. It is also available alongside a 2D side projection on a wide screen.
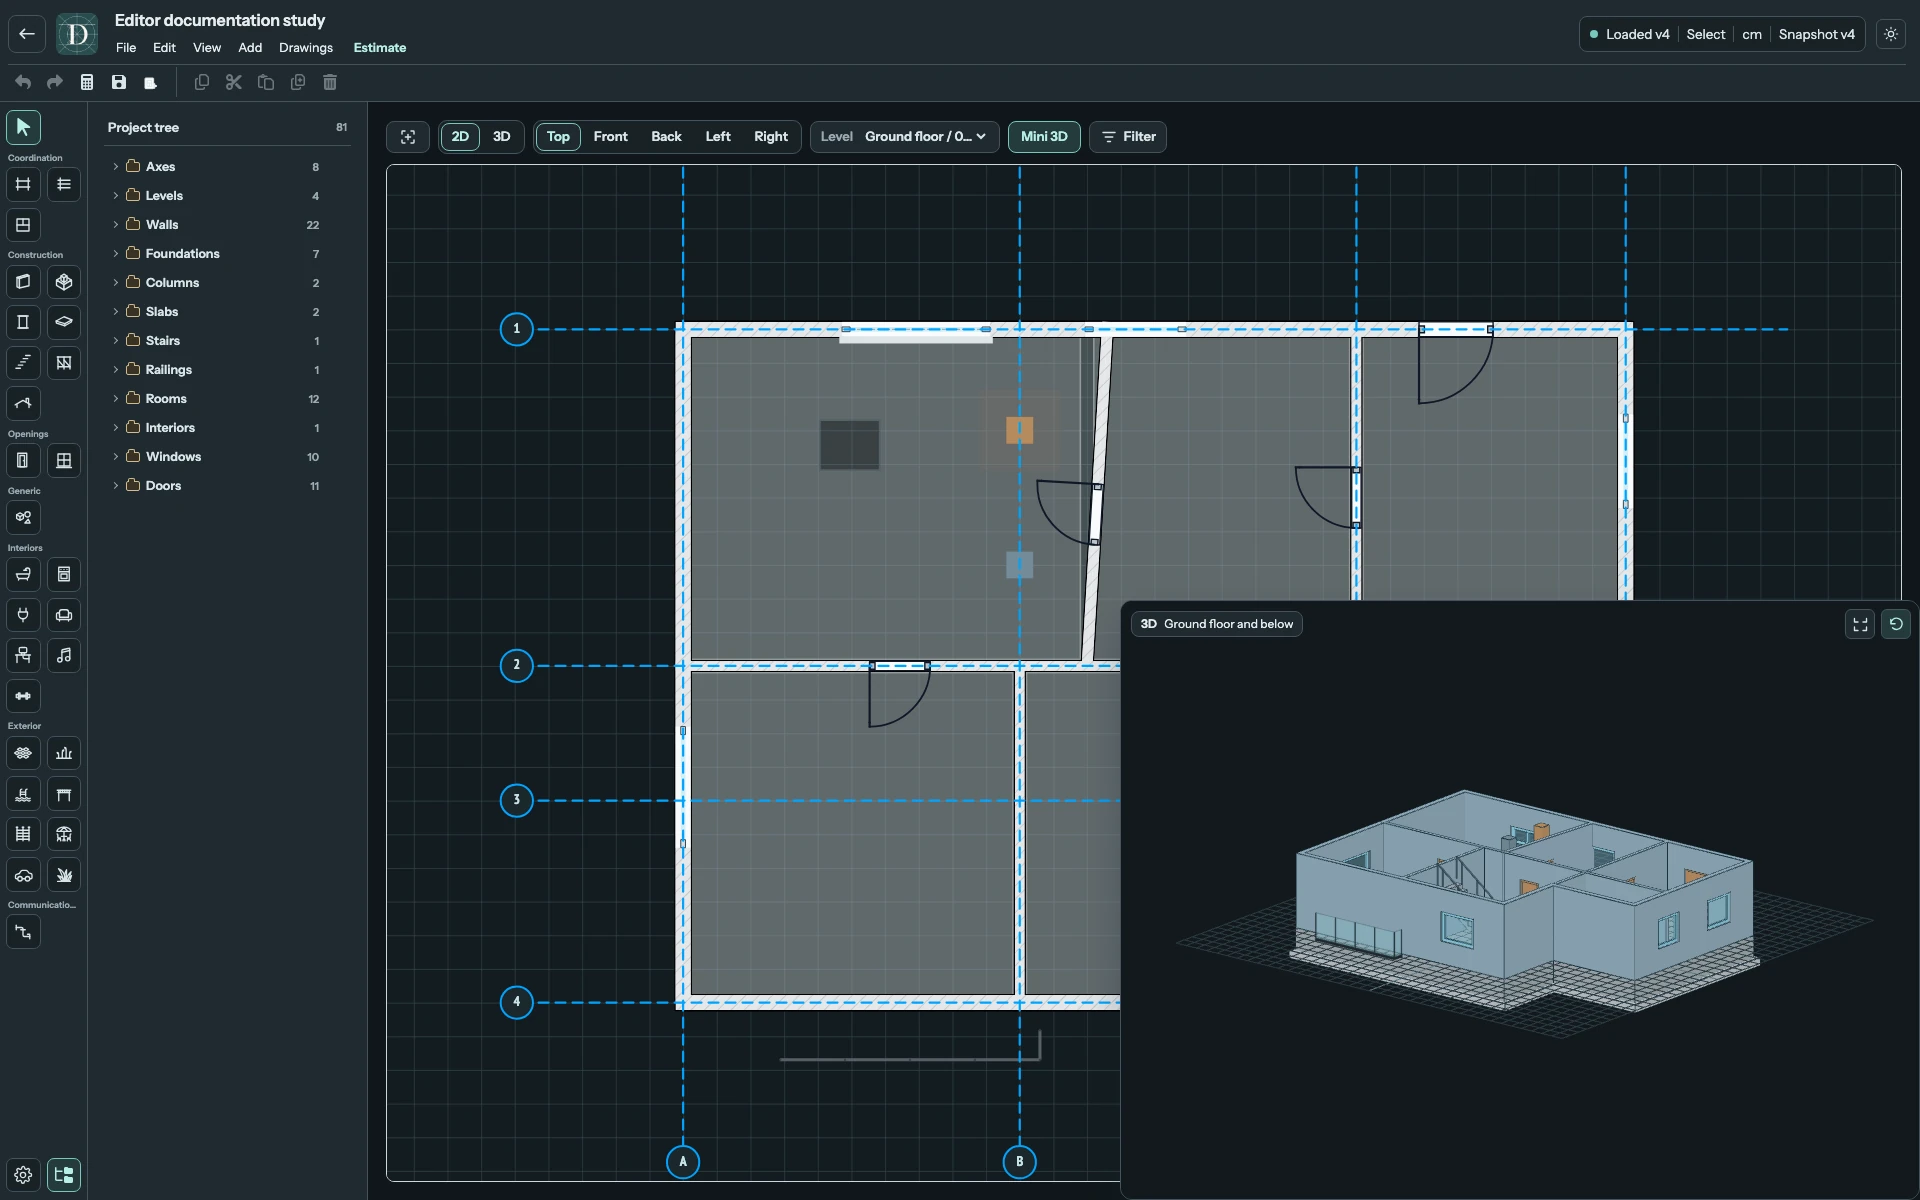
View the full-size Mini 3D screenshot.
Navigate inside the preview with the same orbit, pan and zoom gestures. Its corner controls switch between normal and larger sizes and Reset mini 3D view. Reset restores the preview camera; it does not undo model edits. Mini 3D does not offer the main viewport's object-editing grips. On compact layouts, use main 3D instead.
Check Level and visibility
Main 3D and Mini 3D both stop at the active Level. Elements above that Level are excluded. If a storey or object appears missing, select the intended higher Level and check Filter and Project tree eye controls. Hidden objects remain in the model.
Usage zones toggles supported operation envelopes, such as a Door swing. These are visual aids, not automatic clearance approval. See visibility, Doors, Roofs and Stairs for their model meaning.