
After the first Wall, Door and Window exercises, extend your own model with foundations and a roof. Willow House shows the selected element settings; Test Mansion shows a more developed two-storey result with a garage. Their dimensions are examples, not instructions for your project.
Place the foundations
- In Levels, add a Level for the foundation reference below the ground-floor working Level. Set its Elevation from Project Zero to the height required by your design.
- In Top 2D, select that Level above the viewport, then choose Foundation under Construction. Select a foundation type in the right panel and confirm its Level.
- Trace foundation baselines along the intended bearing lines. In a coordinated plan, center each bearing Wall and its foundation baseline on the appropriate Axis. Add a separate Foundation for each required run, then inspect the result at the foundation Level and in a side view. The reference foundation preset needs project-specific engineering sizing.
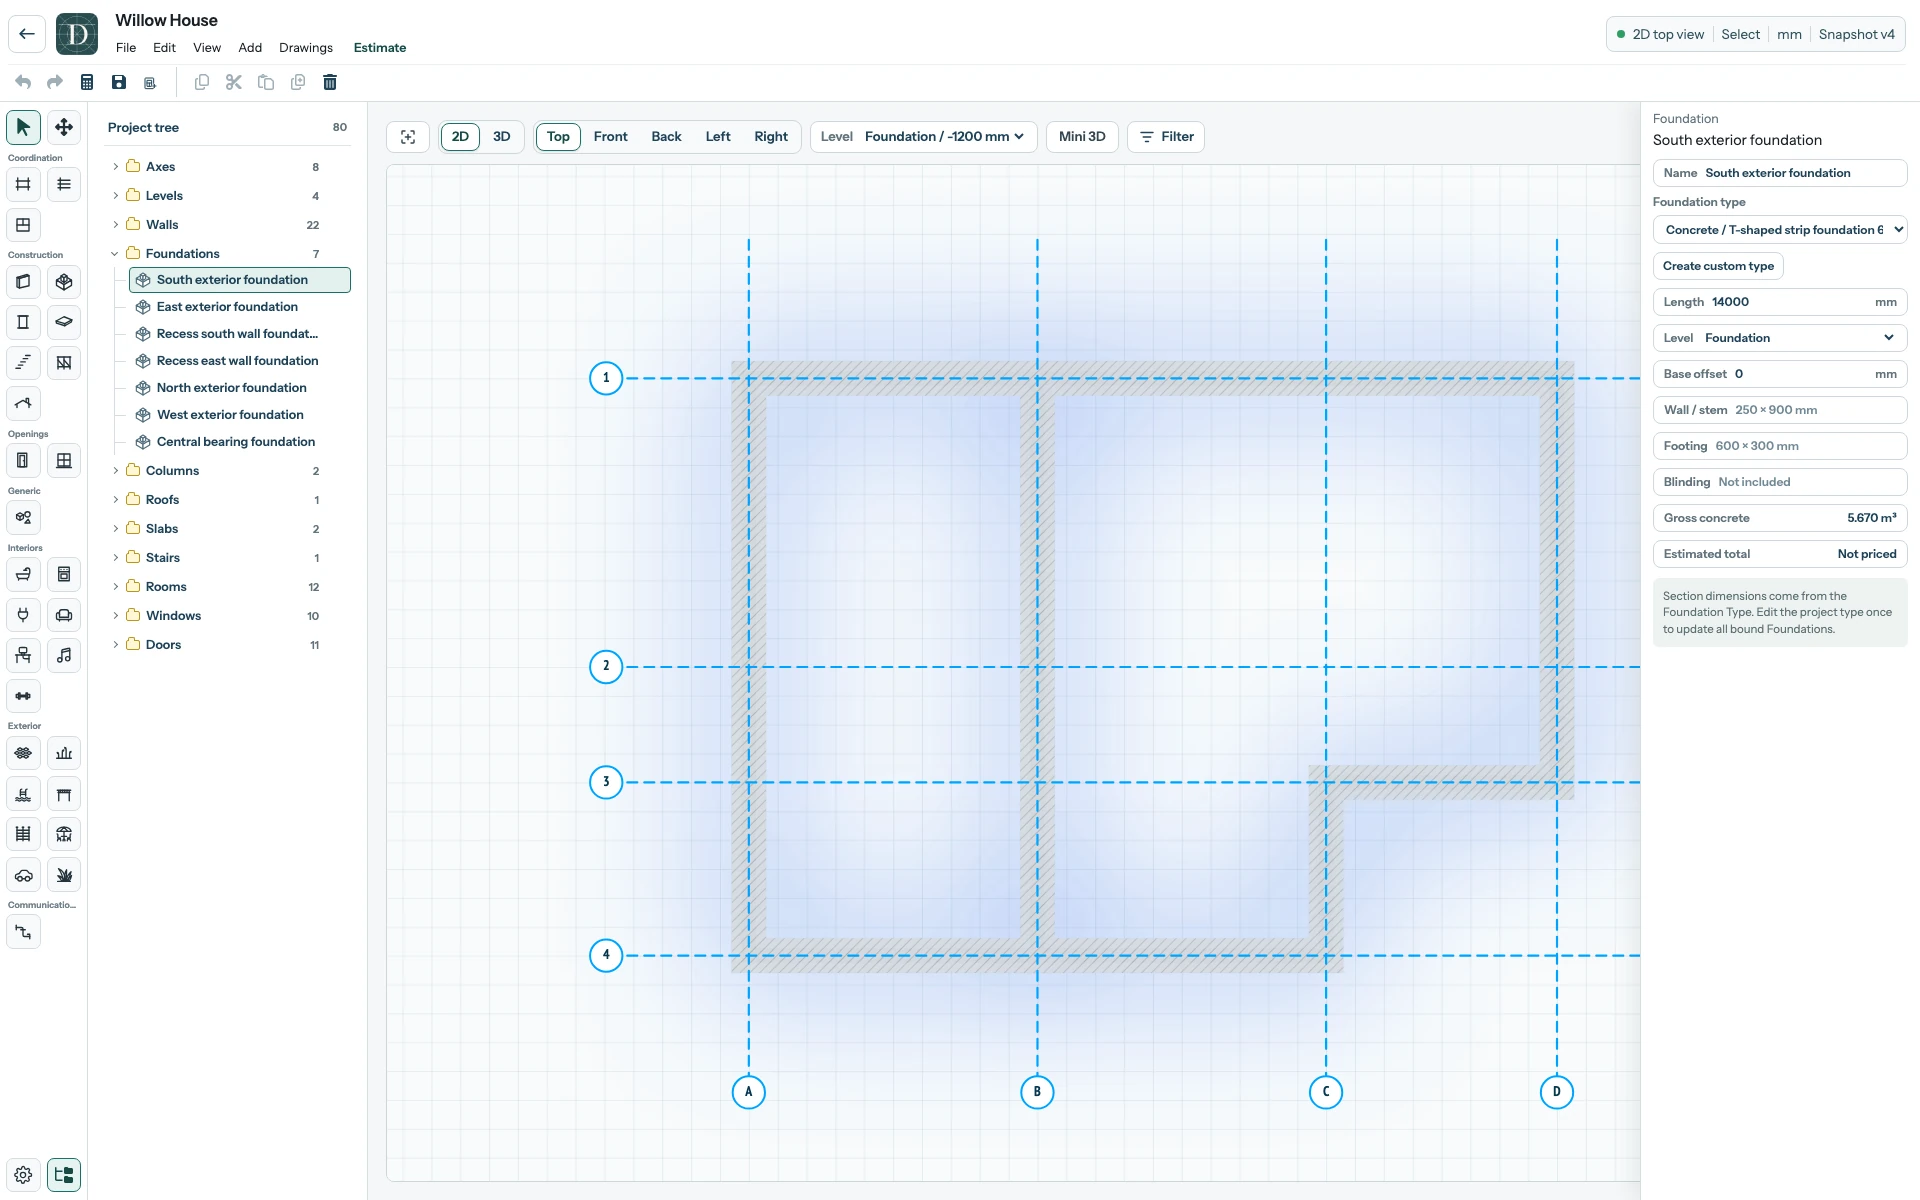
View the full-size Foundation screenshot.
Add the roof and check the shell
- Add or select a roof datum Level above the supporting Walls. Choose Roof under Construction, select the Roof Type and Level in the right panel, and click the intended footprint corners. Click the first corner again to close the contour. A complex building may need more than one roof part; use the Roof comparison to understand the available forms.
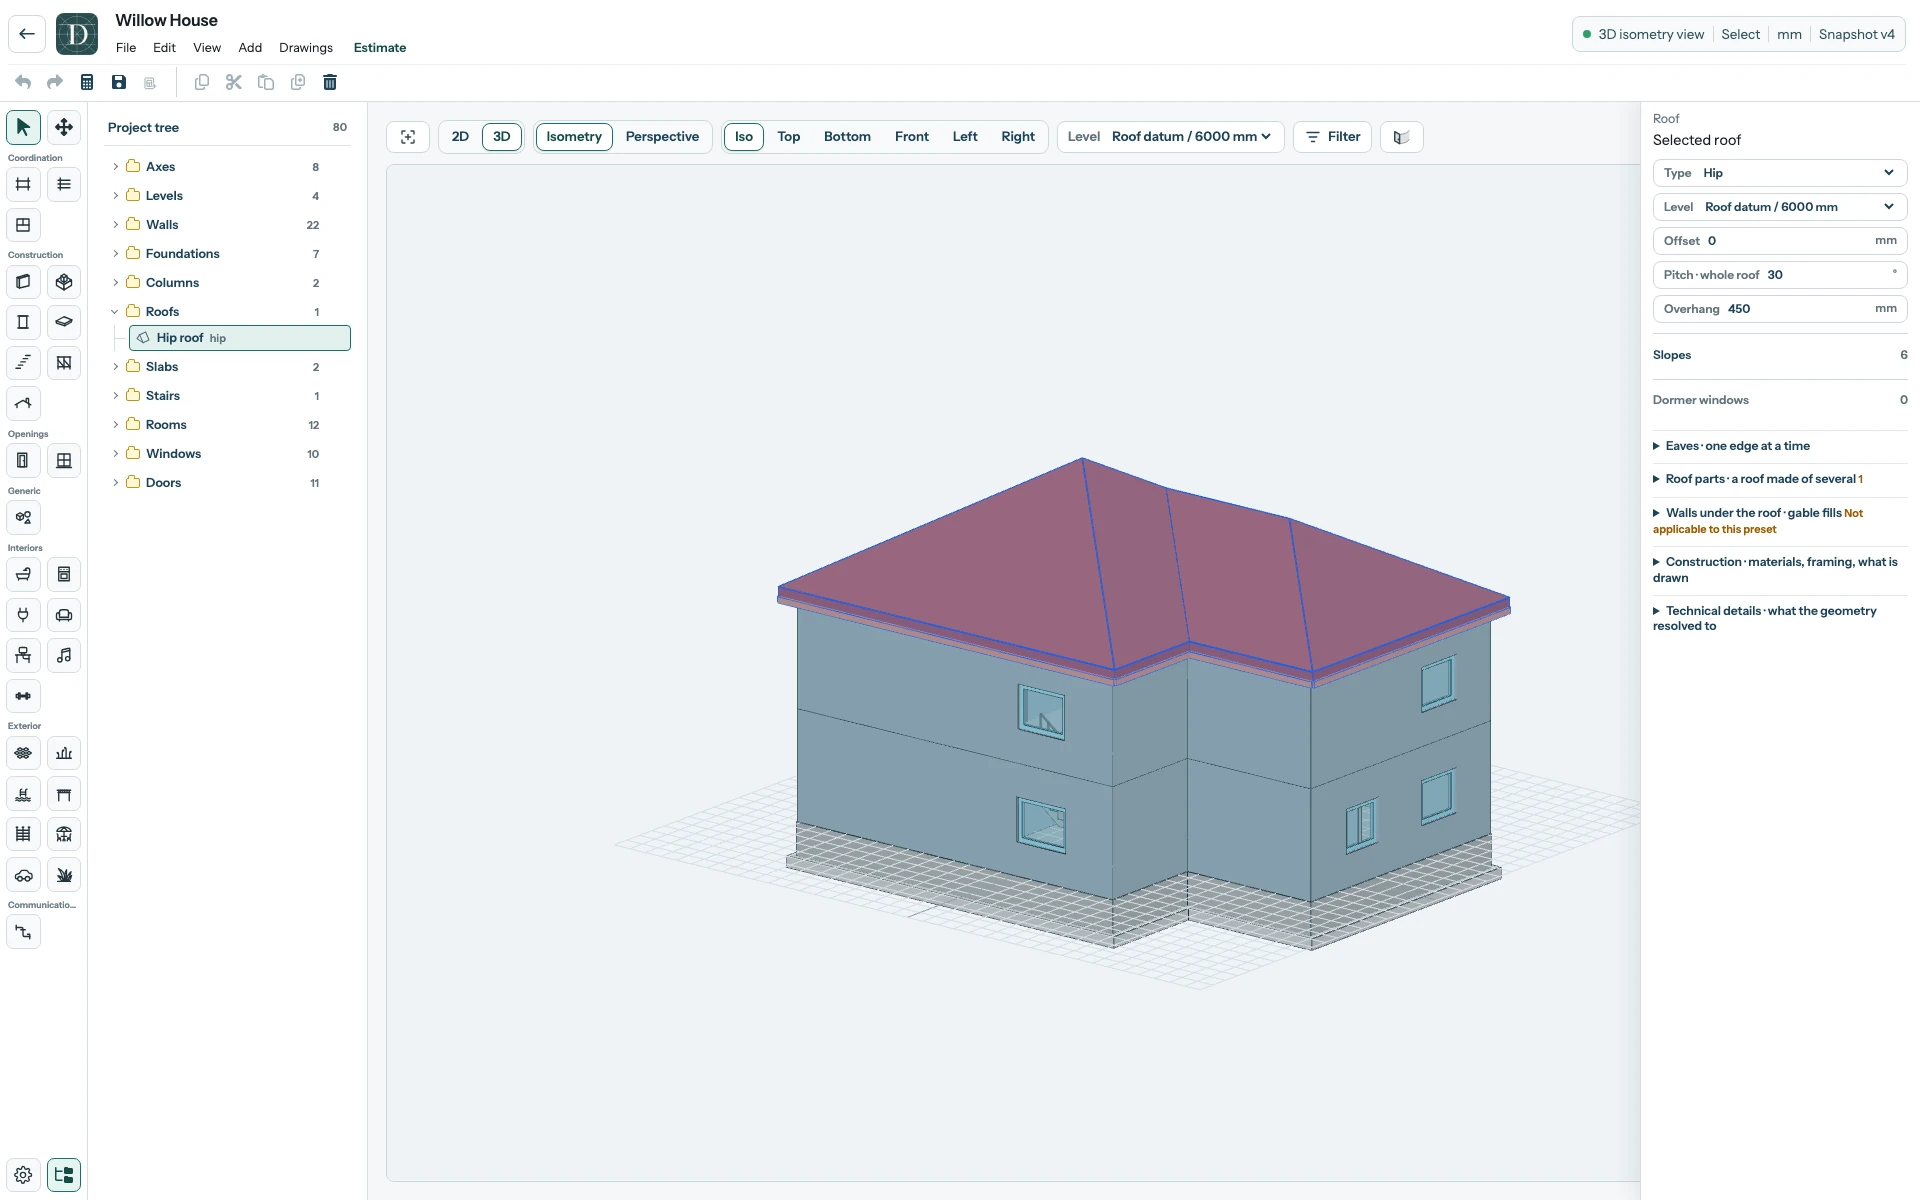
View the full-size selected-Roof screenshot.
- Select Save, switch to 3D, choose Iso, and use Fit viewport to content. Check that the roof covers the intended Walls, the openings remain in their hosts, and the foundation is below the building. Reopen the project to verify that the modeled elements remain. Test Mansion illustrates a developed result; its roof is assembled from several parts.
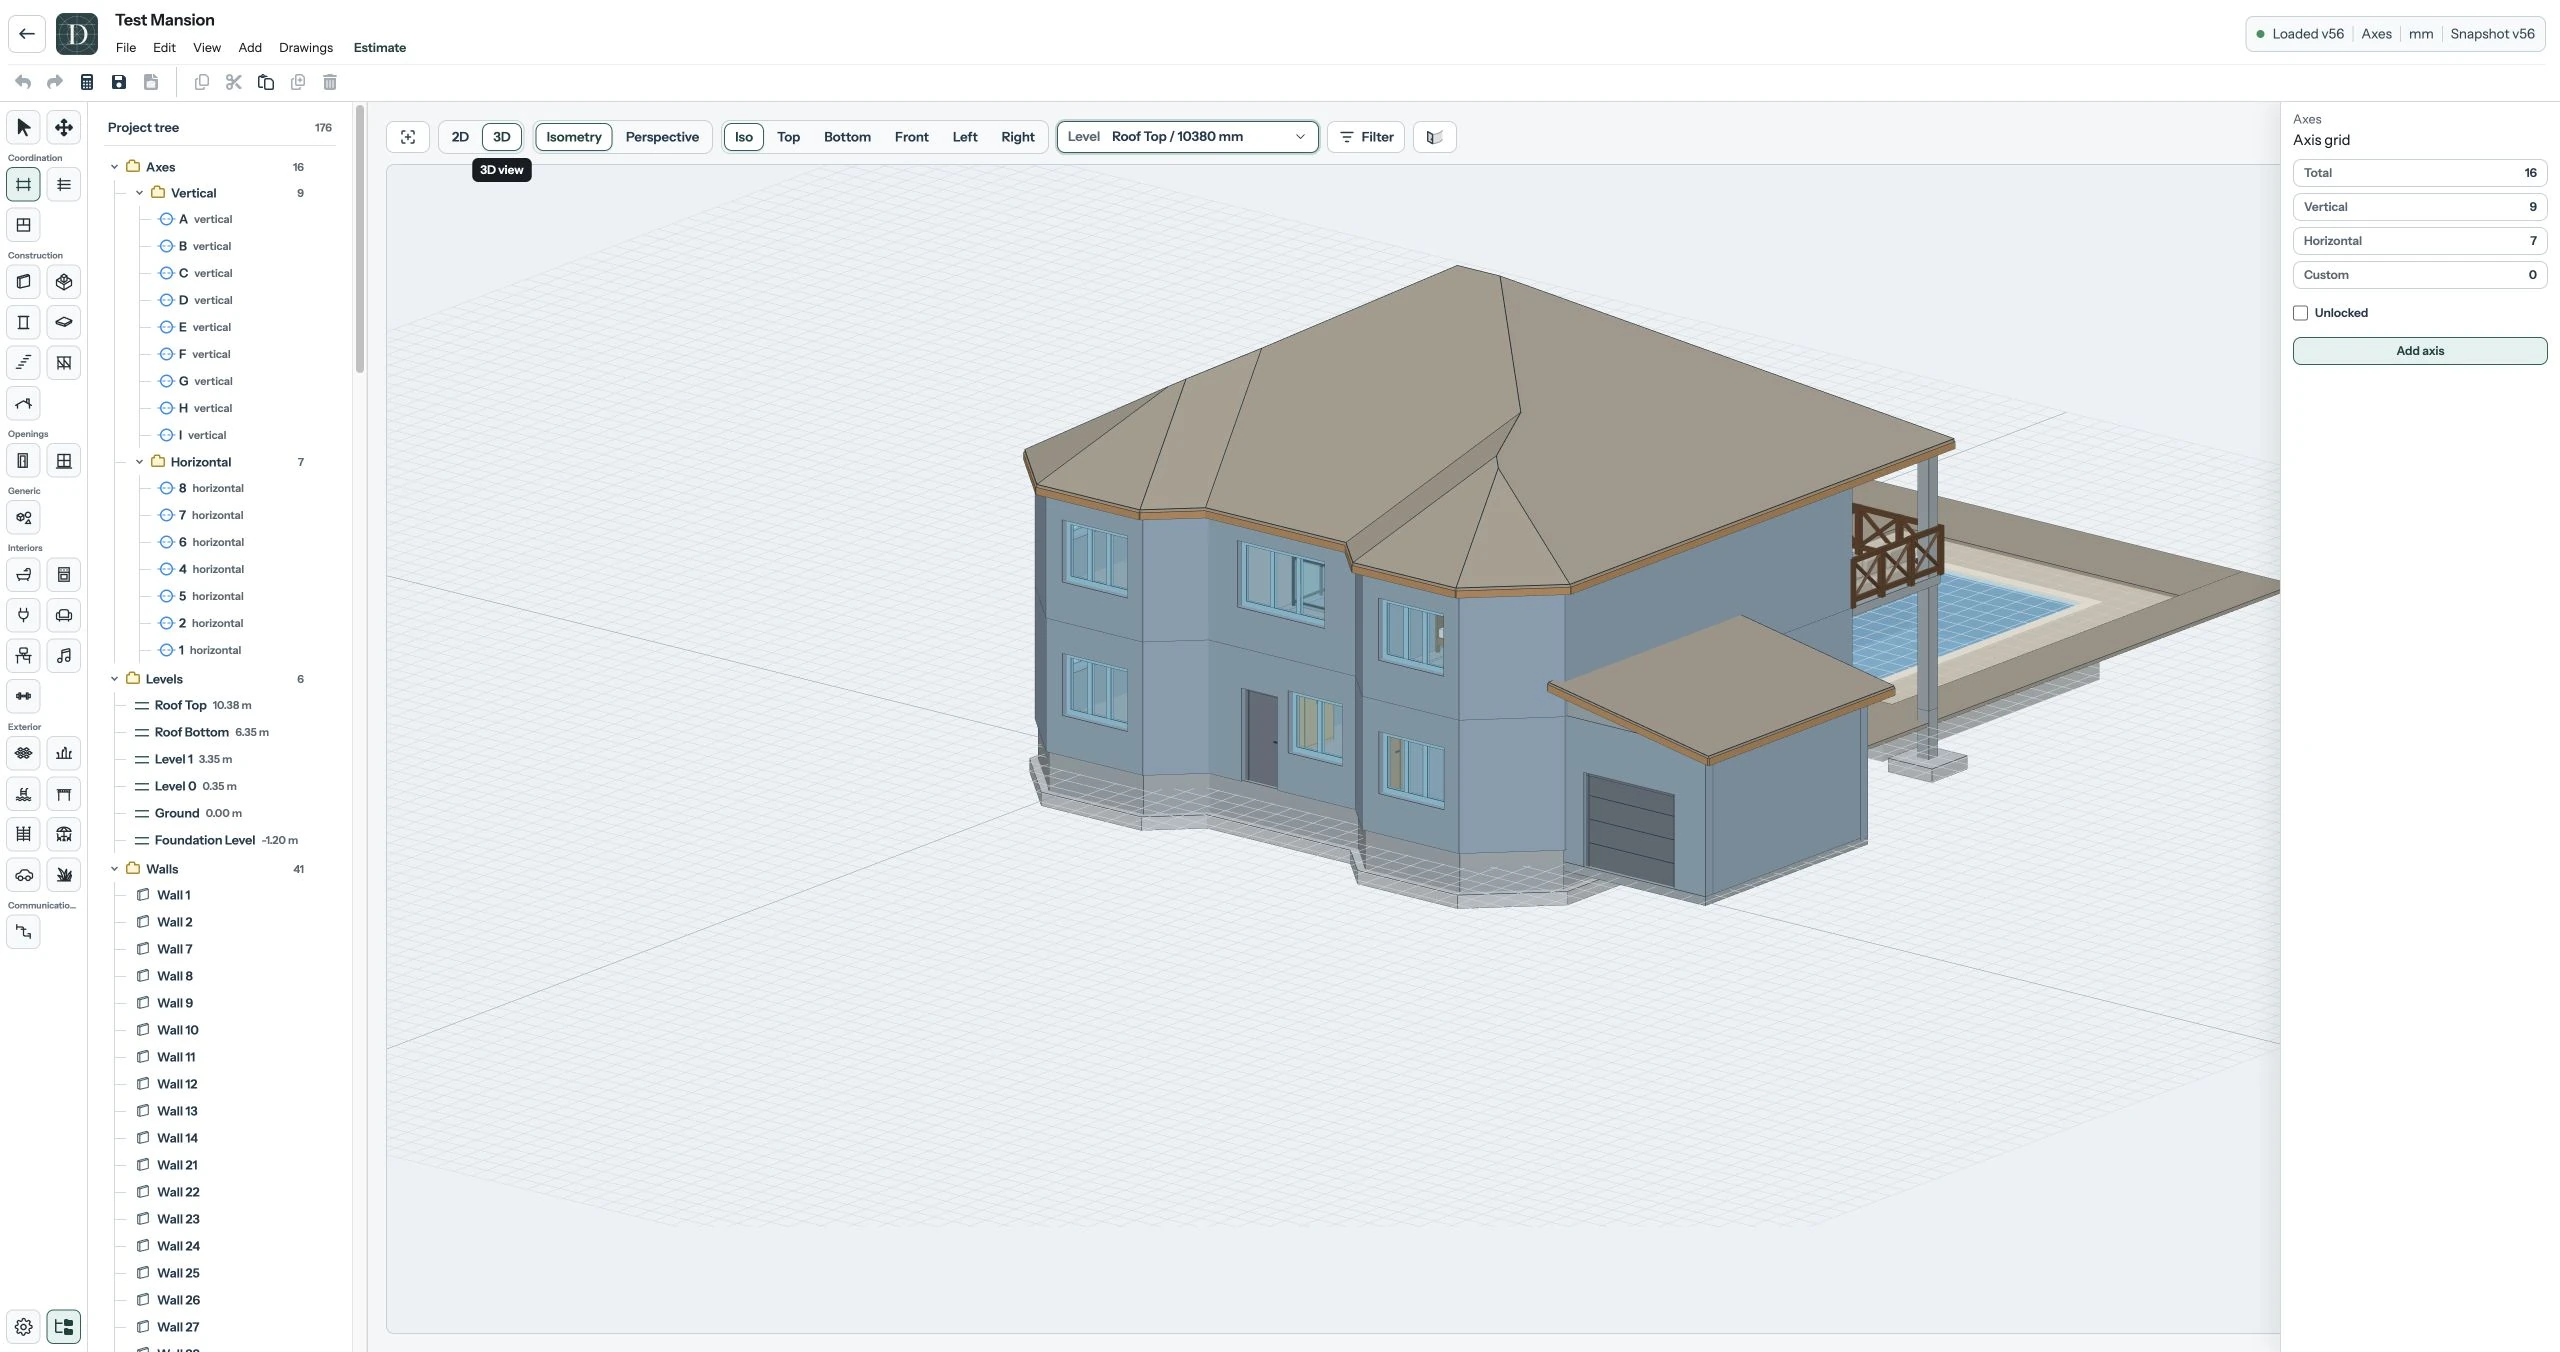
View the full-size building screenshot.
The roof and foundation shown are model geometry, not structural verification. Their type, elevation and dimensions depend on the actual project. Next, move an Axis to see how coordinated construction changes together.