
In Top 2D, use the Axis grid to lay out an L-shaped enclosure and its dividing Wall. Add a Floor, then mark one enclosed space as a Room. The screenshots use a separate Garden Studio project; follow the same steps in the project you created. The Floor is a physical slab; the Room is its named spatial boundary.
- Open a project with a Ground floor Level and read its Axes. Select Top, 2D, and Ground floor. In this example the starter lines A–C and 1–3 set out the plan; adjust the grid first if your project needs different dimensions.
- Select Wall under Construction. Draw the perimeter along A/1 → C/1 → C/2 → B/2 → B/3 → A/3 → A/1. Press Esc to finish each segment. Draw one more Wall along B/1 → B/2 to divide the two bays. The Wall baselines in this example use center alignment, so each construction Axis passes through the center of its Wall section. Snapping to a line gives exact geometry; it does not by itself create a lasting Axis binding.
- Select Floor under Construction. Trace a closed L-shaped boundary just outside the Wall faces and return to the first corner. The Floor appears under Slabs in the project tree.
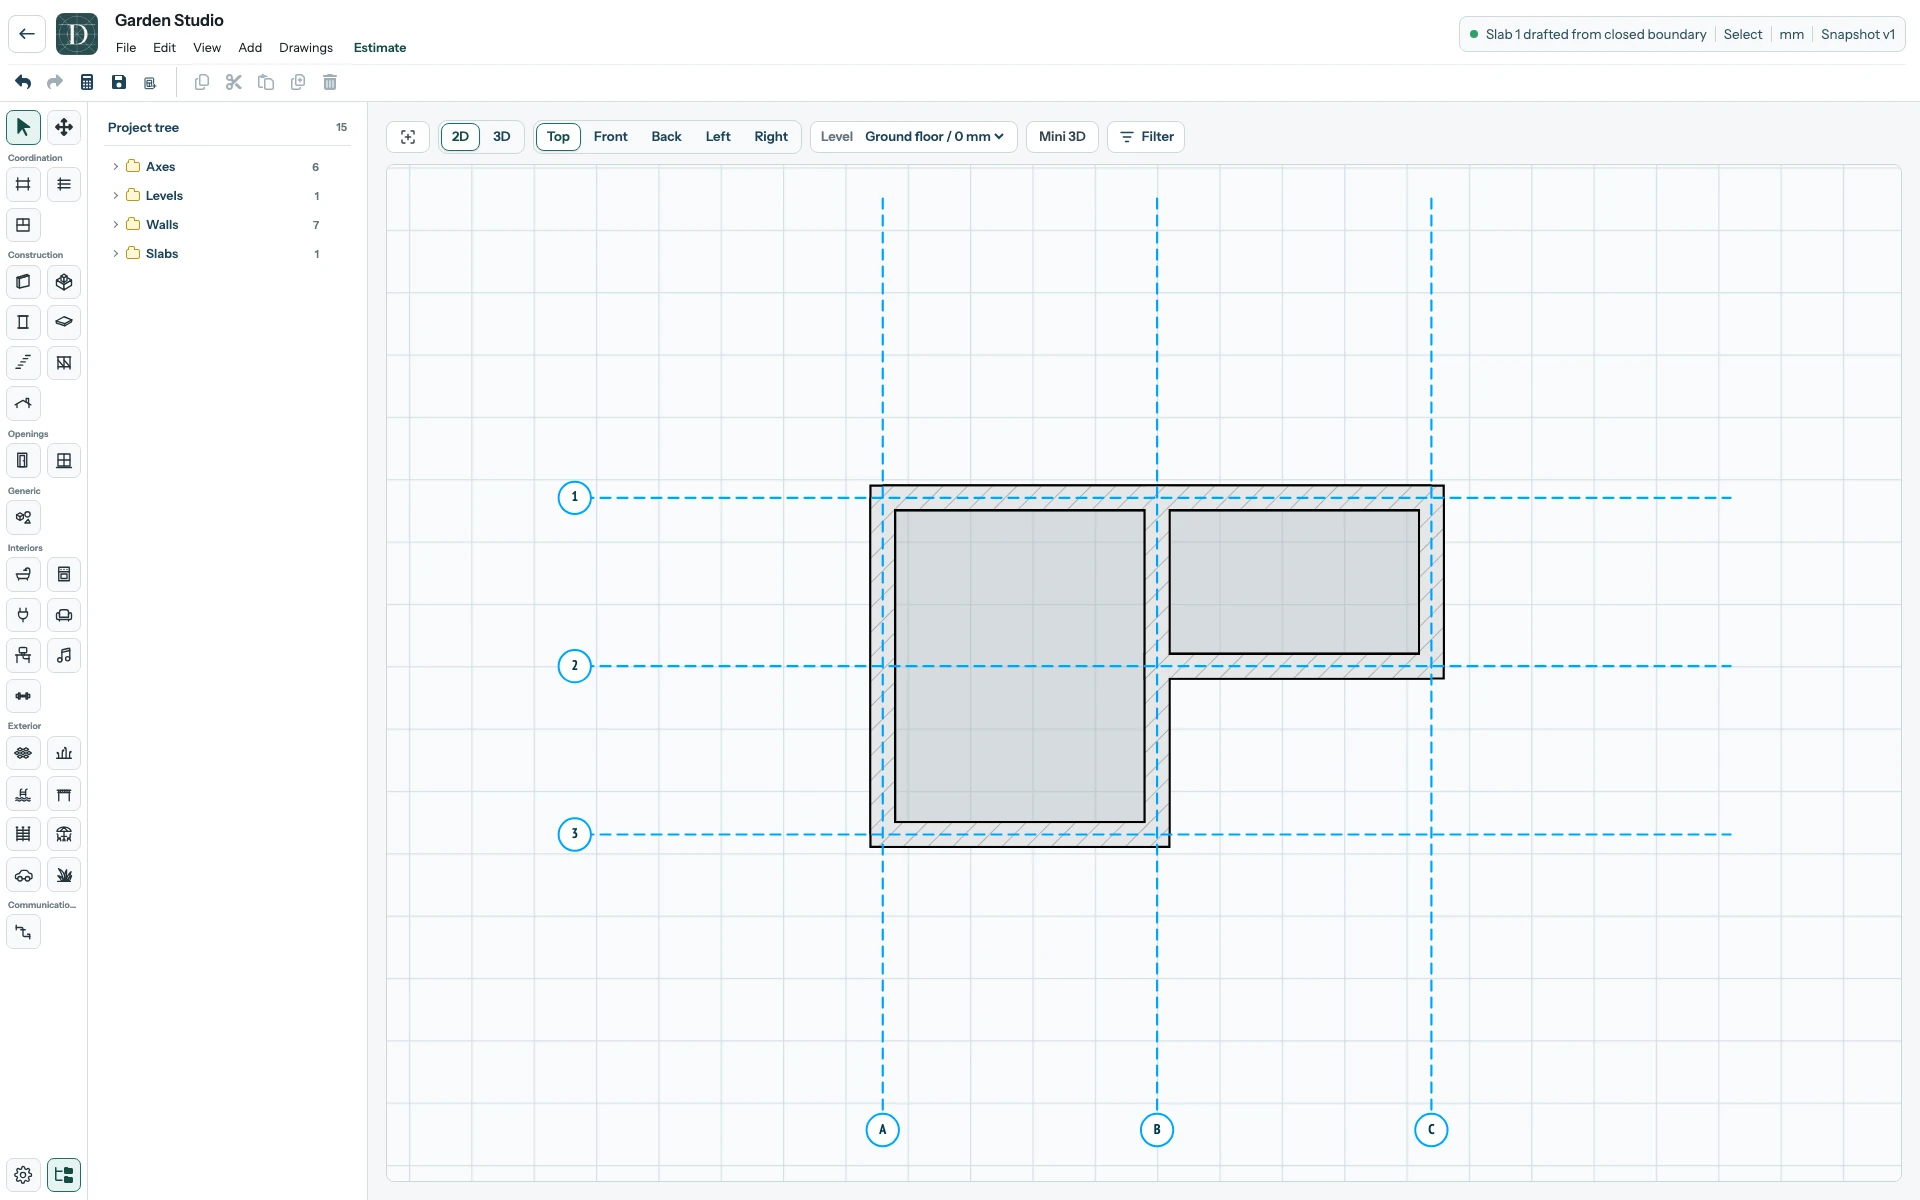
View the full-size Walls and Floor screenshot.
- Select Room under Coordination. Trace the inside faces of the left bay and click the first point again to close the boundary. In the right panel, set Name to Living room and press Enter. Select Save in the top toolbar.
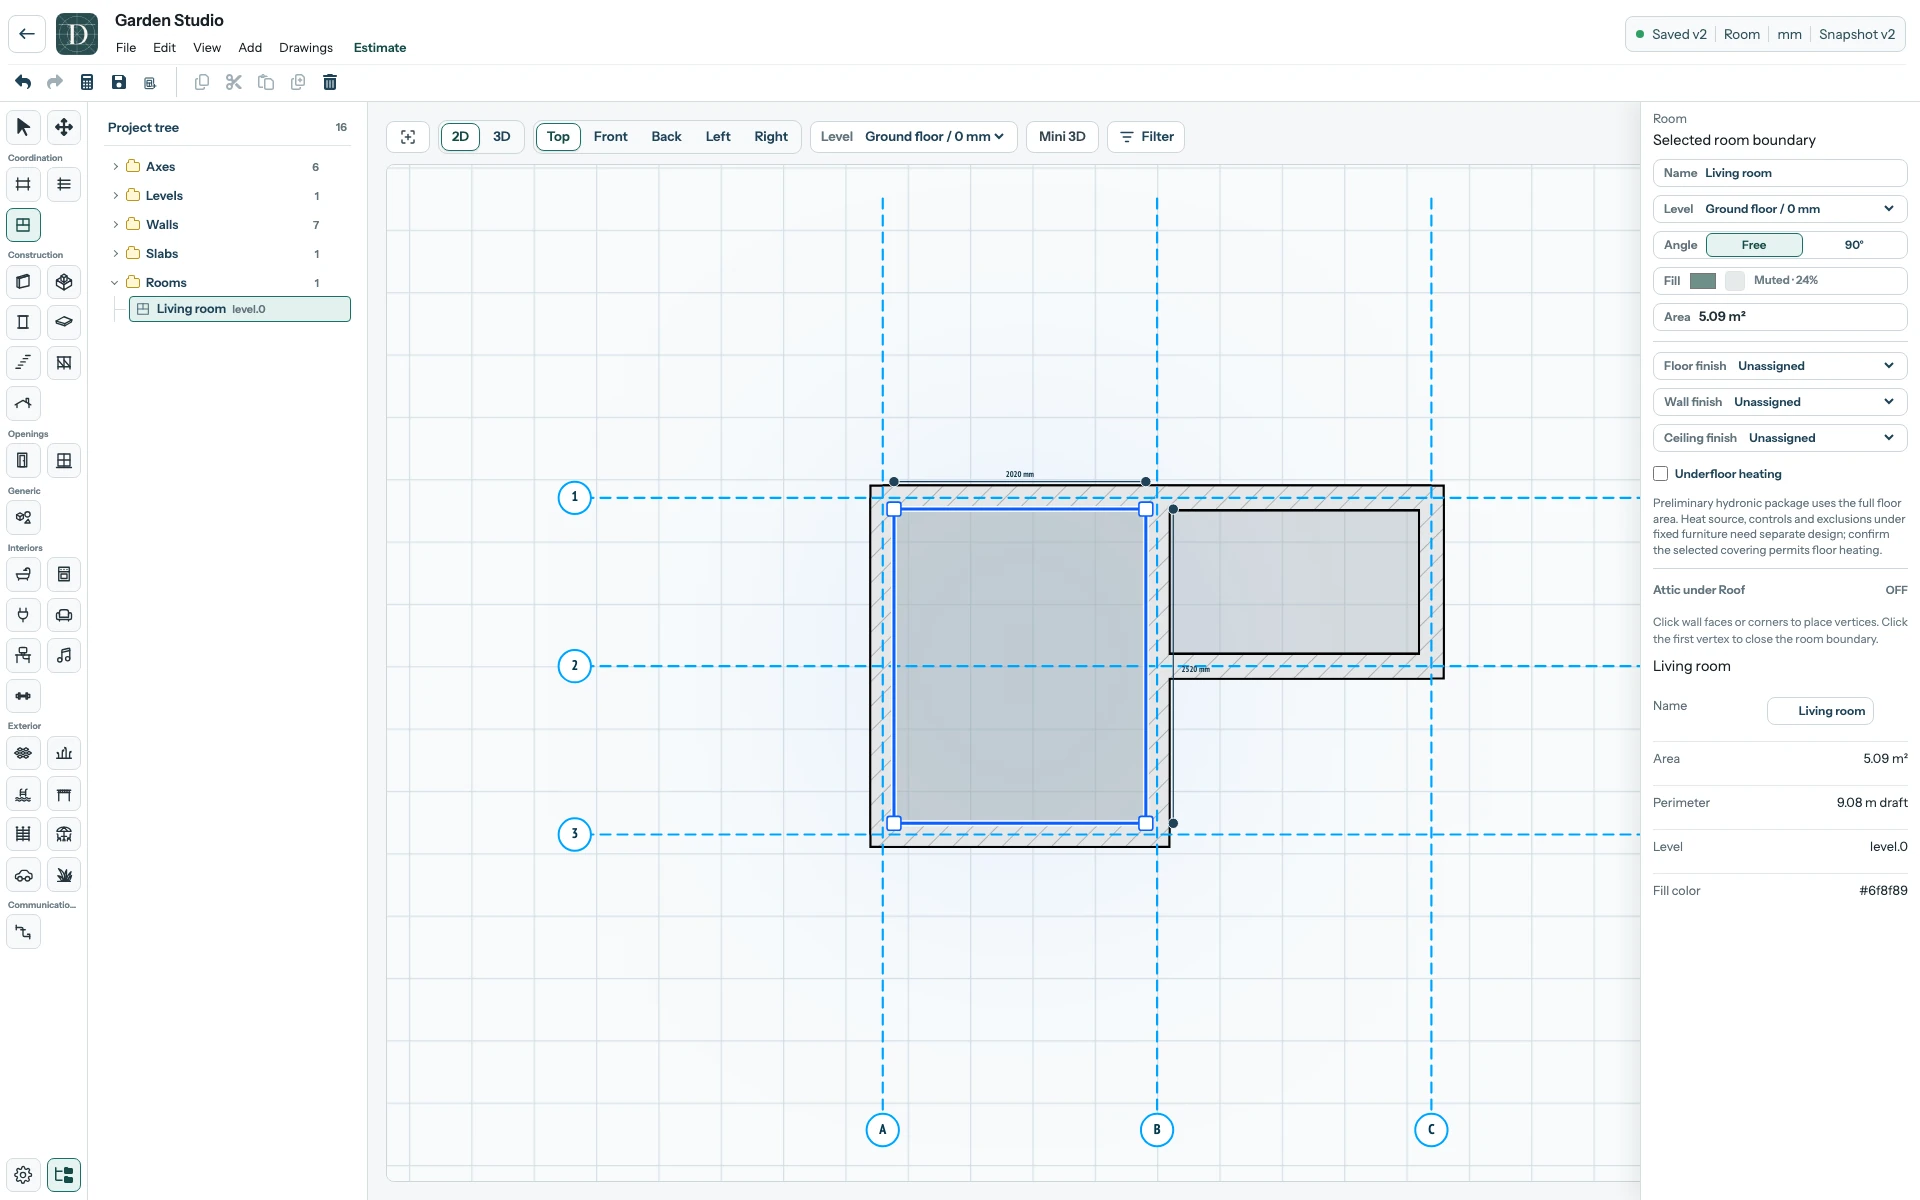
View the full-size named Room screenshot.
The right panel calculates the Room area from its boundary; 5.09 m² is this example's result, not a value to type. The finish fields are still Unassigned. Reopen the project to check that the Walls, Floor and named Room remain. A Room is shown in Top 2D; it does not create another slab or a 3D floor.