
Use Willow House for this example. It is a separate, two-storey demonstration project from the Garden Studio room exercise. The plan has an L-shaped exterior, a bearing foundation along Axis B, and two Columns placed on that line.
- In Top 2D, set the active Level to the floor where the Column begins. Choose Column under Construction and choose Square, Rectangle, or Circle in the right panel. Set its section size, then click the plan at the intended center.
- Select the Column in the plan or Project tree. Check its Base level, Base offset, Top binding, Top level or unconnected height, and Material. These settings define the modeled section and vertical extent.
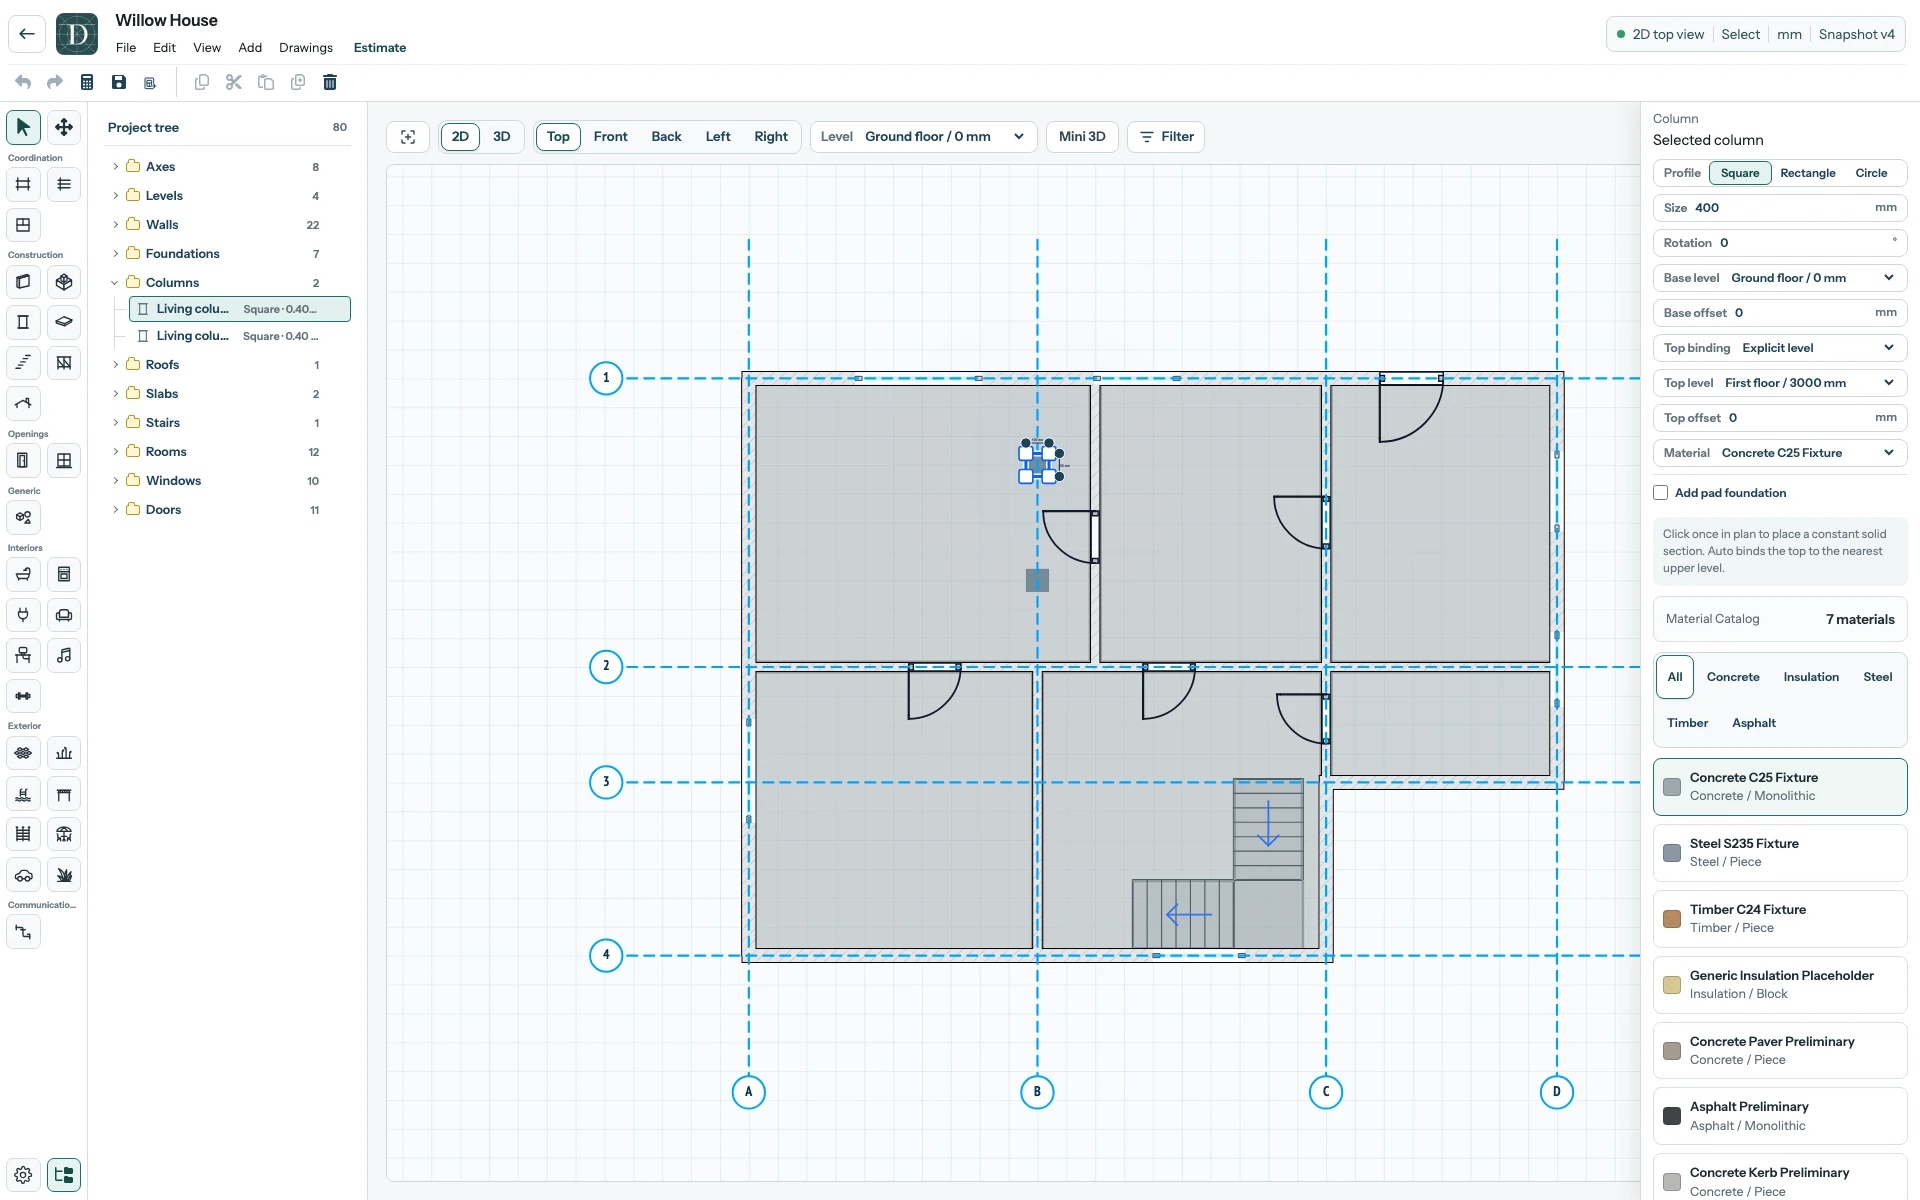
Inspect the full-size Column screenshot.
In Willow House, each Column center lies on Axis B above the central foundation line; its base is Ground floor and its explicit top is First floor. Those positions and dimensions are example data. Align a Column with your own structural layout and check it in Top, a side view, and 3D before saving. When Locked on Constructions is enabled, moving Axis B carries a Column whose center lies on it as one rigid object; a nearby Column off that line stays where it is.
Add pad foundation enables a schematic pad footing attached to the Column. Willow House instead has a separate continuous Foundation beneath Axis B; select Foundation as the active Level to inspect it. A modeled section and its material are not a structural capacity check; sizing and support still need project-specific engineering.