
A Roof covers a closed footprint. Its Level and Offset place the roof vertically; its slopes form the roof surface above that reference. One Roof can contain several connected roof parts, Roof windows and dormers. Choose the shape first, then check its surfaces, wall closures and framing in different views.
Draw a Roof
- Create the required Levels. Choose a datum that identifies your roof's underside reference, such as the top of the supporting Walls. It need not be the same Level as the floor below.
- Switch to Top and choose Add → Construction → Roof, or the Roof tool in the construction toolbar.
- Choose Type, Level, Offset, Pitch · whole roof and Overhang. For a basic Gable, choose Ridge orientation before drawing; for Flat or Shed, choose Fall / joists or Fall. Enter your project's values in the displayed length unit; pitch is in degrees.
- Click the footprint's corners and click the first point again to close it. Keep the contour simple, with at least three distinct points.
- Select the Roof and inspect Slopes, side views and 3D. Check that the underside and the supporting Walls meet at the intended elevation.
A contour alone does not guarantee a valid shape. Read any geometry message and correct the contour or roof-part settings before adding dependent elements.
A new Roof starts with a 400 mm overhang. Enter 0 deliberately for a flush edge, or set another value for your project. Individual edge settings can override the whole-roof value.
Find the Roof controls
The basic fields are Type, Level, Offset, Build knee walls, Pitch · whole roof and Overhang. The direction selectors belong to basic Roof setup; they are not shown for a selected Roof with editable parts. Click a section heading or its chevron to expand the controls; the chevron rotates as the section opens.
Use Slopes for a surface's pitch, edges and windows. Select Add window inside the supporting slope, choose Roof window or Dormer window, and select the dormer shape when applicable. Confirm to create a complete window automatically. Its settings and deletion stay inside that slope's child row. Attic analyzes a Room's headroom below this Roof.
For more detailed geometry, open Roof shape or, for manually drawn planes, Custom slopes. Gable walls controls roof-end fills. Materials and framing controls the covering and schematic framing.
Compare all six types
The screenshots use independent roof studies of the same building. Their dimensions and pitches illustrate the shape; choose values appropriate to your own model.
| Type | Result | Direction or extra setup |
|---|---|---|
| Flat | One surface; a zero pitch makes it horizontal. | During basic creation, Fall / joists sets the direction used for the plane and framing. |
| Shed | One inclined surface. | During basic creation, Fall determines which way it rises. |
| Gable | Two slopes meet along a ridge, with end walls. | Choose Ridge orientation during basic creation; use a supported existing ridge part's Rotate ridge 90° afterward. |
| Hip | Slopes rise from the perimeter and meet along ridges and hips. | The contour determines the resolved faces; inspect concave footprints and their valleys. |
| Pavilion | The slopes meet at one apex. | A single-apex part exposes apex position and height policies. |
| Custom planes | You draw the individual planar surfaces. | Drawing order sets each plane's pivot edge and rising side. |
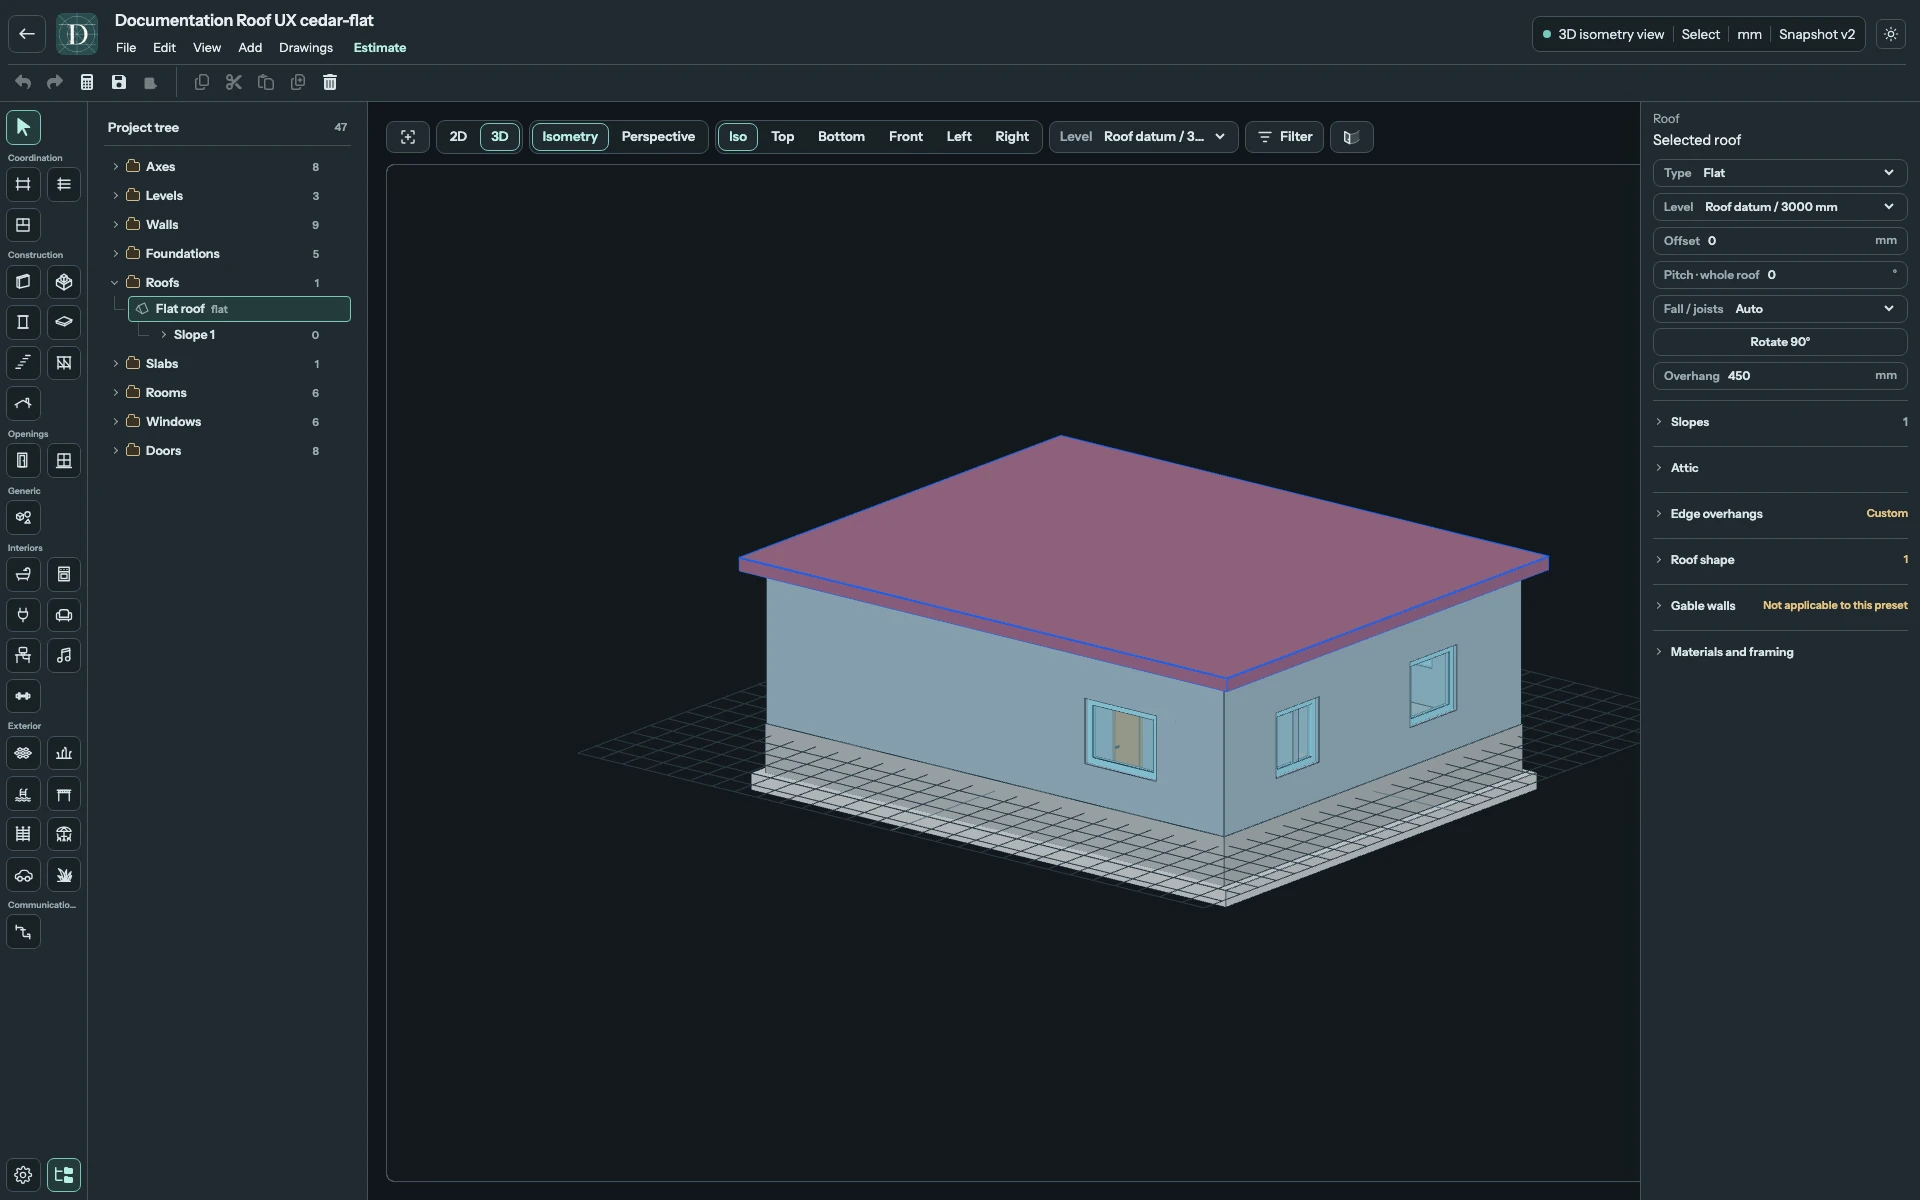
View the Flat example at full size.
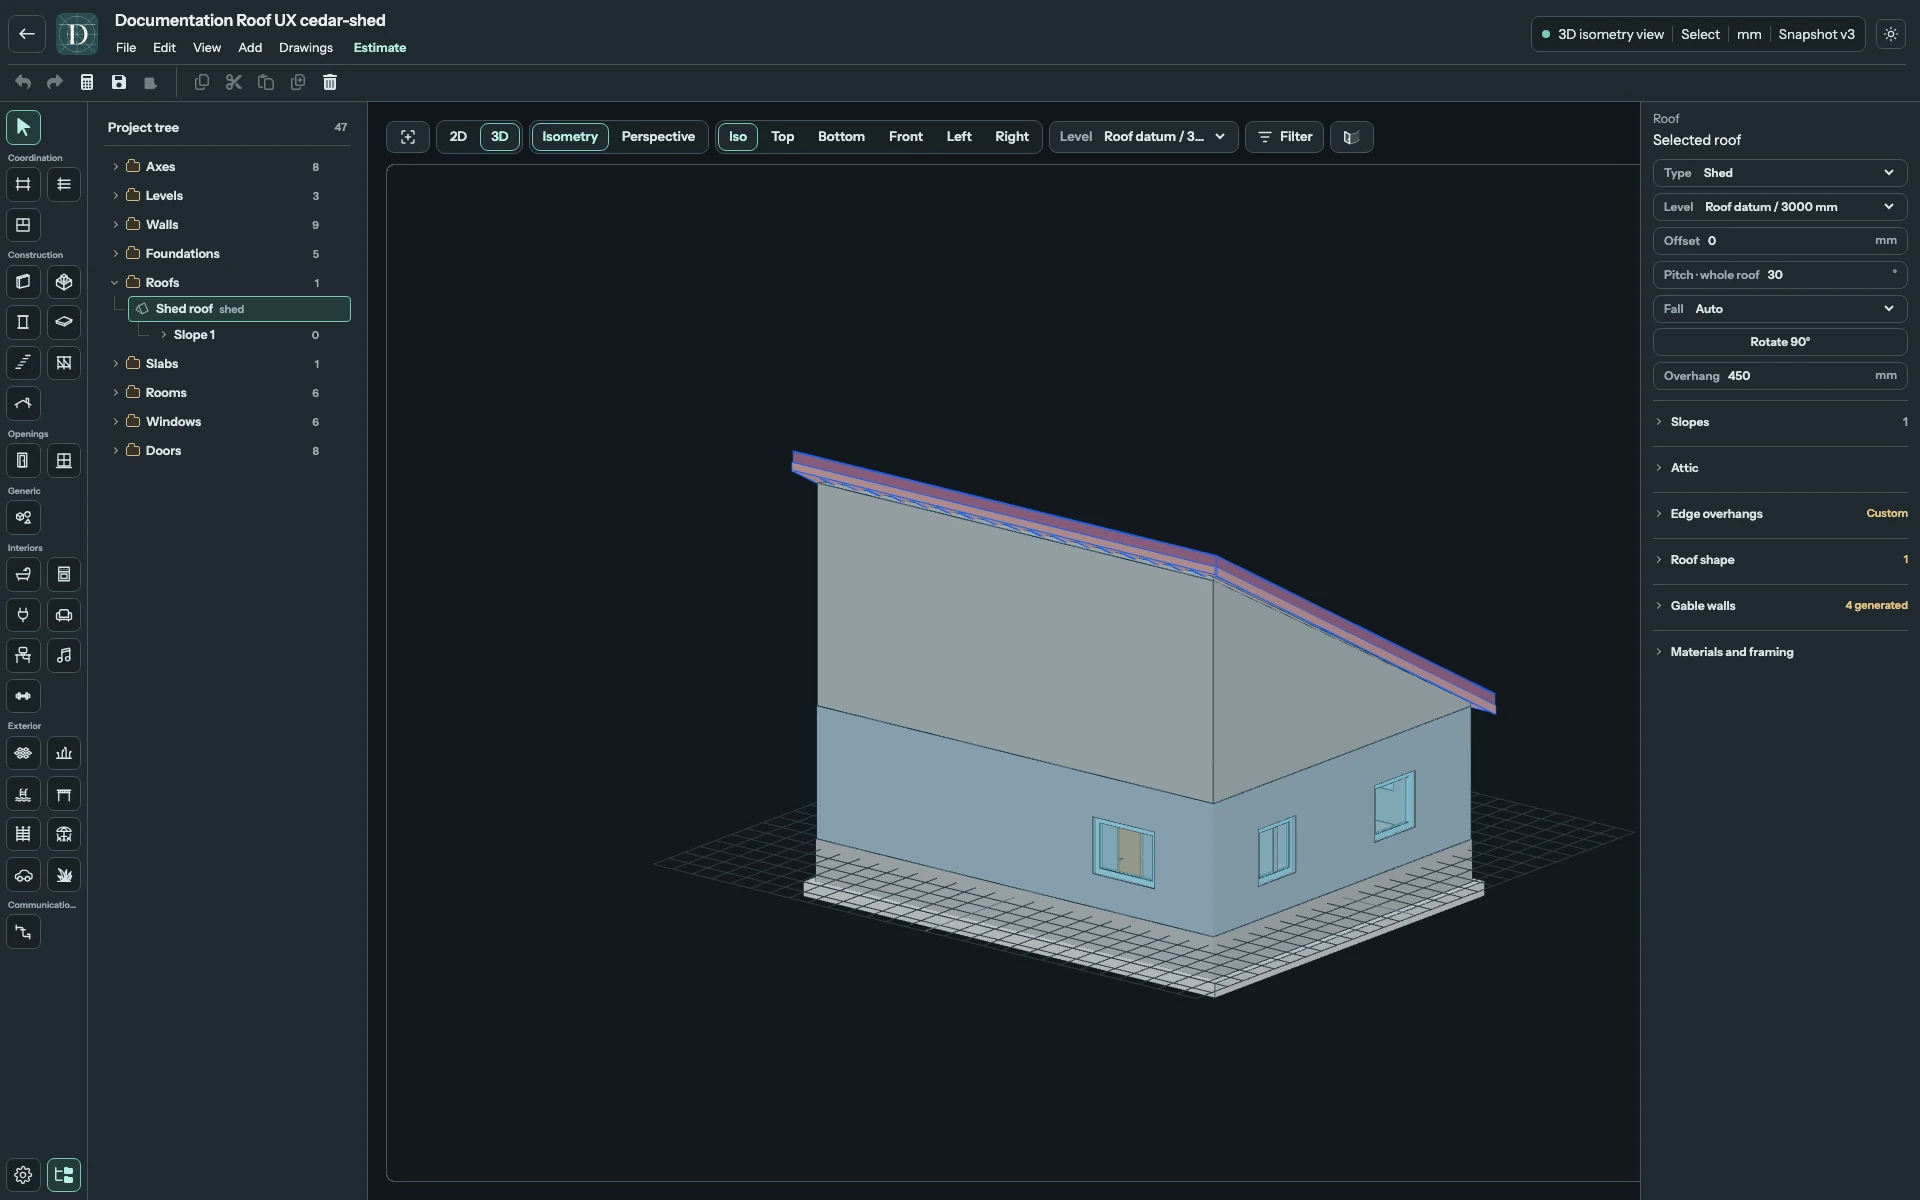
View the Shed example at full size.
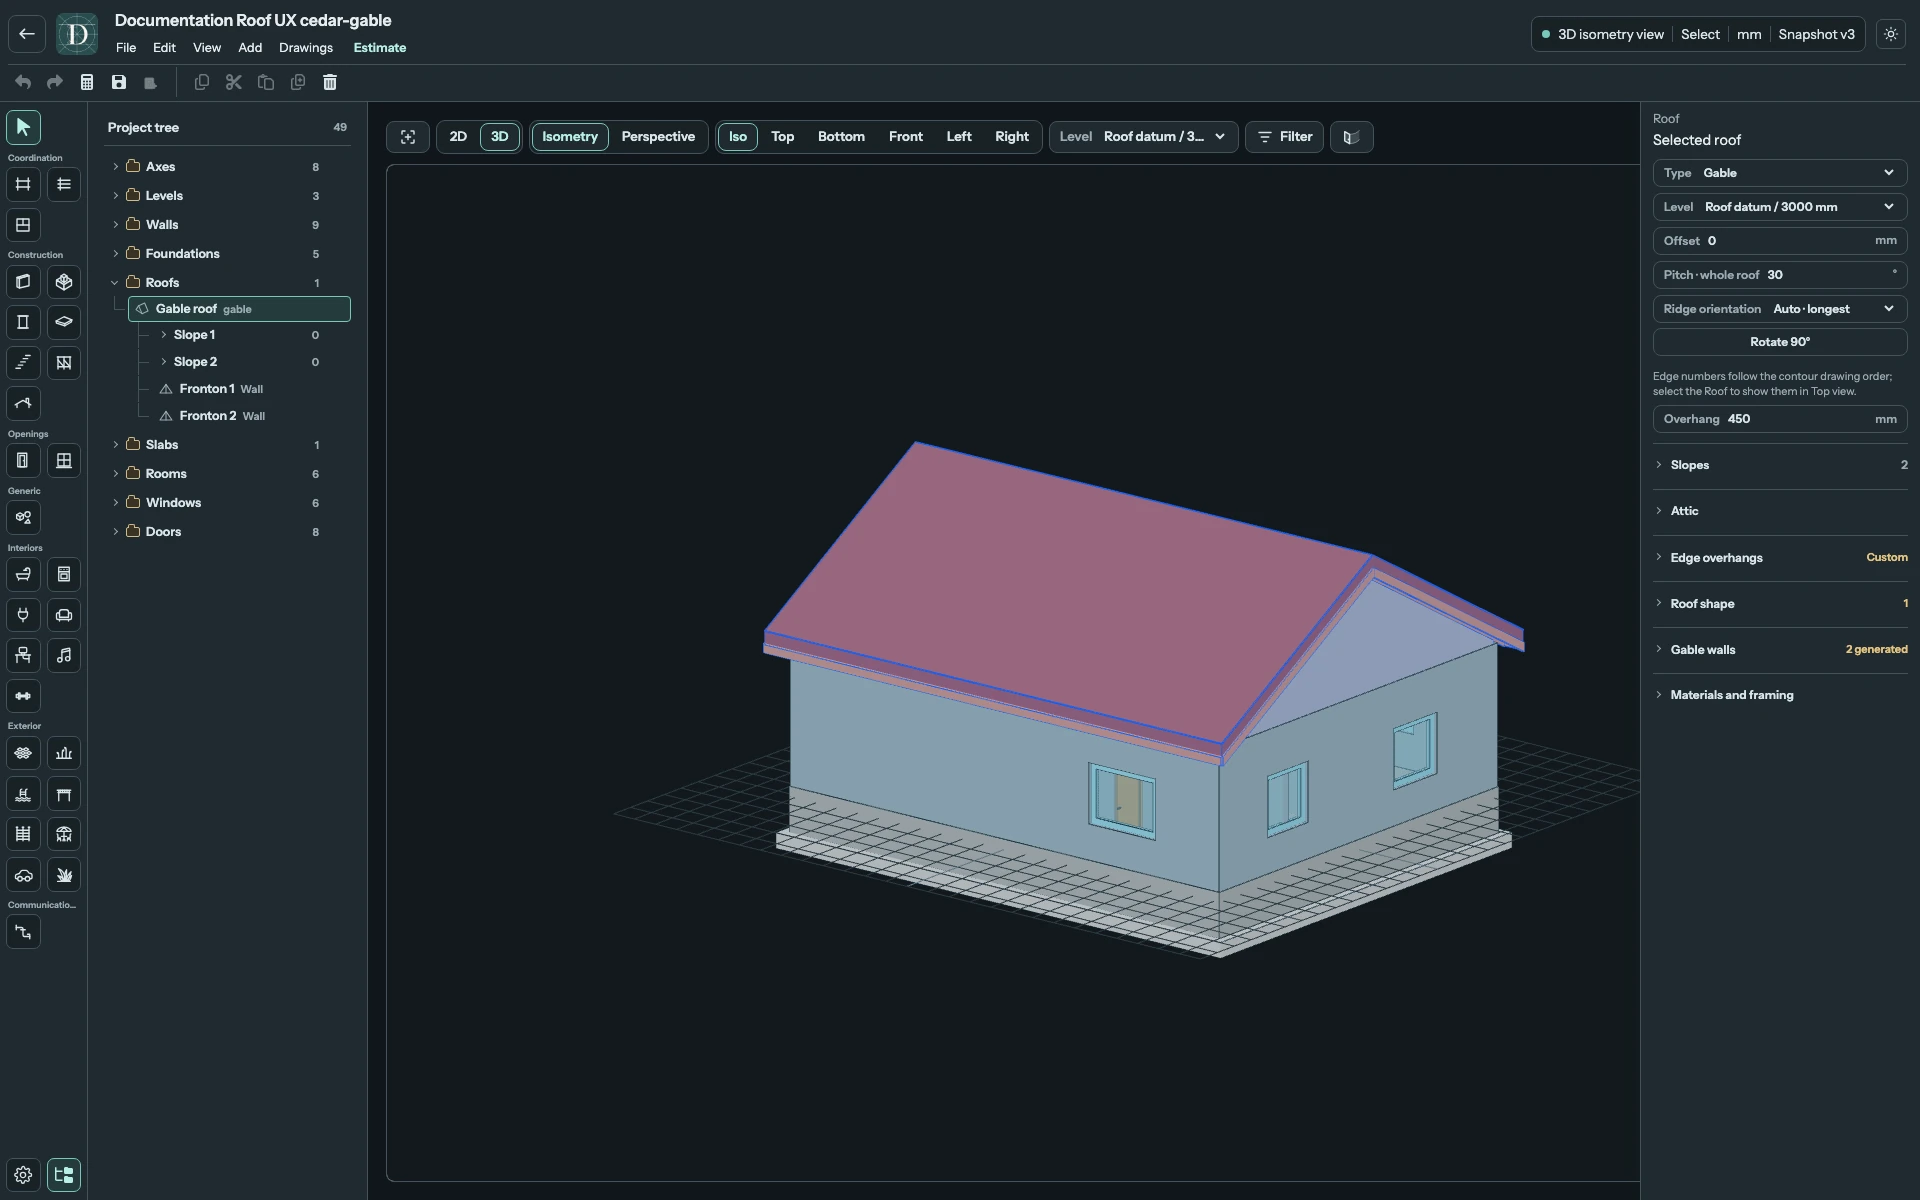
View the Gable example at full size.
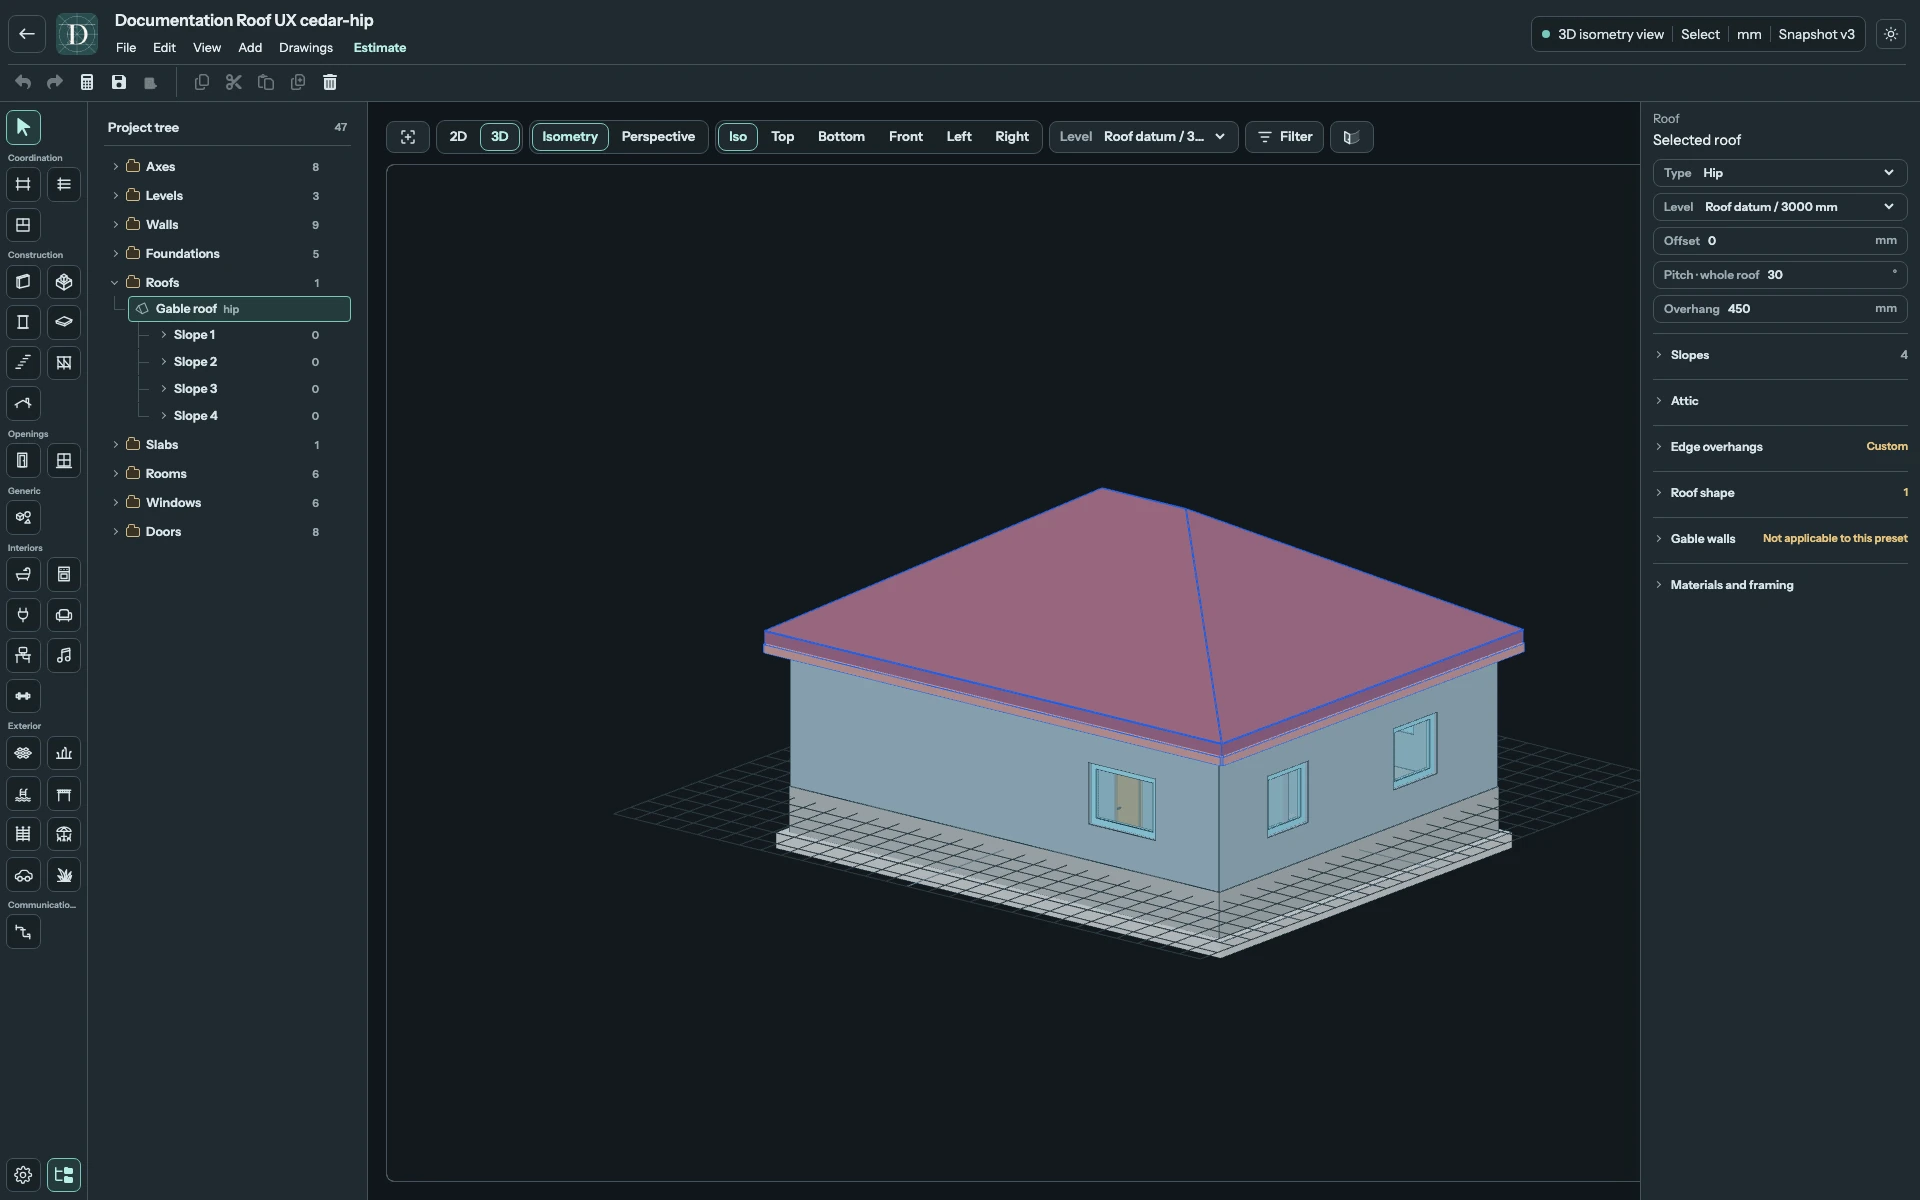
View the Hip example at full size.
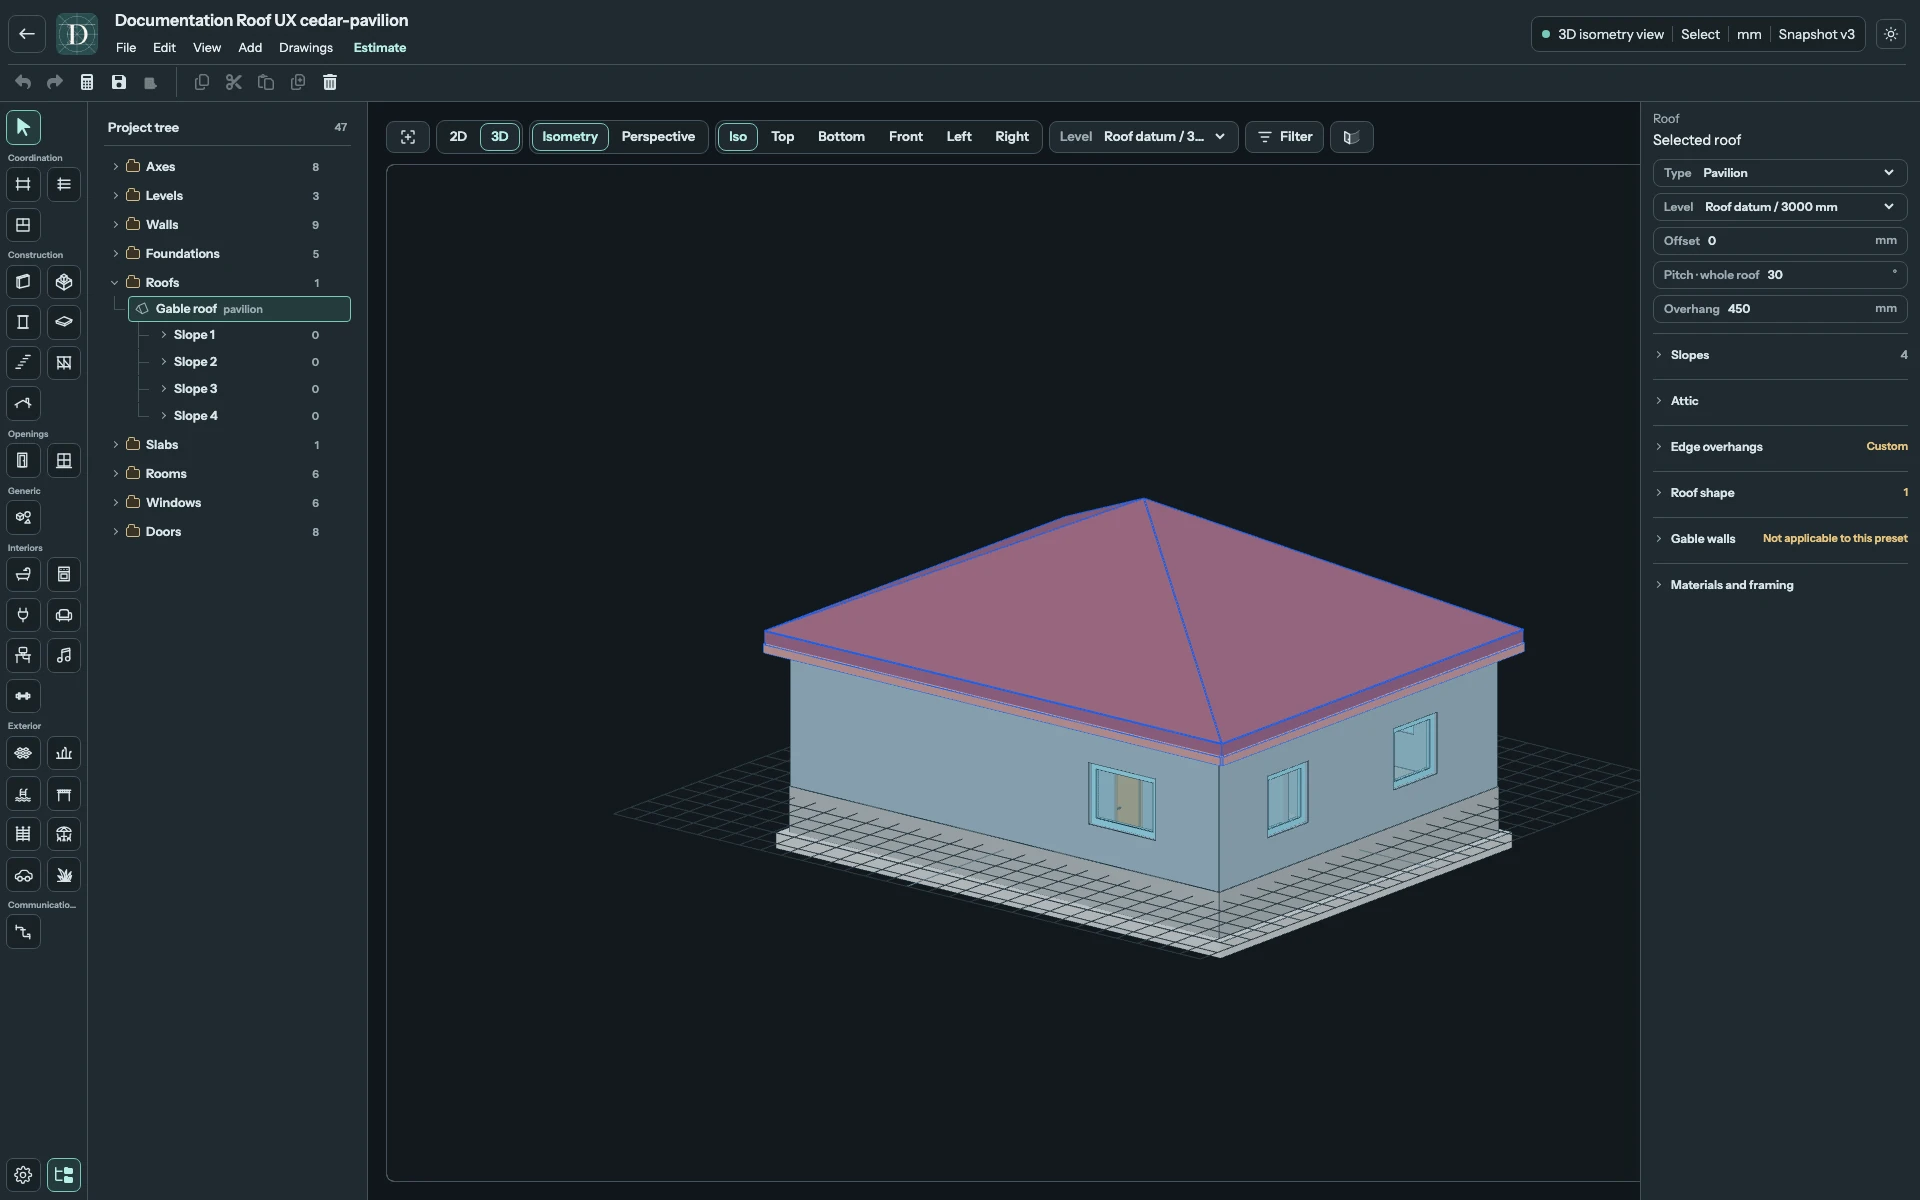
View the Pavilion example at full size.
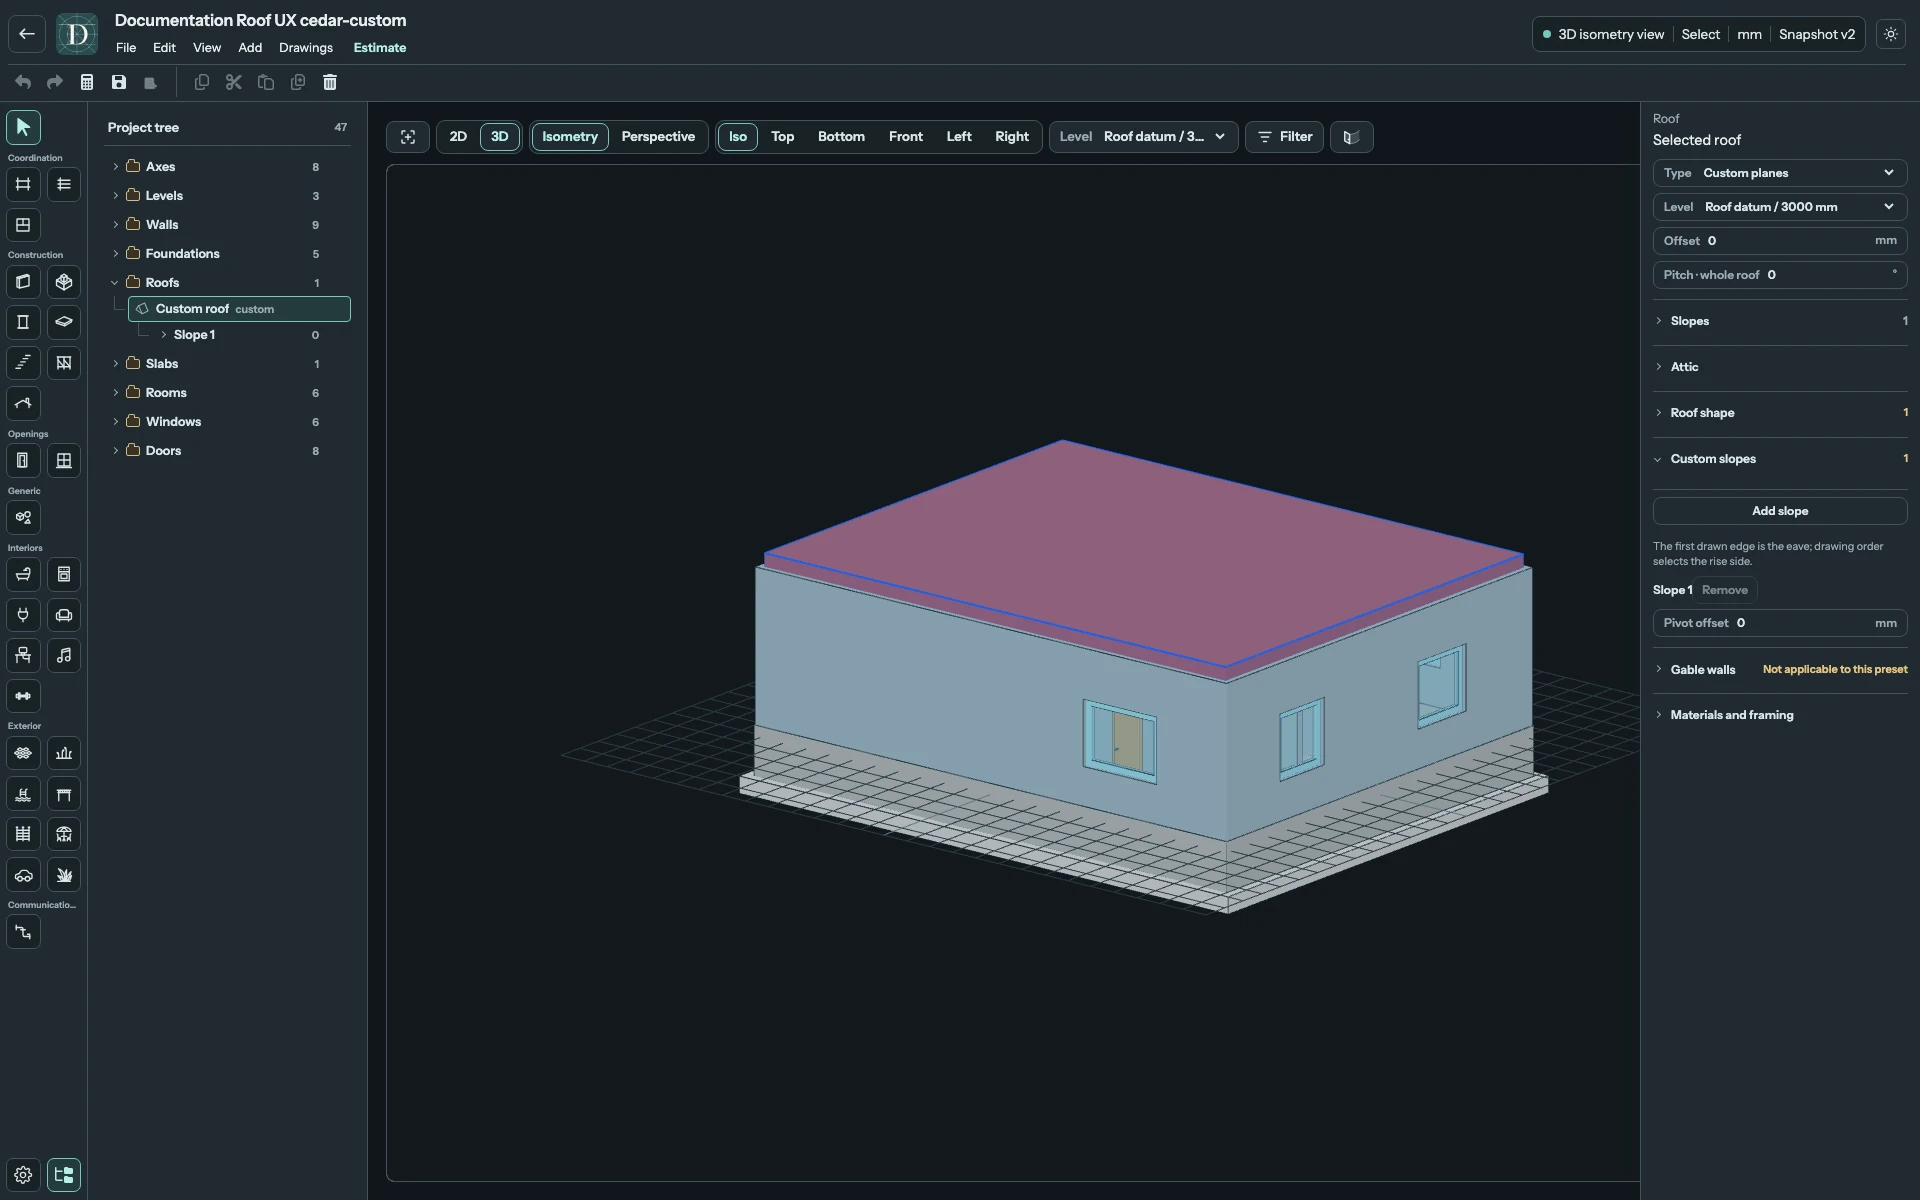
View the Custom example at full size.
Height, pitch and orientation
Level supplies the reference elevation. Offset adds a vertical distance to it. Cover thickness builds upward from the underside reference. Changing the Level's elevation therefore moves the referenced Roof; changing Offset moves it relative to that Level.
Pitch · whole roof changes the Roof's applicable pitches together. For a roof with different pitches, the field can be empty; entering a value makes those pitches uniform. To change one surface, select it under Slopes and use Pitch · this slope. This changes the actual roof geometry, including the resulting ridge and valley positions. A Pavilion's slopes share one apex, so changing one angle also adjusts that apex and the other resolved angles. See slopes, parts and Custom planes before editing a composed roof.
Before drawing a basic Gable, choose Ridge orientation → Auto · longest, Edges 1 & 3 or Edges 2 & 4. For a basic Flat or Shed, Fall / joists or Fall offers Auto and four numbered directions. Choose the direction in that select before drawing; the neighbouring Rotate 90° button is disabled for a new Roof. Edge numbers follow the contour's drawing order, not compass directions. These selectors are hidden when a selected Roof has editable parts. To rotate an existing ridge, open Roof shape, select the ridge part and use Rotate ridge 90° when it is offered.
When Type is disabled for a roof made of editable parts, change a part under Roof shape. The existing roof remains visible while you prepare a Change shape draft; Apply commits a valid replacement and Cancel discards the draft.
Overhang, end walls and openings
Overhang is the roof-wide horizontal projection beyond the footprint, measured in plan rather than along the slope. A selected slope's edge can have its own overhang and reset to the roof value. Changing the main Overhang value resets the individual edge overrides. Connected edges have different rules; inspect their edge role before changing the distance. Open Edge overhangs to enter Edge N distances around the selected part's contour. Selecting or focusing an edge highlights its associated slope. Edge numbers follow the drawn perimeter, so inspect the highlighted side before entering a distance. These settings and Slopes → This edge overhang edit the same boundary overrides. Custom planes use their drawn contour rather than the basic preset overhang control.
Use slopes and parts for edge roles, gable walls, glazed end fills and apex settings. Use Roof windows for openings lying in inclined or horizontal roof surfaces, or dormer windows for a vertical window projecting out of a pitched slope. Attic analysis measures the space below the actual underside. Roof materials and framing explains what the structural display represents.
Build walls below a raised Roof
Build knee walls, directly below Offset, starts off. Enable it when the Roof should generate walls from its bound Level up to its raised bearing contour. It does not require a Room or attic analysis. A positive Offset gives these lower walls height; zero is allowed but adds no lower band. The checkbox is unavailable for a negative Offset, and an enabled Roof rejects a negative Offset edit.
The walls follow the exposed bearing perimeter, excluding the covering overhang and internal joins between roof parts. Existing physical Walls cover their own intervals, so the Roof fills the remaining space rather than duplicating them. Read a review message if the existing coverage cannot be resolved.
These walls belong to the Roof. Changing its Offset or shape rebuilds them; switching Build knee walls off removes the generated lower walls. The command does not move the Level or Room floor and does not create separate Wall objects. Under Gable walls, Preset and Thickness also apply to these walls. Mode → Off removes the upper gable fills while retaining the lower perimeter band when Build knee walls is enabled.
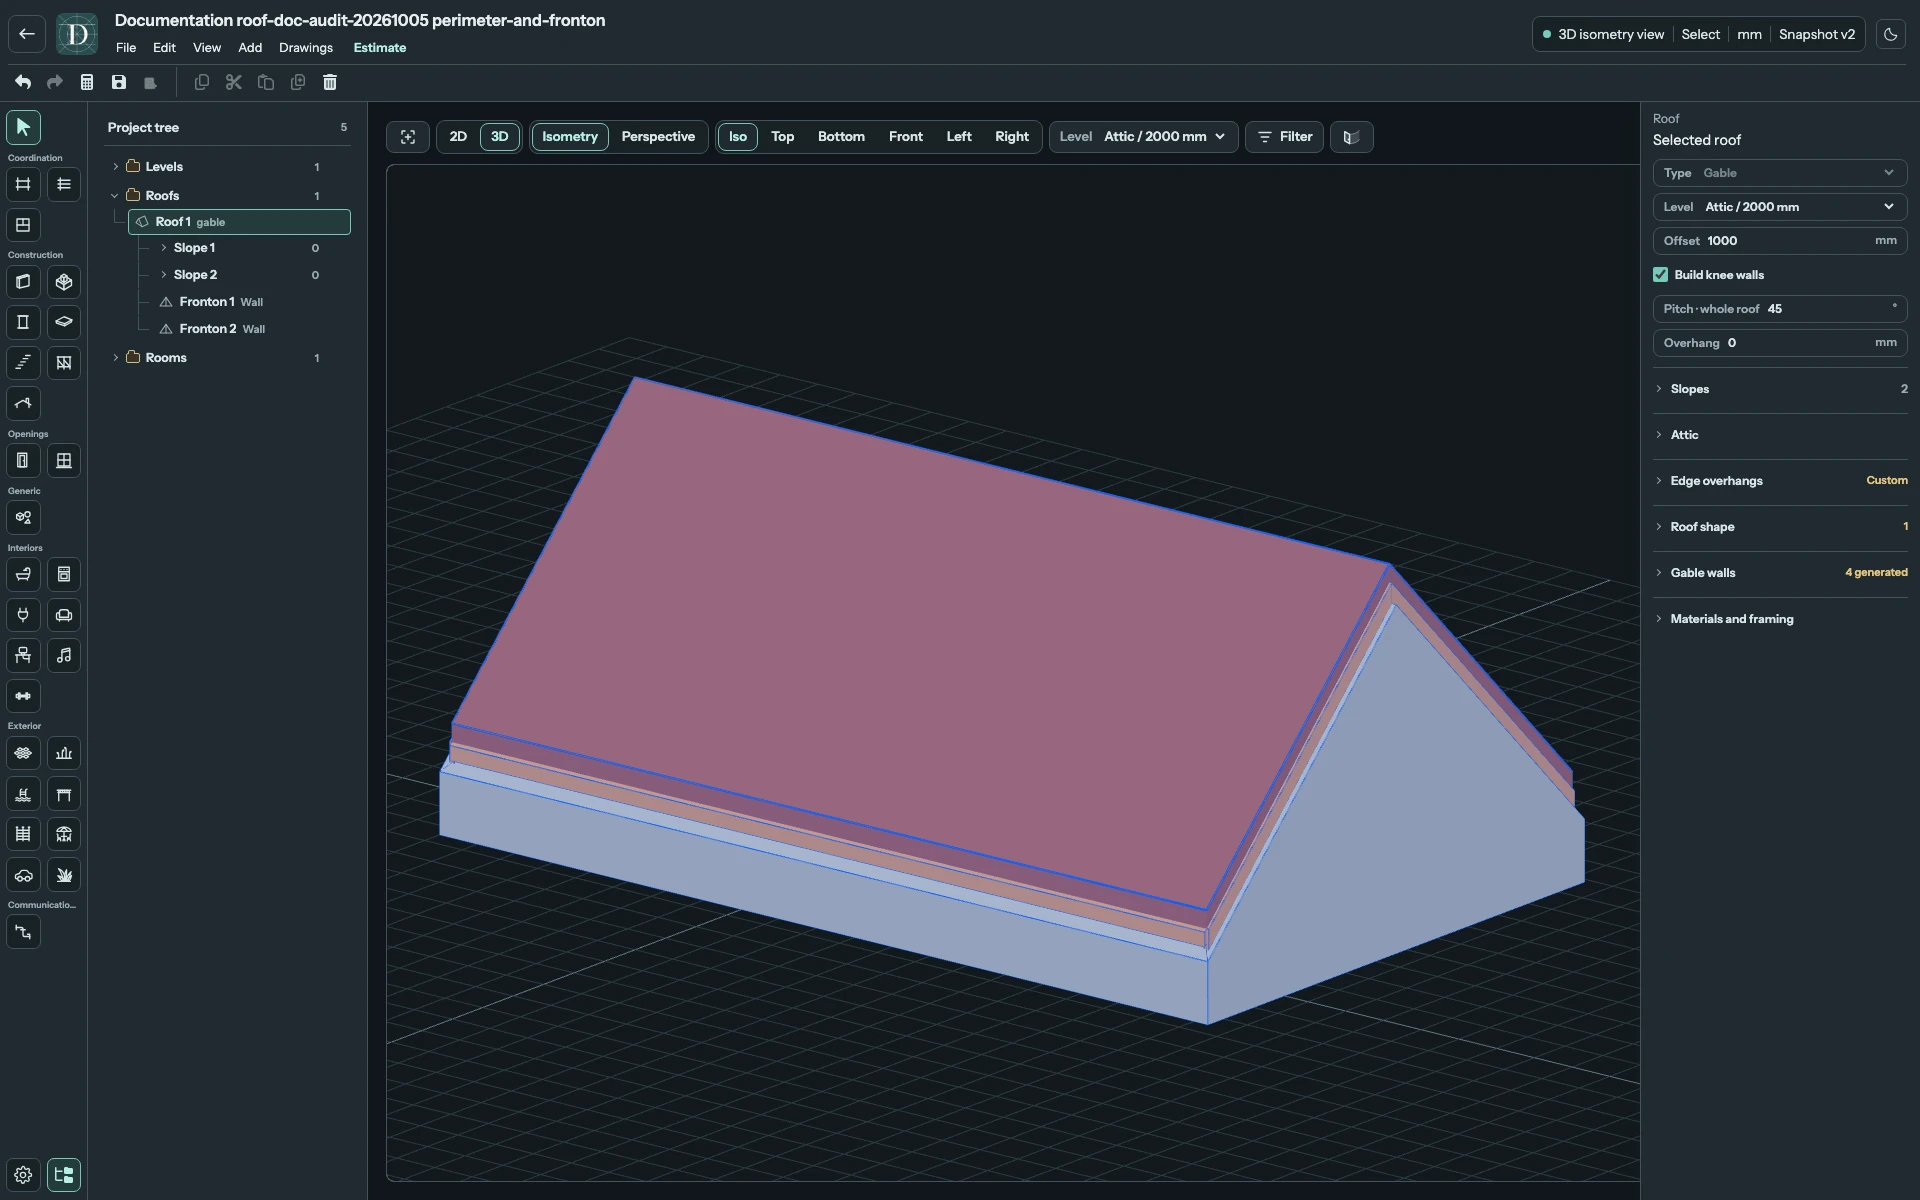
View the generated perimeter walls at full size.
The attic analysis command Create N knee walls is a separate operation: it creates ordinary, independently editable Walls along a Room's headroom contours. Use it for that room-specific layout rather than treating the two commands as interchangeable.