
A Stair connects two modeled heights. Willow House uses two flights with a 90° turn between Ground floor and First floor. The lower end is approached from the ground-floor hall. The landing meets the outer wall of the stair hall, and the upper flight ends in the first-floor hall. Both arrows point uphill. The earlier Garden Studio remains a one-storey exercise.
- Create the upper Level at the height needed for your project and add a slab for that floor. In Willow House the upper slab and its stair opening are already modeled.
- In Top 2D, make the lower Level active and choose Stair under Construction. Click the start point, then set the upward direction and run endpoint in the plan. Leave space to approach the lower end. Select the Stair. For the Willow House turn, use Flights and landings to insert after Flight 1, set Angle to 90° and Side to Right, then select Add landing. Position the Stair so the landing meets the hall's outer wall and neither flight blocks a doorway.
- In the right panel, verify Base level and Goes up to. If the latter is Auto · nearest upper level, confirm that it chose the intended Level. Adjust the step rule, Riser target, Tread depth, and Width for your design. Read Total rise, Actual step, Flight split, and Against the step rule after the values resolve; the target is an input, while the actual step is the resulting division of the rise.
- Expand Opening in the floor above. For a compatible upper slab, Automatic opening can generate a linked opening. To make one manually, select the upper slab, choose Opening under Sketch, trace its inner contour, and click the first point to close it. Check the result around the whole run. Willow House illustrates an opening already present in the upper slab.
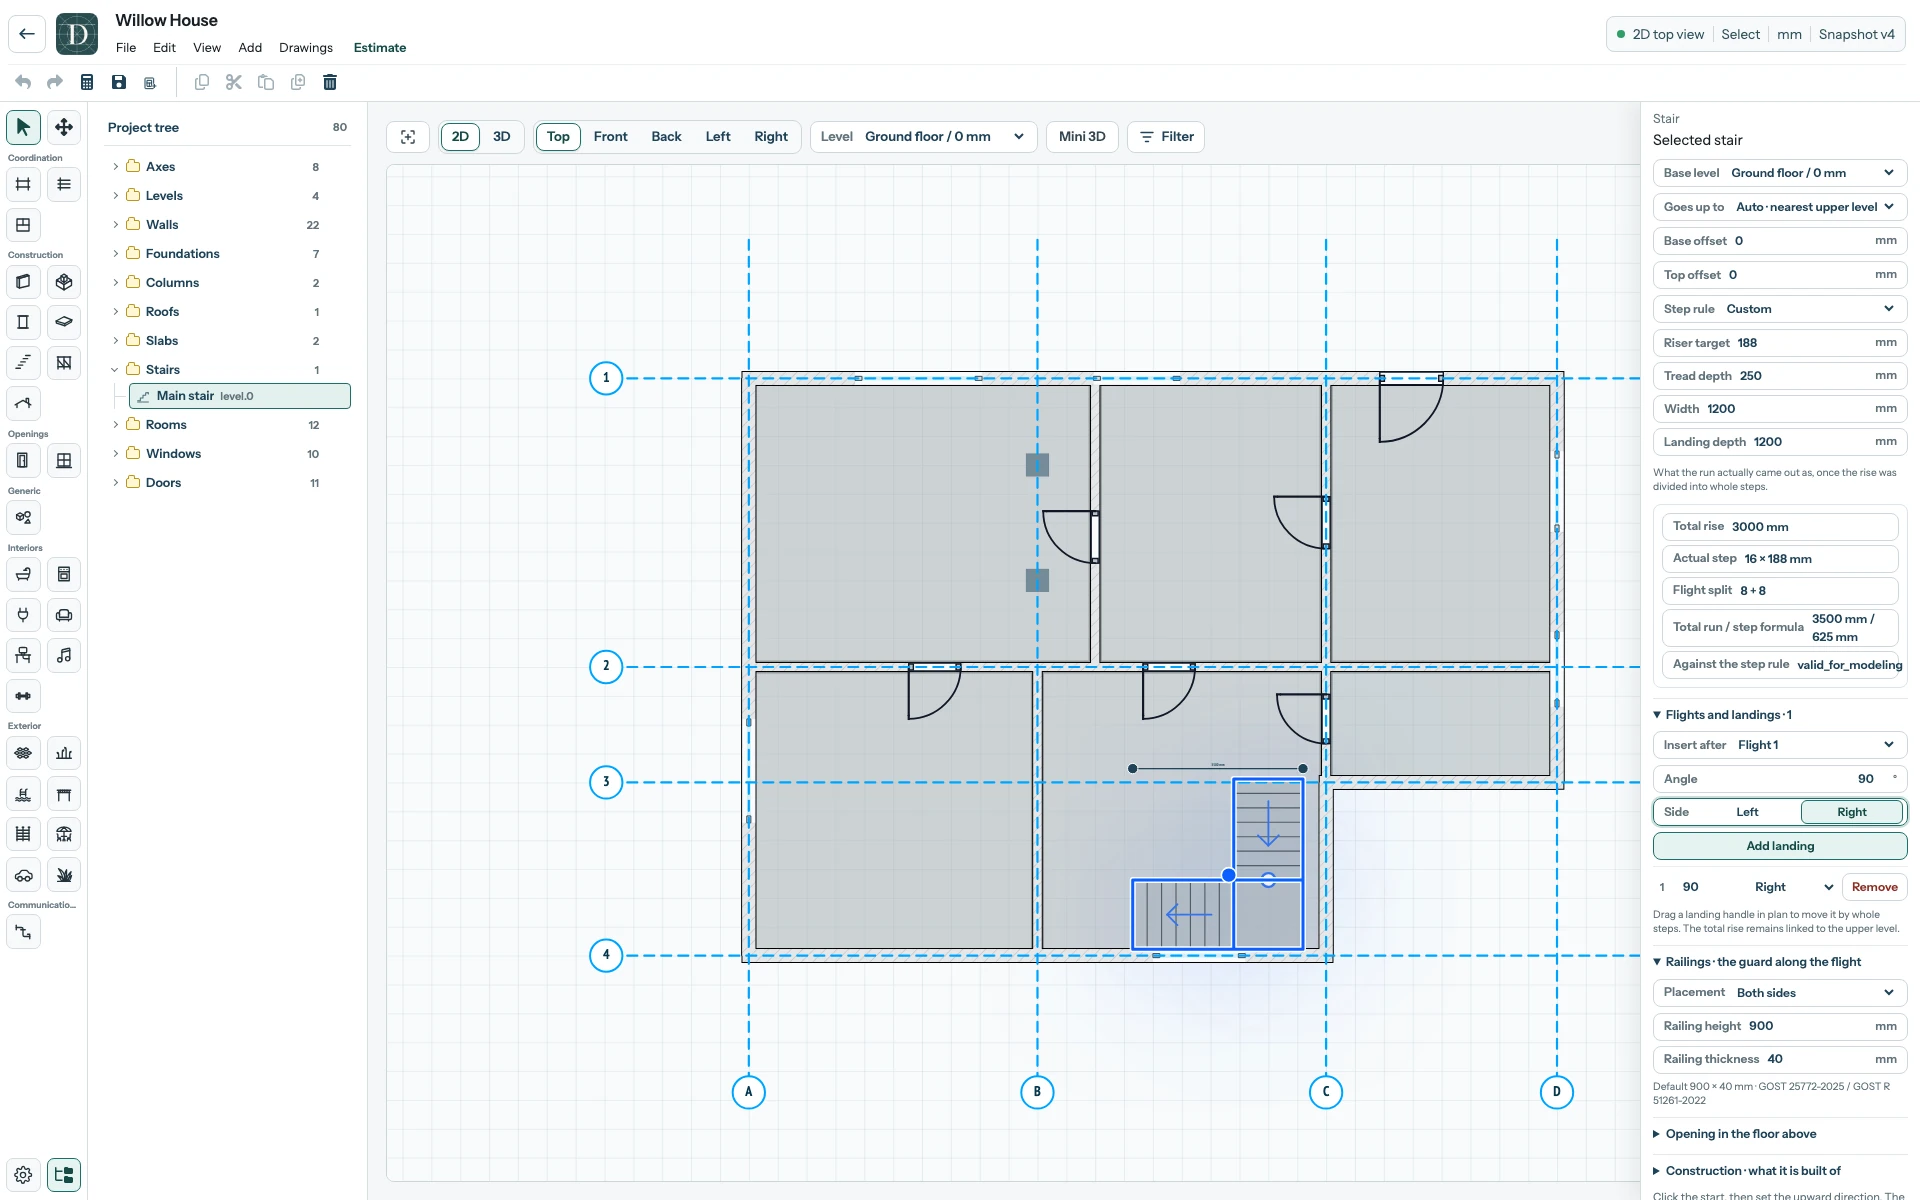
Inspect the full-size Stair screenshot.
Switch to First floor in Top 2D to inspect the opening around both flights and the landing. The upper flight must finish at a walkable part of that floor; a slab across the route would obstruct the Stair. Save, reopen, and check both Levels and the Stair in 3D.
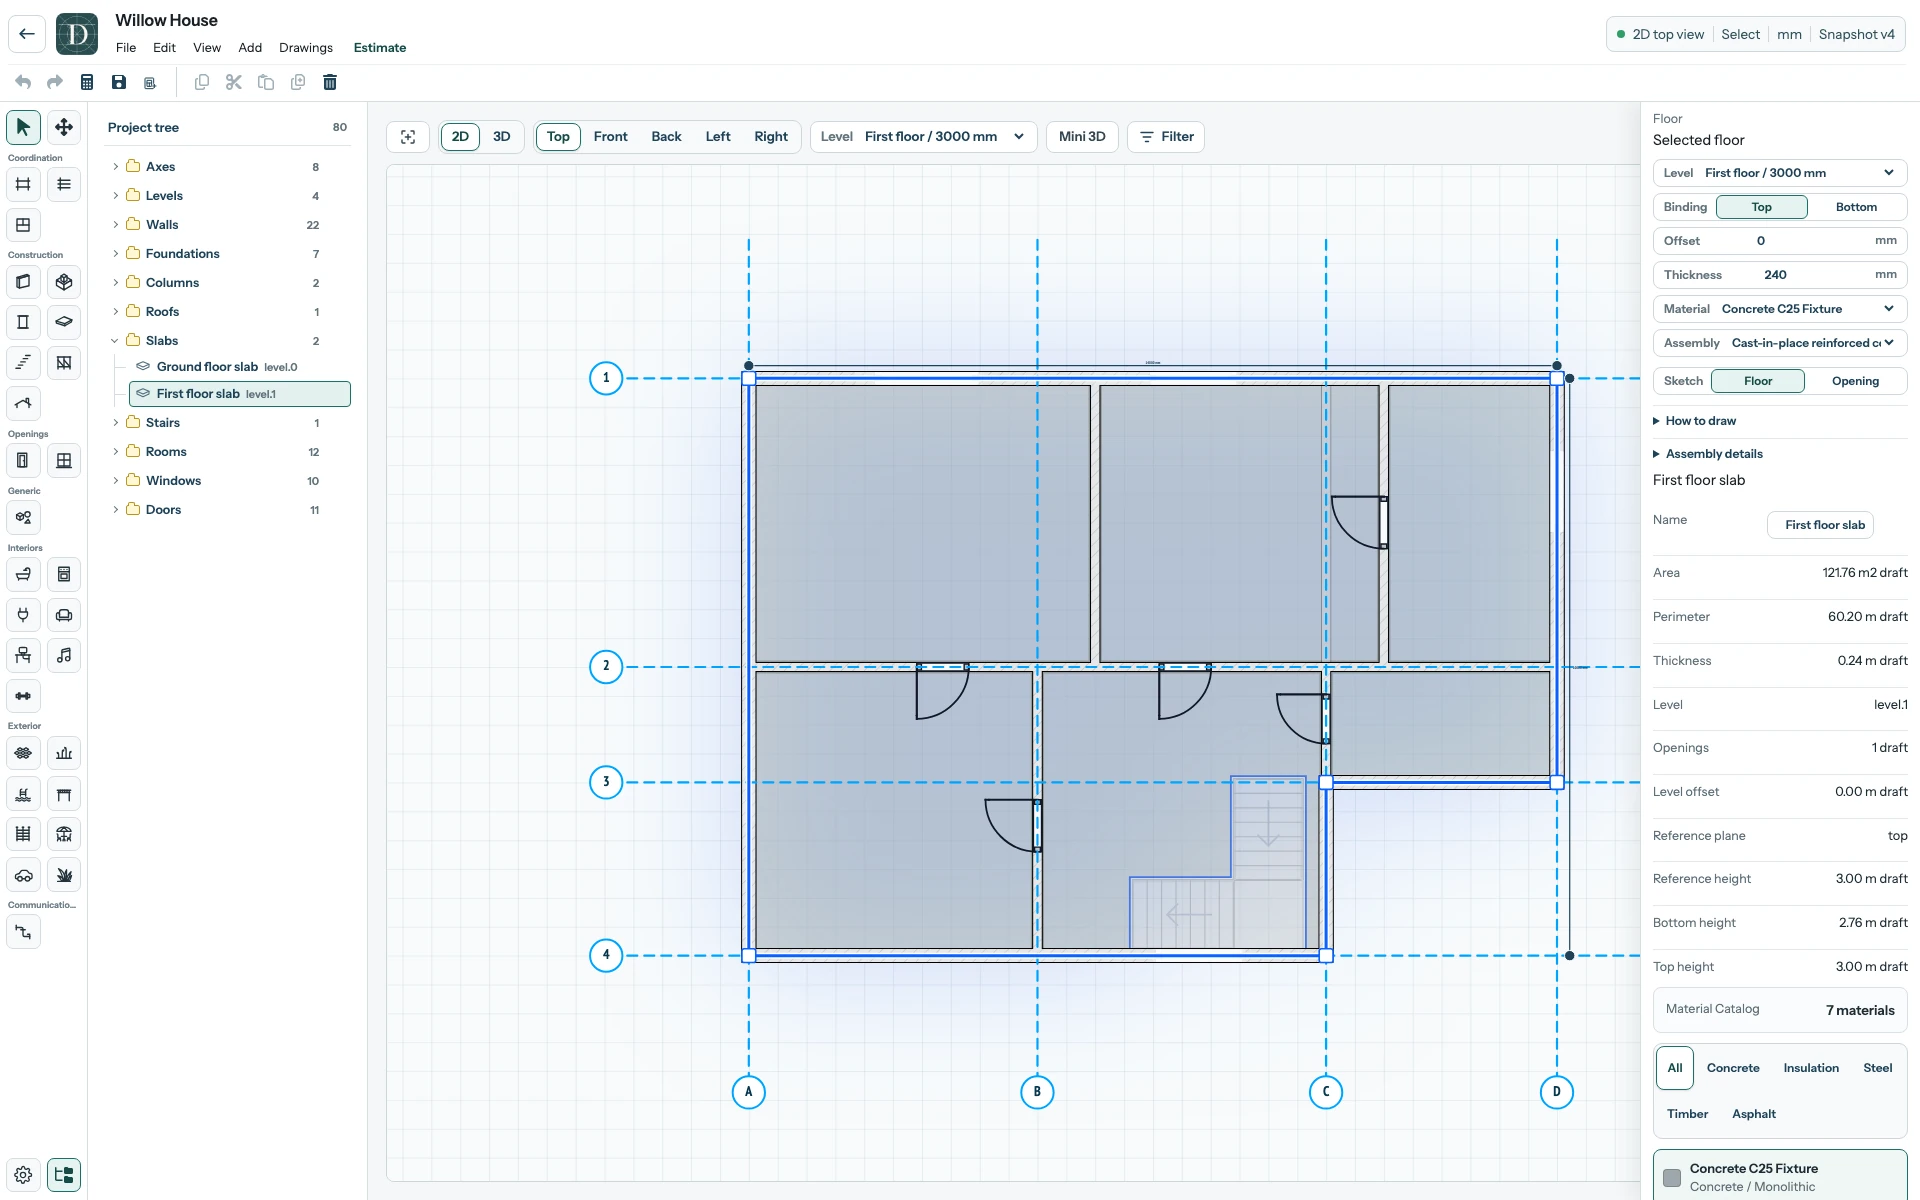
Inspect the full-size upper floor opening screenshot.
The screenshot's rise, tread and width are Willow House values. Choose your own geometry and applicable requirements; a valid modeling status is not a code-compliance or structural approval. Continue by adding foundations and a Roof to your model or comparing Roof types.
Use the detailed guide for straight, turning and spiral layouts, steps, railings and linked floor openings.