
Use Interiors → Bathroom to lay out sanitary fixtures and appliances on a chosen Level. Each item is one object with its own dimensions and placement. A shower enclosure, for example, lets you compare its footprint with the room before inspecting its height in a side view or 3D.
Place a bathroom object
- Open 2D → Top and choose the working Level above the plan.
- Open Bathroom in the left tool rail and choose an item.
- Set its installation option, dimensions and Level in the right panel. Enter lengths in the unit displayed by the project.
- Move the pointer until the complete placement preview is where you want it. Position the intended edge beside the Wall manually in Top.
- Click to place it, then choose Select or press Escape when finished placing objects. Select the object in the plan or Project tree to edit the instance.
Bathroom objects use free placement. The object center determines its optional same-Level Room link. Placement outside a Room remains possible; a fixture beside a Wall does not follow later Wall edits.
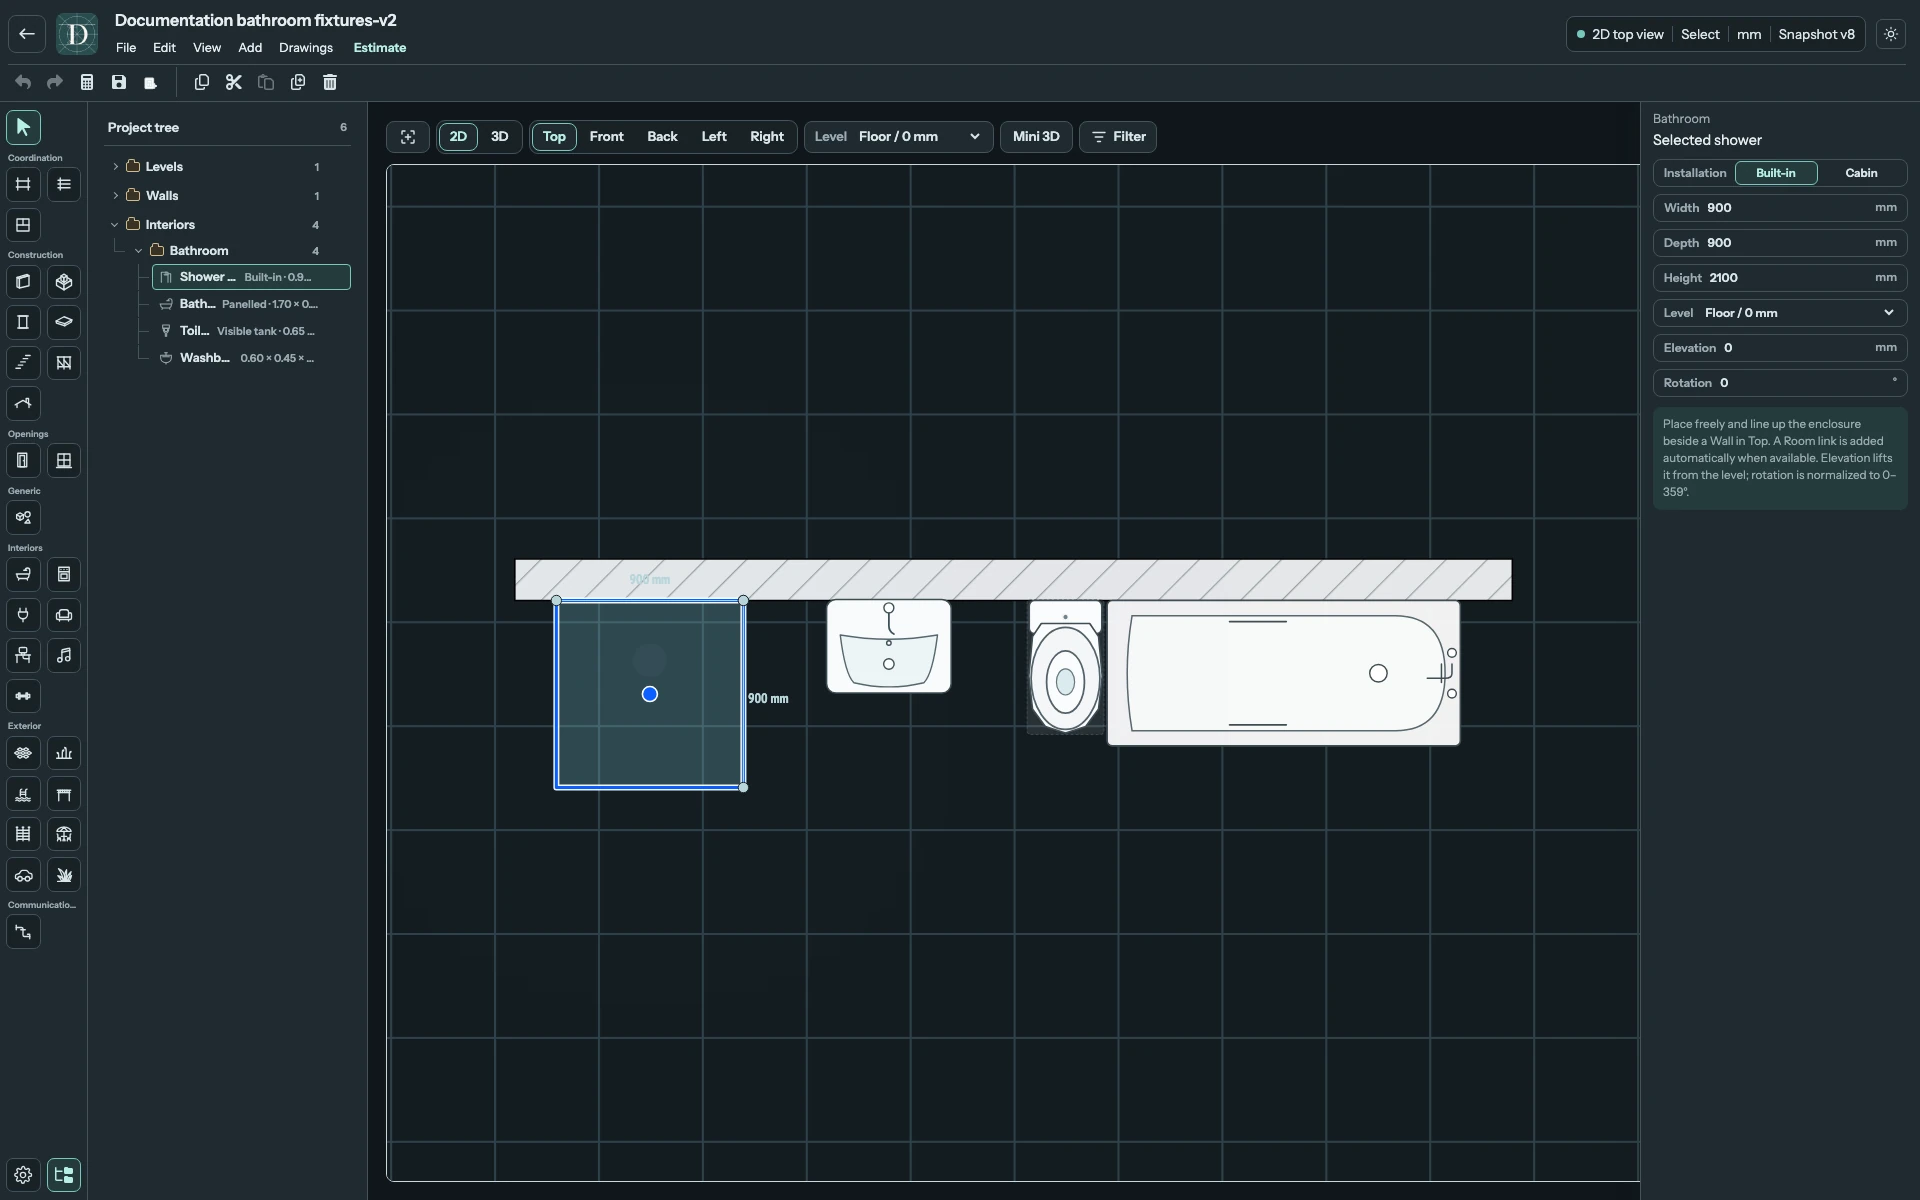
View the full-size screenshot.
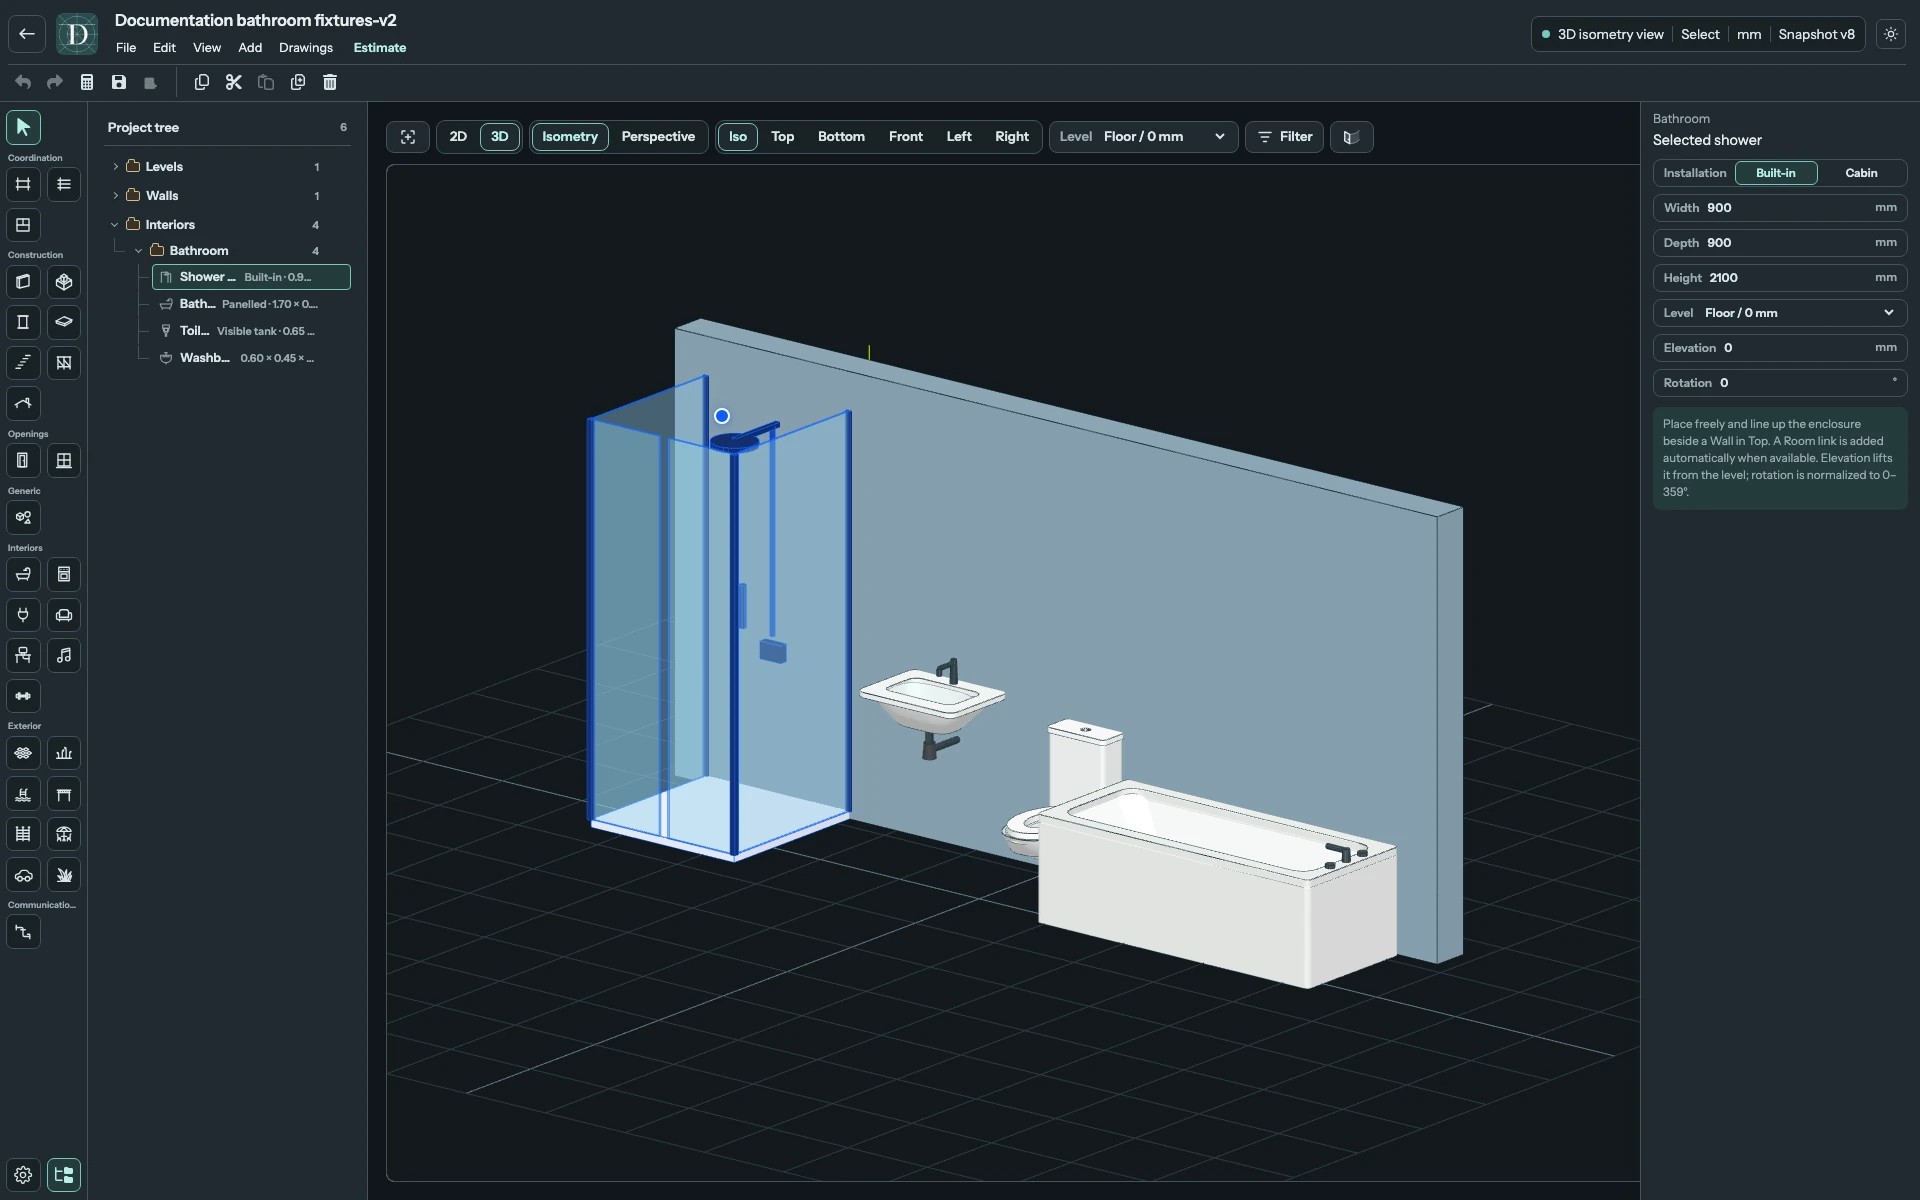
View the full-size screenshot.
Common placement settings
Every Bathroom panel includes Level and Rotation. Level chooses the floor datum; each fixture's height or offset field then places it relative to that datum. Rotation turns its whole footprint in plan. For example, use 90° to turn a bathtub's long edge into the other direction. It does not change the dimensions or attach an item to a Wall.
Set the options before placement to configure the next object; a Water heater's Connection profile becomes available after placement. Select a placed object to change only that instance. The controls below use mm examples; input fields use the unit chosen in Project settings. Invalid sizes leave the previous valid geometry in place.
Shower
Use Installation → Built-in for an enclosure with an open rear side intended to sit next to a separately modelled Wall. Cabin includes a rear enclosure and a raised tray. Changing Installation changes the form while retaining its dimensions and position.
| Field | What it changes |
|---|---|
| Installation | Built-in or Cabin, as described above. |
| Width, Depth | Enclosure footprint. Each starts at 900 mm and must be at least 600 mm. They can differ for a rectangular shower. |
| Height | Enclosure height; starts at 2100 mm, minimum 1500 mm. |
| Elevation | Signed offset from Level to the shower base. Use 0 on the floor or, for example, 100 mm to lift the whole shower. It does not change Height. |
| Level, Rotation | Datum and orientation of the complete enclosure. |
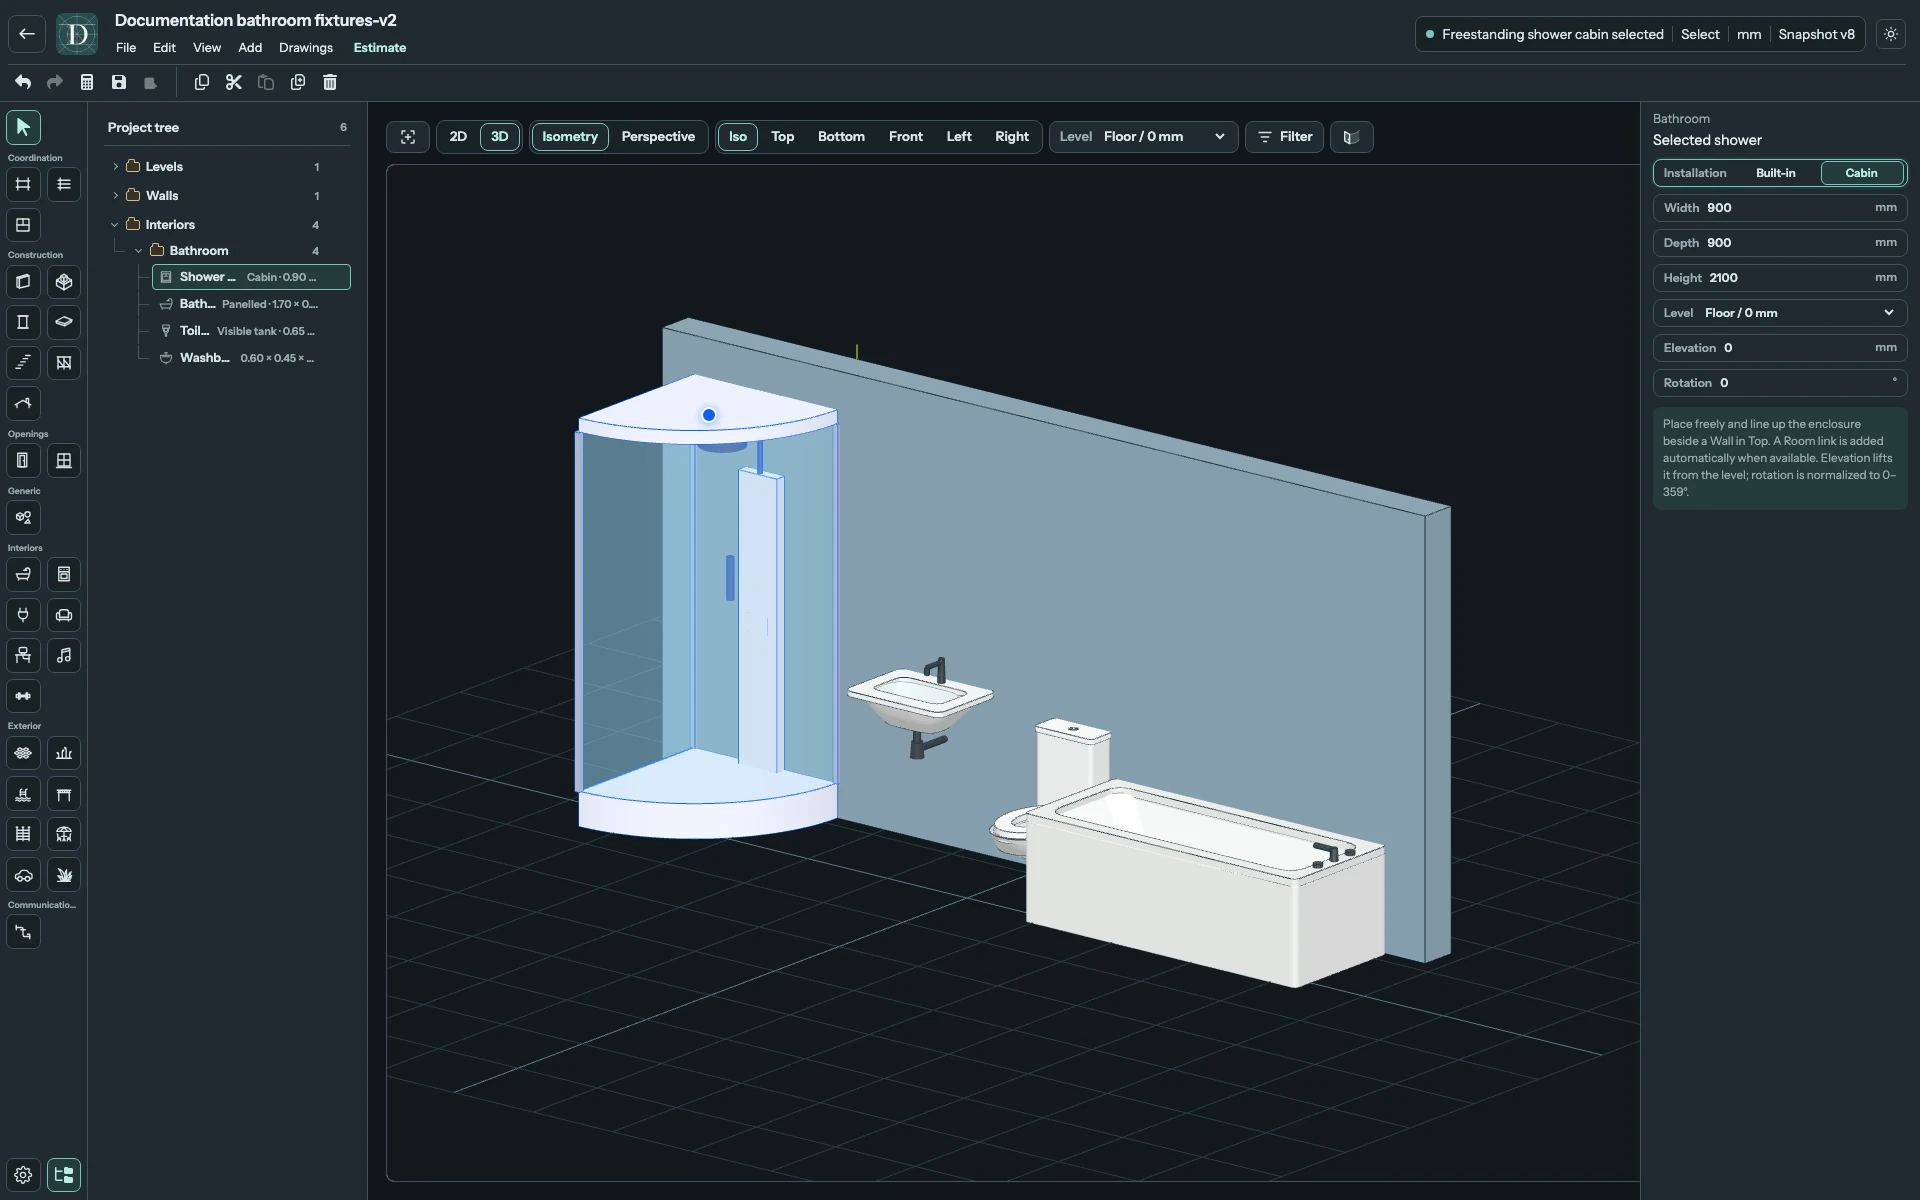
View the full-size screenshot.
Bathtub
Type → Panelled shows the bath with its outer panels. Built-in shows a different shell and support representation. This choice does not generate surrounding masonry, tiling or a plumbing installation.
| Field | What it changes |
|---|---|
| Type | Panelled or Built-in. Switching form retains the current dimensions. |
| Length | Long dimension; starts at 1700 mm, minimum 1200 mm. |
| Width | Short dimension; starts at 700 mm, minimum 600 mm. |
| Height | Bath-body height; starts at 550 mm, minimum 400 mm. |
| Elevation | Signed offset from Level to the bath base. Raises or lowers the whole bath while keeping Height. |
| Level, Rotation | Datum and plan orientation. |
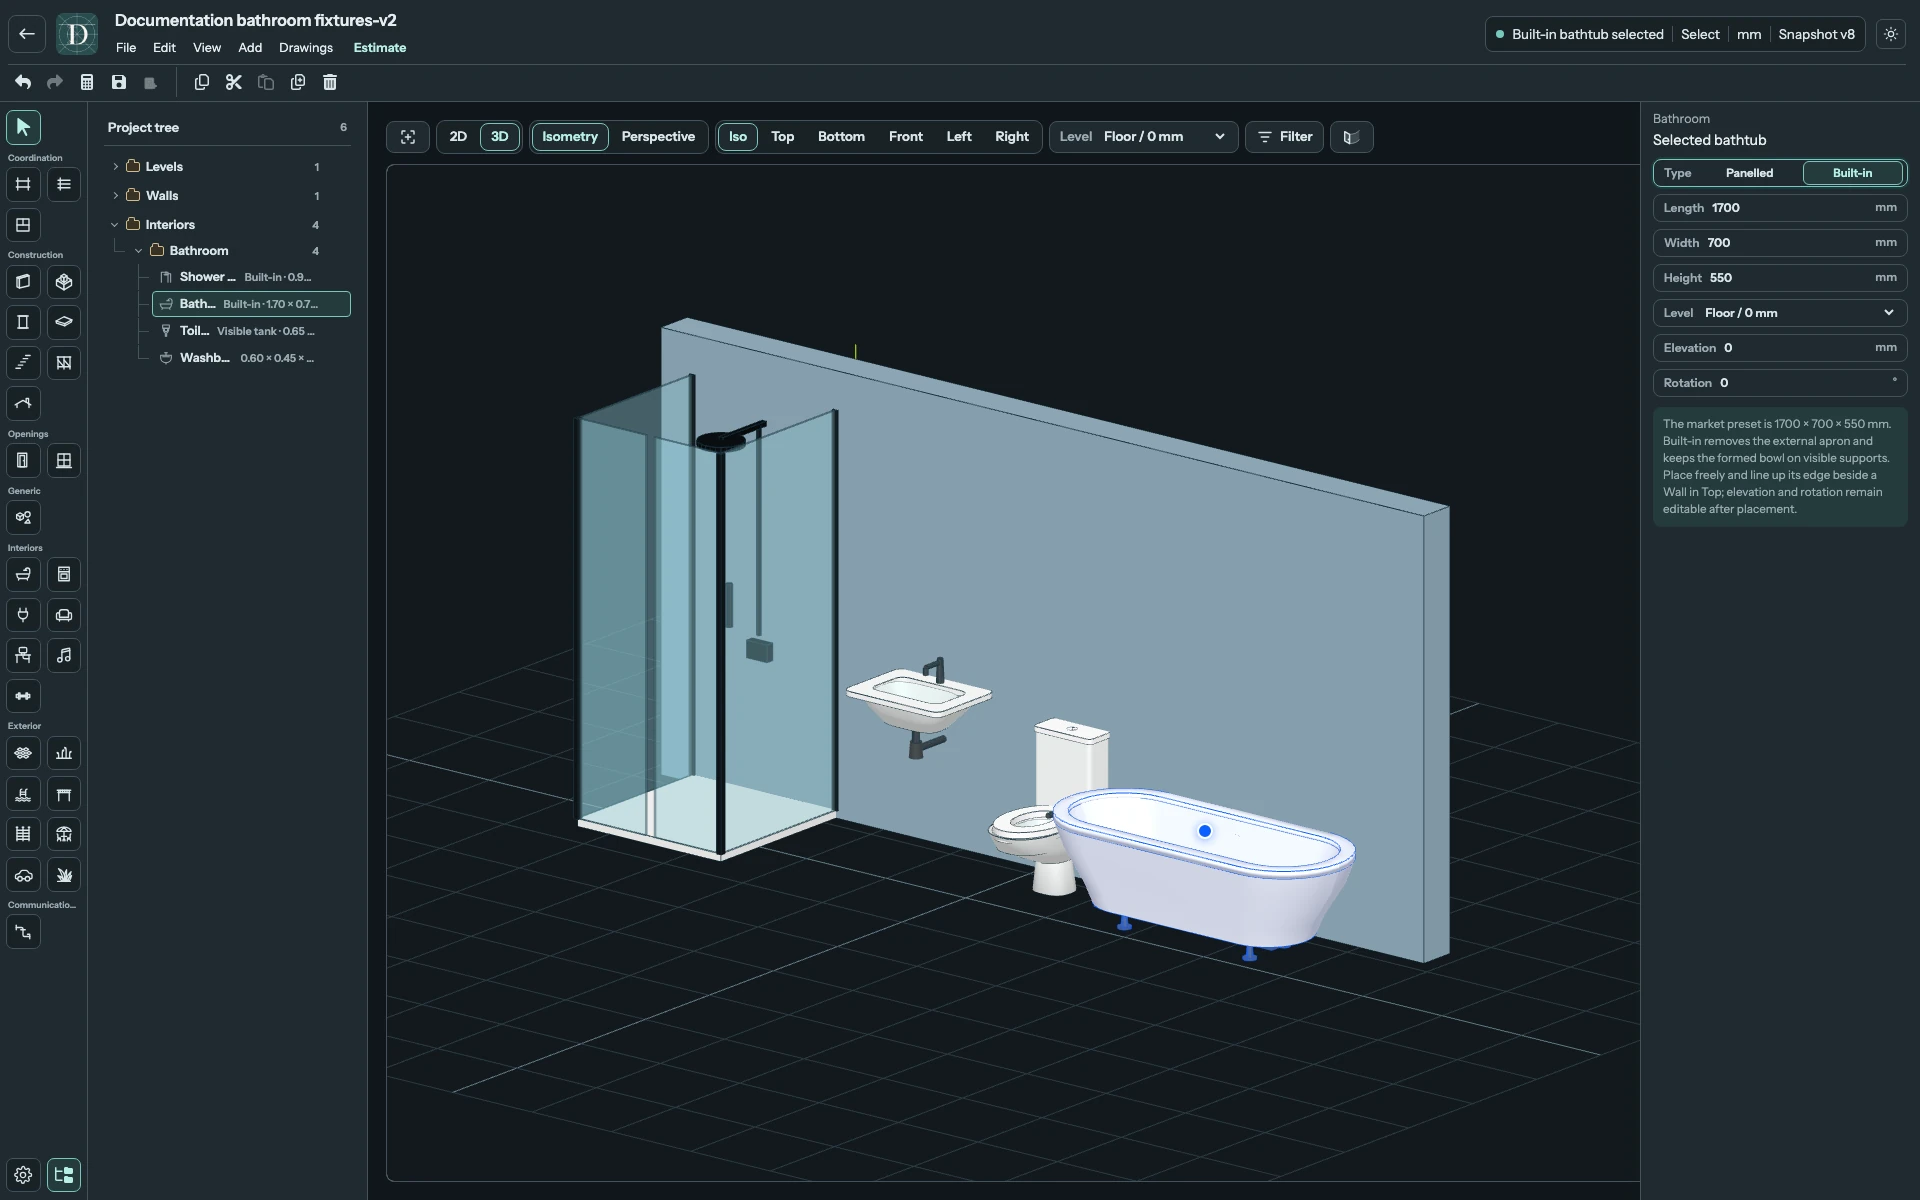
View the full-size screenshot.
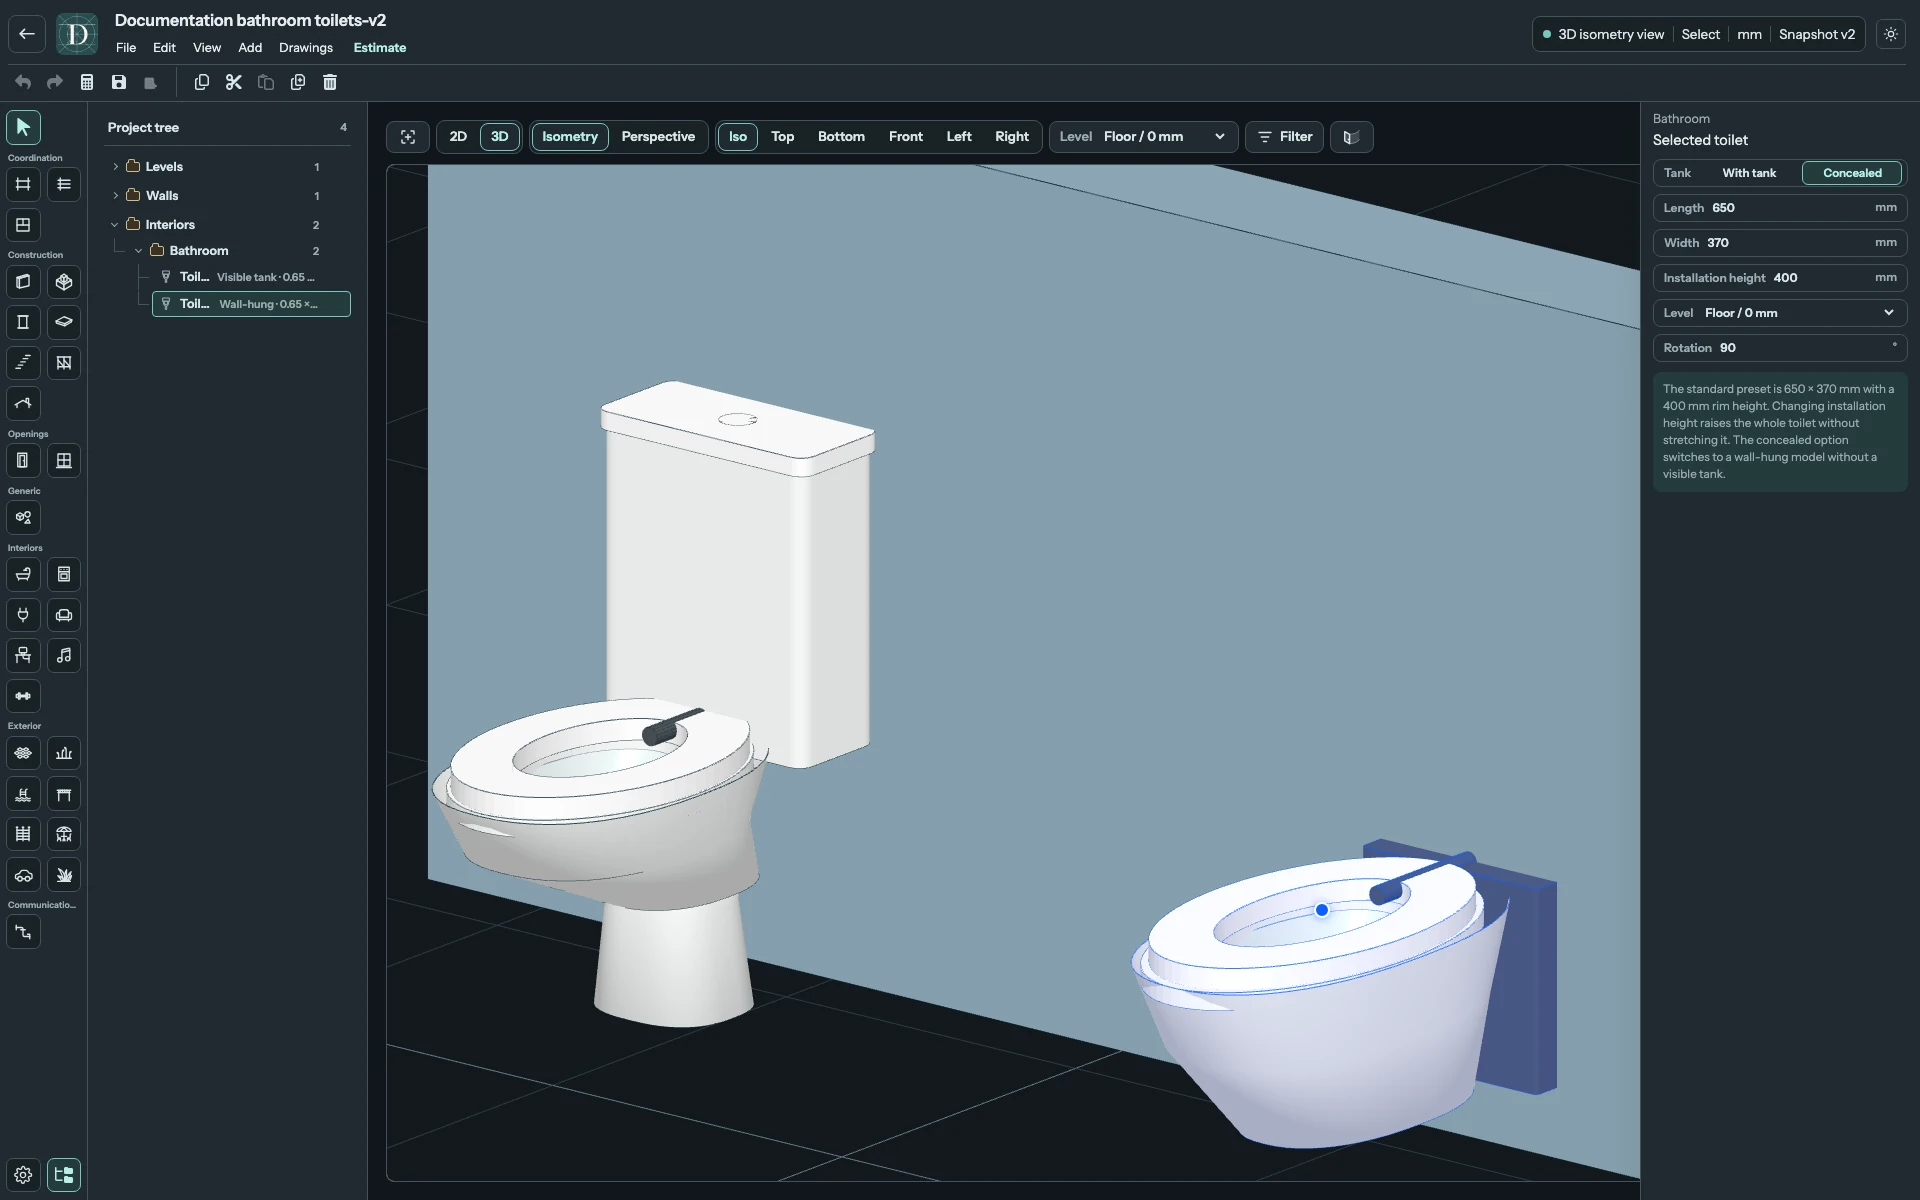
Toilet
Choose Tank → With tank for a visible cistern or Concealed for a wall-hung body without an exposed cistern. The current object remains independently placed; Concealed does not add an in-wall installation system.
| Field | What it changes |
|---|---|
| Tank | With tank or Concealed. |
| Length | Front-to-back envelope; starts at 650 mm, minimum 450 mm. |
| Width | Side-to-side envelope; starts at 370 mm, minimum 300 mm. |
| Installation height | Seat height relative to Level; starts at 400 mm and cannot be lower. Raising it to 450 mm raises the body by 50 mm. |
| Level, Rotation | Datum and direction in which the toilet faces. |
View the full-size screenshot.
Washbasin
Use the Washbasin for an individual bowl, tap and trap. For a sink within a kitchen cabinet, use a Kitchen module with Base unit → Sink.
| Field | What it changes |
|---|---|
| Width, Depth | Basin footprint; starts at 600 × 450 mm, minimum 300 × 200 mm. |
| Basin height | Bowl-body height, starting at 165 mm; minimum 80 mm. This is not its height above the floor. |
| Rim height | Height of the rim above Level; starts at 850 mm and must be at least Basin height. |
| Level, Rotation | Datum and orientation; turn the rear edge towards the Wall when arranging the basin. |
At Level 0 mm, Rim height 850 mm and Basin height 165 mm put the bowl's lower edge at 685 mm. Changing Rim height to 900 mm lifts the bowl by 50 mm. Increasing Basin height with the same Rim height extends it downward while the rim remains at that height.
Washing machine
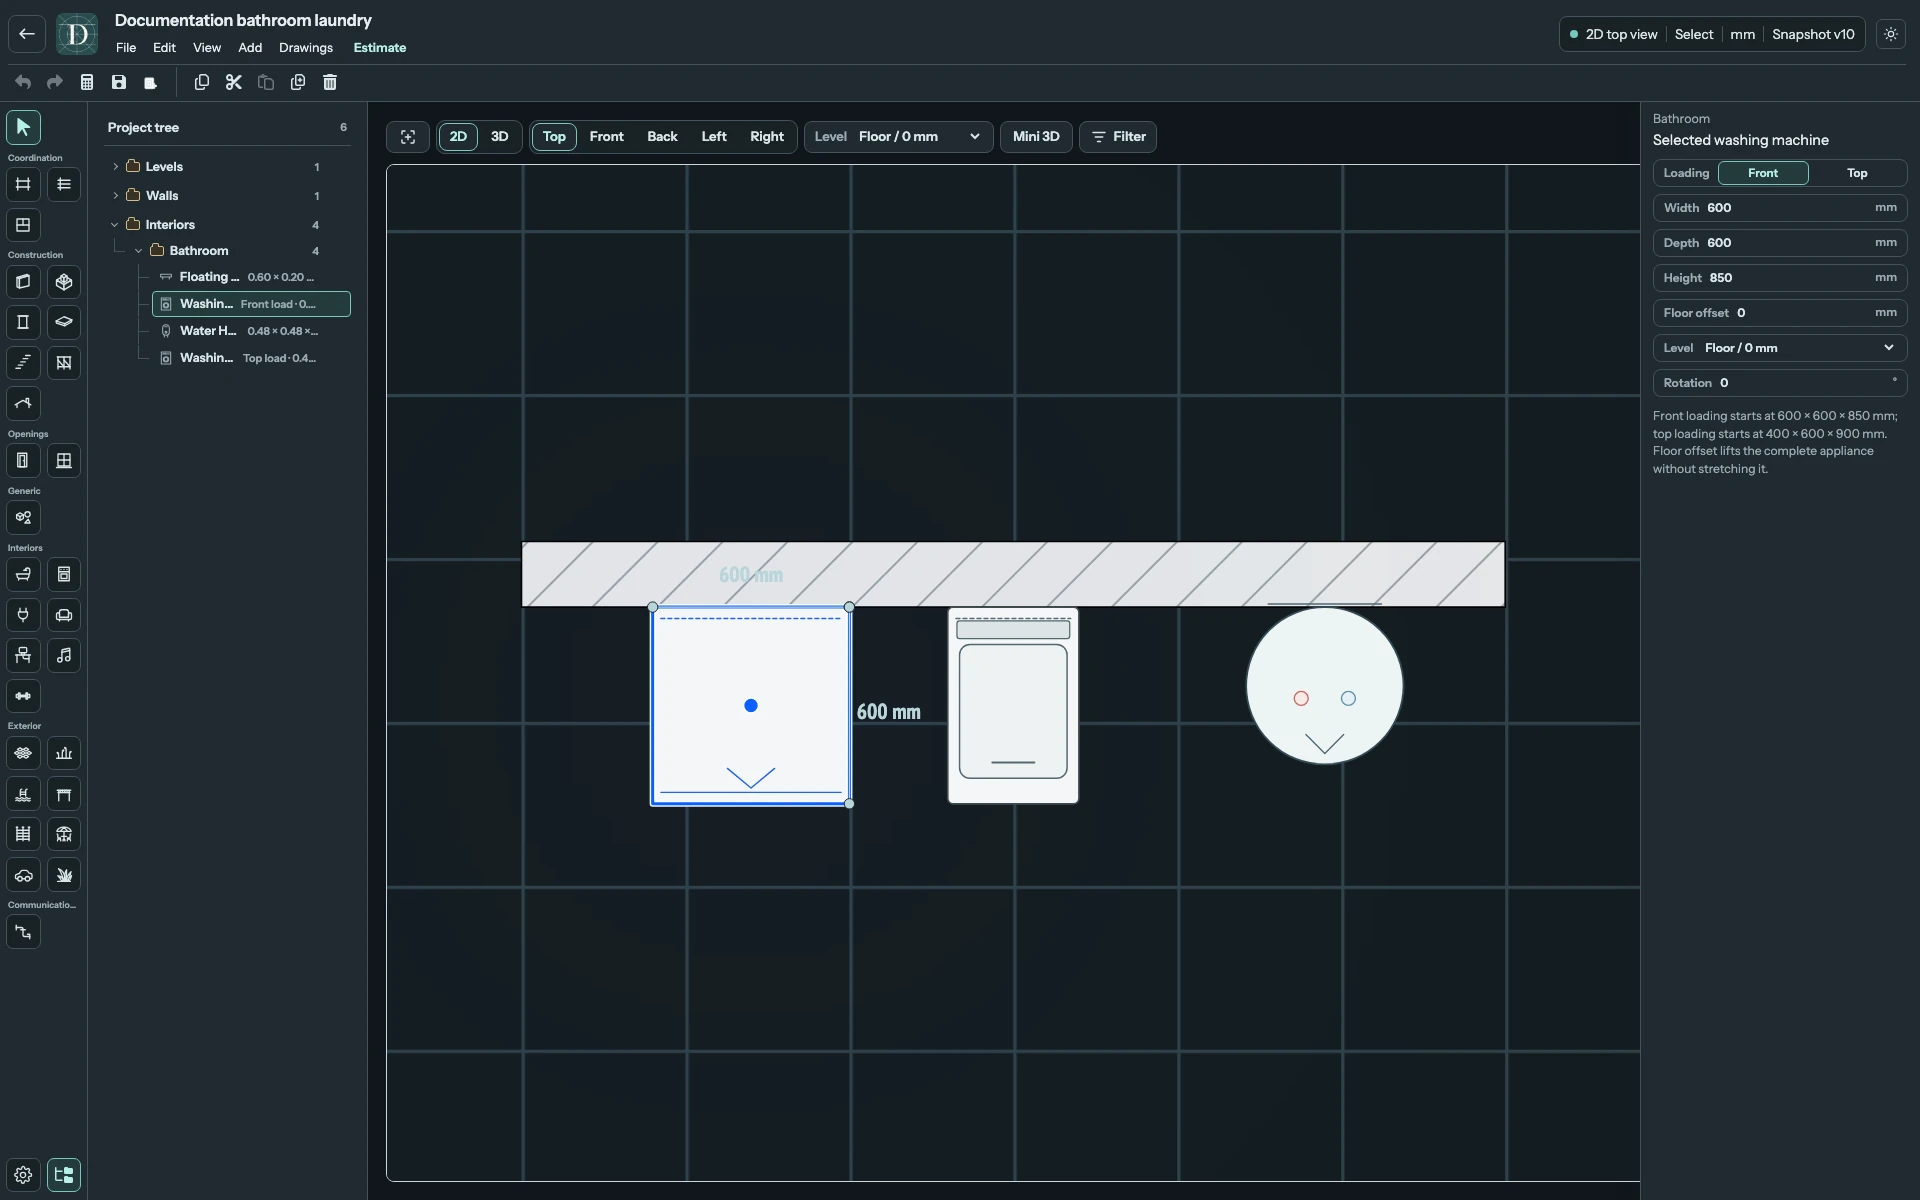
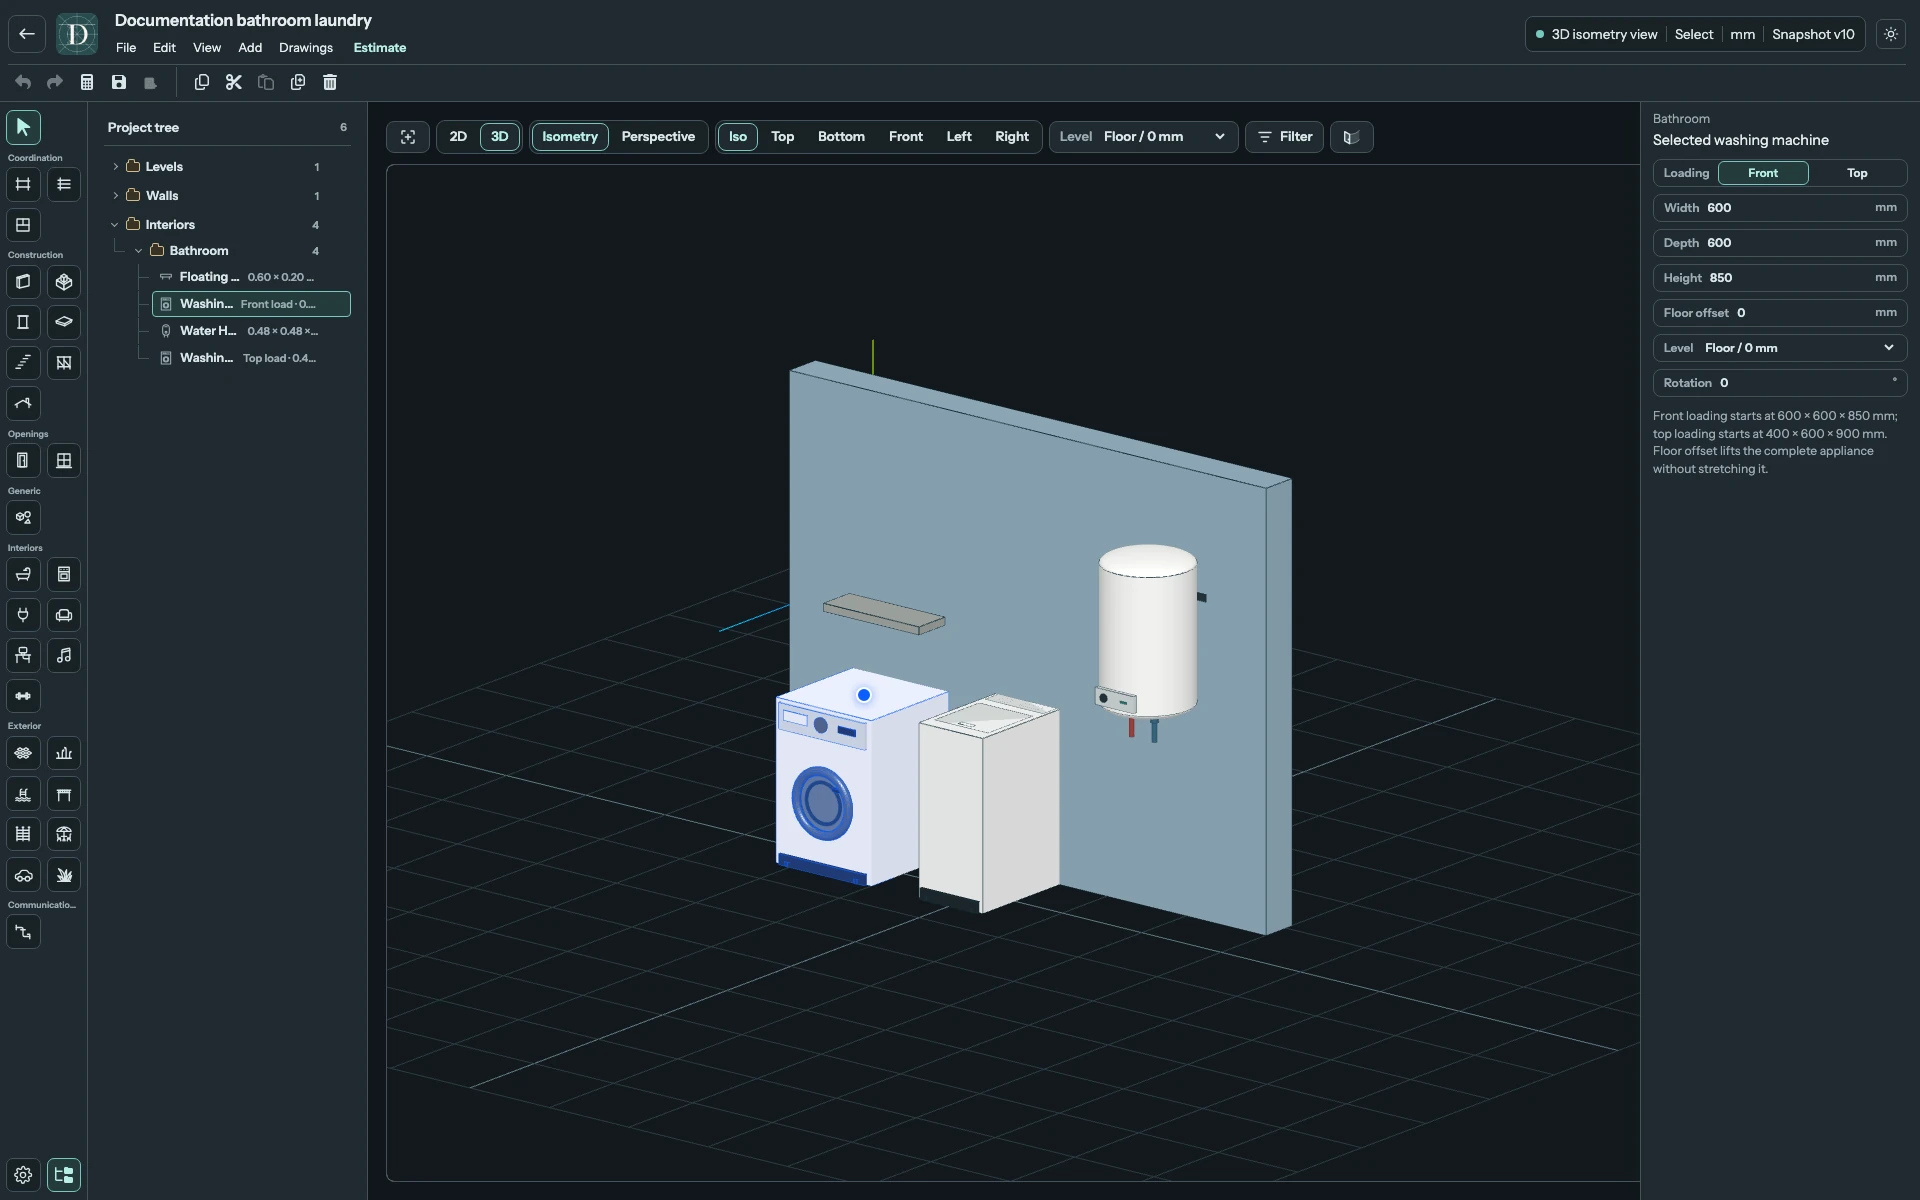
Choose Loading → Front for a front door or Top for a top lid. Switching loading type reapplies its starting dimensions. Adjust manual dimensions afterwards.
| Field | What it changes |
|---|---|
| Loading | Front starts at 600 × 600 × 850 mm. Top starts at 400 × 600 × 900 mm. |
| Width, Depth, Height | Appliance envelope; minimum 300 × 400 × 600 mm. |
| Floor offset | Distance from Level to the base, minimum 0 mm. Moves the complete appliance without stretching it. |
| Level, Rotation | Datum and orientation; turn the rear edge towards the Wall when arranging the appliance. |
View the full-size screenshot.
View the full-size screenshot.
Floating shelf
| Field | What it changes |
|---|---|
| Width, Depth | Shelf footprint; starts at 600 × 200 mm, minimum 200 × 80 mm. |
| Height | Shelf thickness; starts at 40 mm, minimum 20 mm. |
| Floor offset | Distance from Level to its lower face; starts at 1200 mm, minimum 0 mm. |
| Level, Rotation | Datum and orientation; either long edge can face the Wall. |
For example, Floor offset 1200 mm and Height 40 mm put the shelf's upper face at 1240 mm above Level. Increase Floor offset to move it up; change Height to make the shelf thicker.
Water heater
| Field | What it changes |
|---|---|
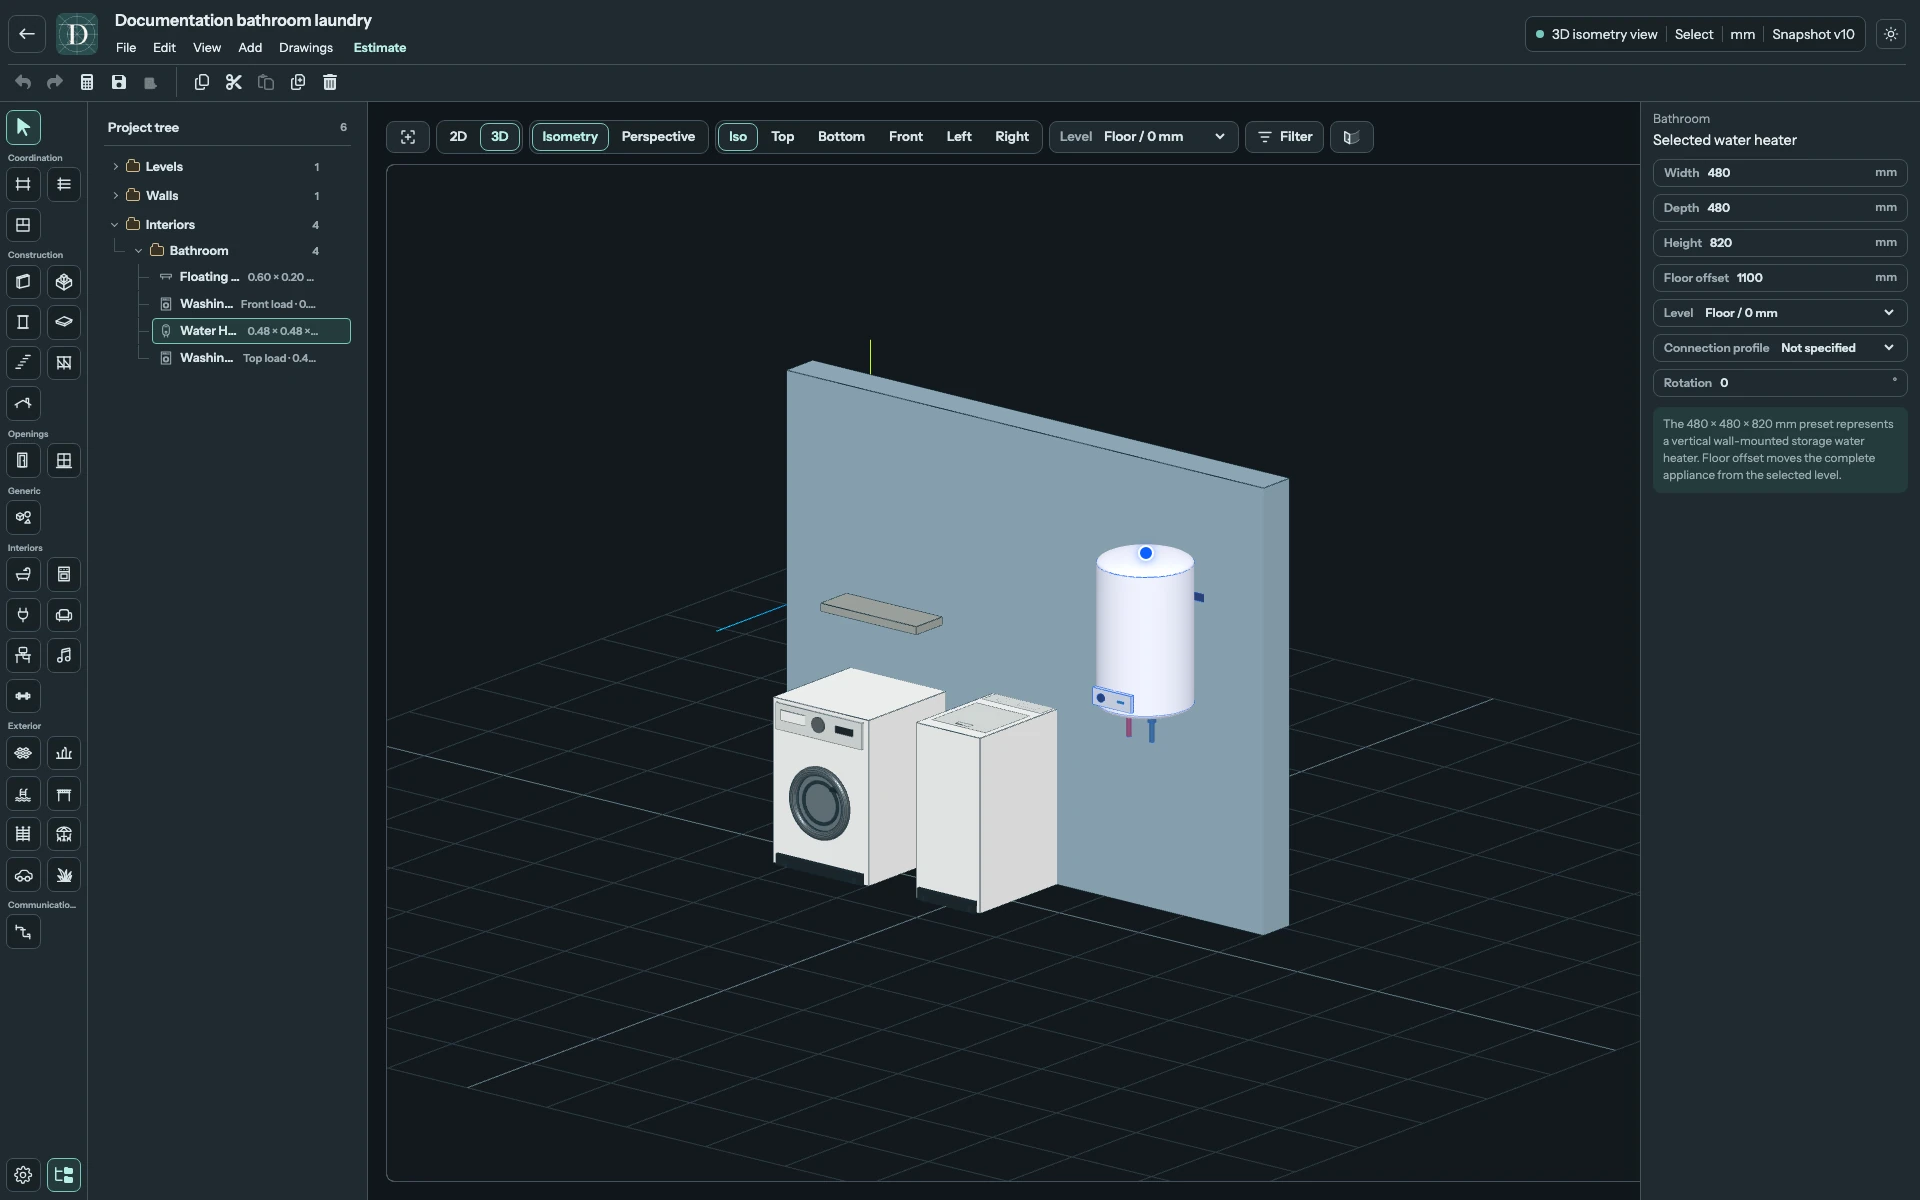
| Width, Depth, Height | Tank envelope; starts at 480 × 480 × 820 mm, minimum 300 × 250 × 400 mm. |
| Floor offset | Height of the tank-body base above Level; starts at 1100 mm, minimum 0 mm. The lower connection parts move with it. |
| Level | Floor datum for this offset. |
| Connection profile | Available after placing and selecting the heater. Not specified leaves it as an unconnected model object. A catalog profile defines the connection points available to Pipe Network. |
| Rotation | Turns the complete tank and its connections; position its rear edge beside the Wall manually. |
View the full-size screenshot.
To connect the heater, place it and select it, then choose an available Connection profile and follow Pipe Network connection. This enables specific connector locations; choosing the profile does not draw pipes by itself. If the catalog cannot load, use Retry profiles or leave Not specified while arranging the geometry.
Check the result
Use Rotation or the selected object's supported handles to adjust the layout. Follow Move and reshape an object for movement, rotation and resizing. Inspect the selected object in Top, a side view and 3D, then save and reopen to check the retained settings. Visible taps, traps and appliance parts illustrate the object; placing them does not create a complete plumbing or electrical installation.
Select an unwanted fixture and use Delete to remove the complete object. Use Undo to restore an accidental deletion. Recheck any Pipe Network connections when changing or removing connected equipment.