
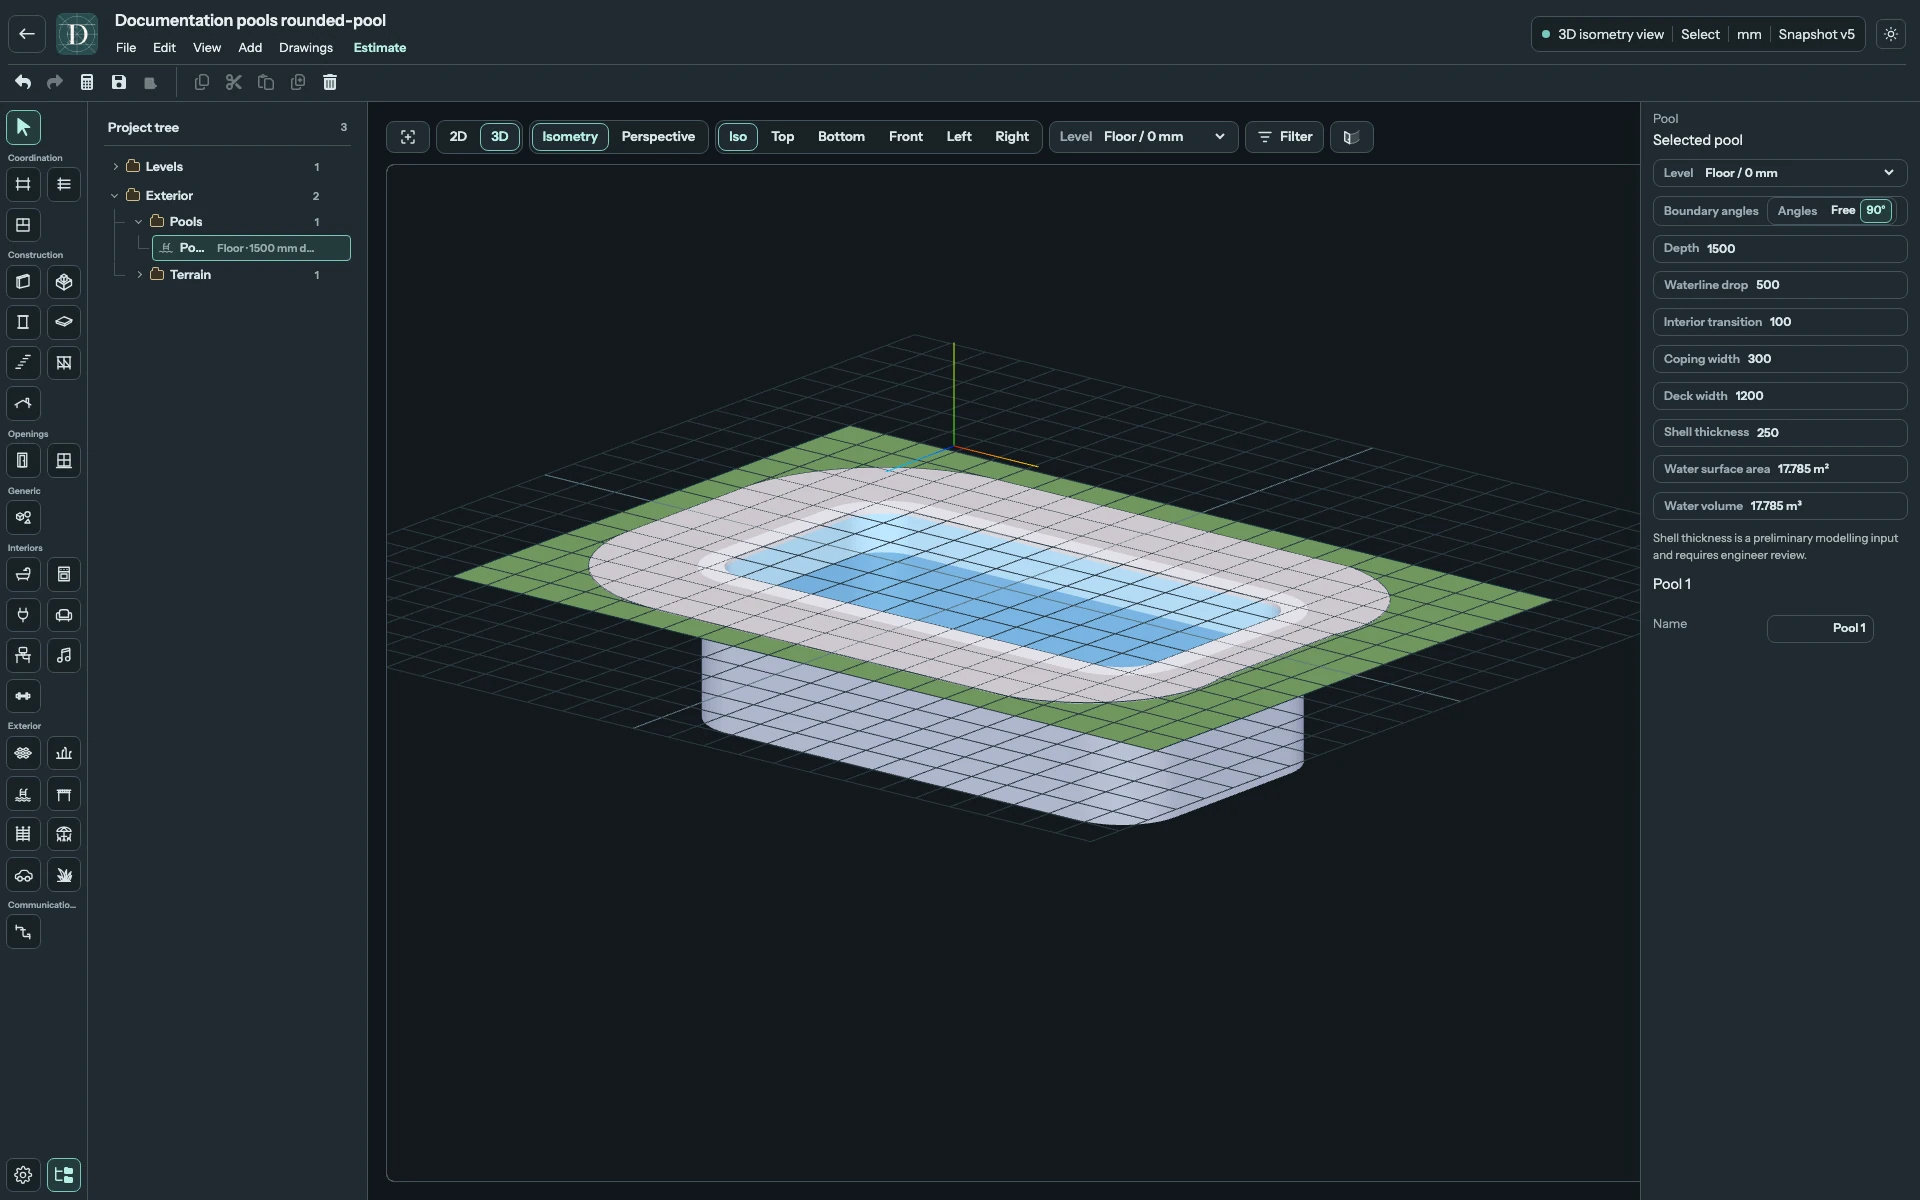
Pool creates an in-ground pool as one Site object. Its water boundary, shell, edge coping and surrounding deck change together. Draw the water footprint in Top, then inspect the cavity and surrounding bands in 3D.
Draw the water footprint
- Choose 2D → Top, then Exterior → Pool.
- Choose Level and Boundary angles → Free or 90°.
- Click ordered water-boundary corners, then click the first to close the polygon. Escape cancels the unfinished draft.
- Choose Select and select the Pool in the viewport or Exterior → Pools in the Project tree.
The boundary you draw encloses the water, not the outside of the deck. Coping and deck extend outward from it. Keep room for both bands when placing the pool near other objects.
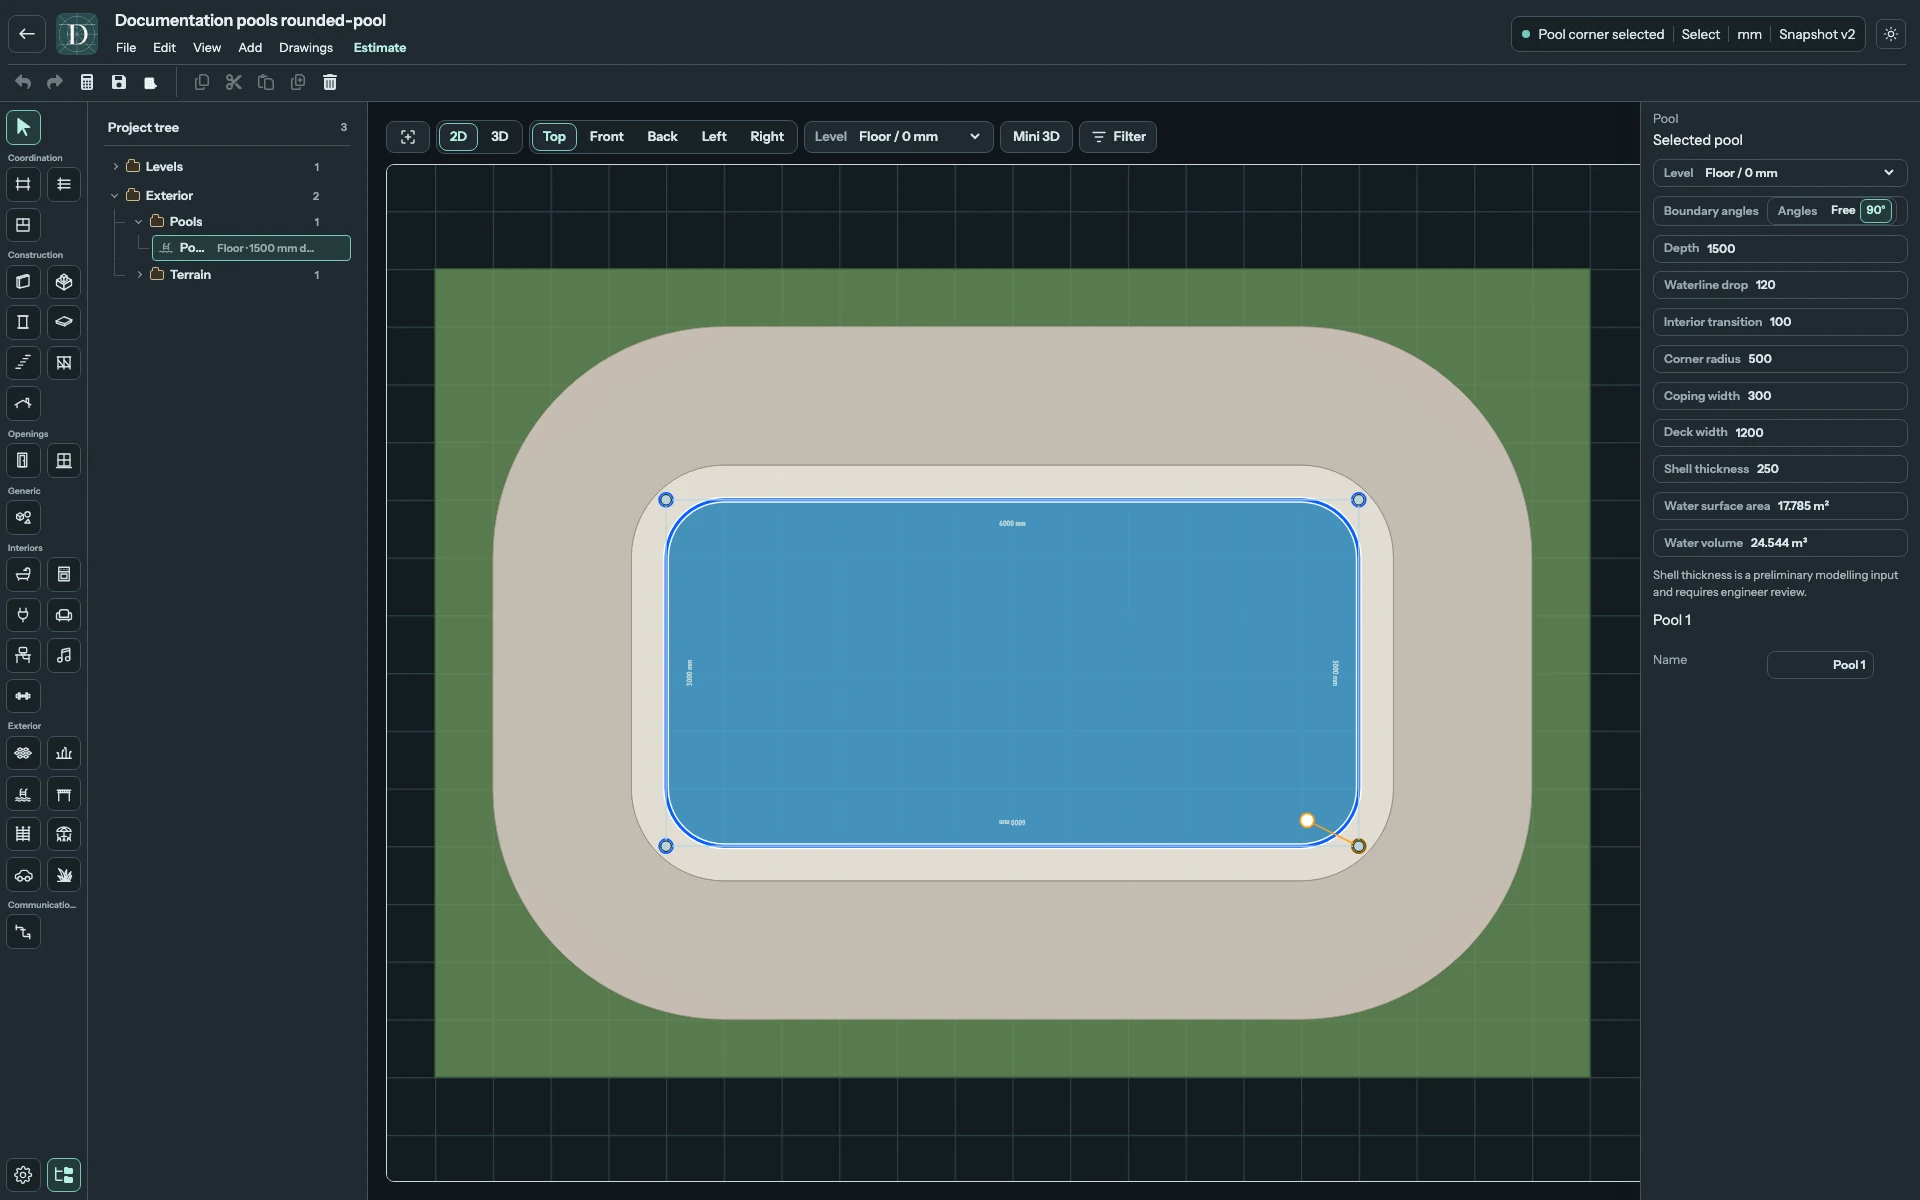
View the boundary and corner controls at full size.
Every editable setting
Enter lengths in the displayed project unit. The selected Pool exposes these controls:
| Control | Effect and conditions |
|---|---|
| Name | Renames the Pool in the object inspector below its pool settings. Maximum 120 characters; it must not be blank. |
| Level | Sets the upper rim reference. The current newly drawn pool places its rim at that Level and its depth below it. |
| Boundary angles → Free / 90° | Direction constraint for drawing a new boundary. It does not straighten an existing pool. |
| Depth | Positive distance from the rim to the finished floor for the current flat-bottom pool. Starting value: 1500 mm. It must exceed Waterline drop. |
| Waterline drop | Nonnegative distance from the rim down to the water surface. Starting value: 120 mm. It must be less than Depth. |
| Interior transition | Nonnegative transition radius used by a sloped-bottom profile. It does not curve the bottom or floor-to-wall junction of the current flat-bottom pool. Starting value: 100 mm. |
| Corner radius | Appears when a water-boundary corner is selected. Zero makes it sharp; a positive fillet must fit between neighboring corners and their fillets. |
| Coping width | Positive width of the inner edge band. Starting value: 300 mm. With a selected edge, changes that edge only. |
| Deck width | Nonnegative width of the outer surrounding band. Starting value: 1200 mm. Zero omits that band on the affected edge. With a selected edge, changes that edge only. |
| Shell thickness | Positive preliminary shell thickness. Starting value: 250 mm. The shell extends outside the water boundary and below the finished floor. |
The current tool creates a flat-bottom pool. It does not expose a bottom-profile selector, separate shallow/deep depths, a rim-offset field, material selectors or coping/deck thickness fields. Coping starts 50 mm thick and deck 60 mm thick; their top surfaces meet the rim. These fixed starting properties are different from the editable width and shell-thickness controls.
Reshape and round the boundary
In Top, click a water-boundary corner to select it. Drag the corner to move its source point. Enter Corner radius, or drag the separate radius handle, to adjust its fillet. This changes the water boundary and rebuilds the coping, deck and shell around it.
To insert a corner, first click the boundary edge you want to edit. Hover along that selected edge and click its plus control. The new point splits the source edge; review both resulting band widths after insertion.
With a corner selected, Delete or Backspace removes that corner. Removing a corner from a triangle deletes the whole Pool; Undo restores it. Crossing boundaries, duplicate points, radii that cannot fit, and band offsets that cannot resolve are rejected, keeping the previous valid pool.
The current Pool uses boundary editing. It does not have the shared center movement or rotation handles used by point-placed catalog furniture. Press Escape to clear the corner or edge selection, then select the Pool's Project tree row before applying the editor's whole-object Delete action.
Give one side a different coping or deck
- Select the Pool in Top, then click the required water-boundary edge.
- Check that the fields say Coping width · selected edge and Deck width · selected edge.
- Enter the width for that side. The other sides retain their values.
- Press Escape, then select the Pool's tree row to leave edge selection. The fields return to the whole-boundary default widths.
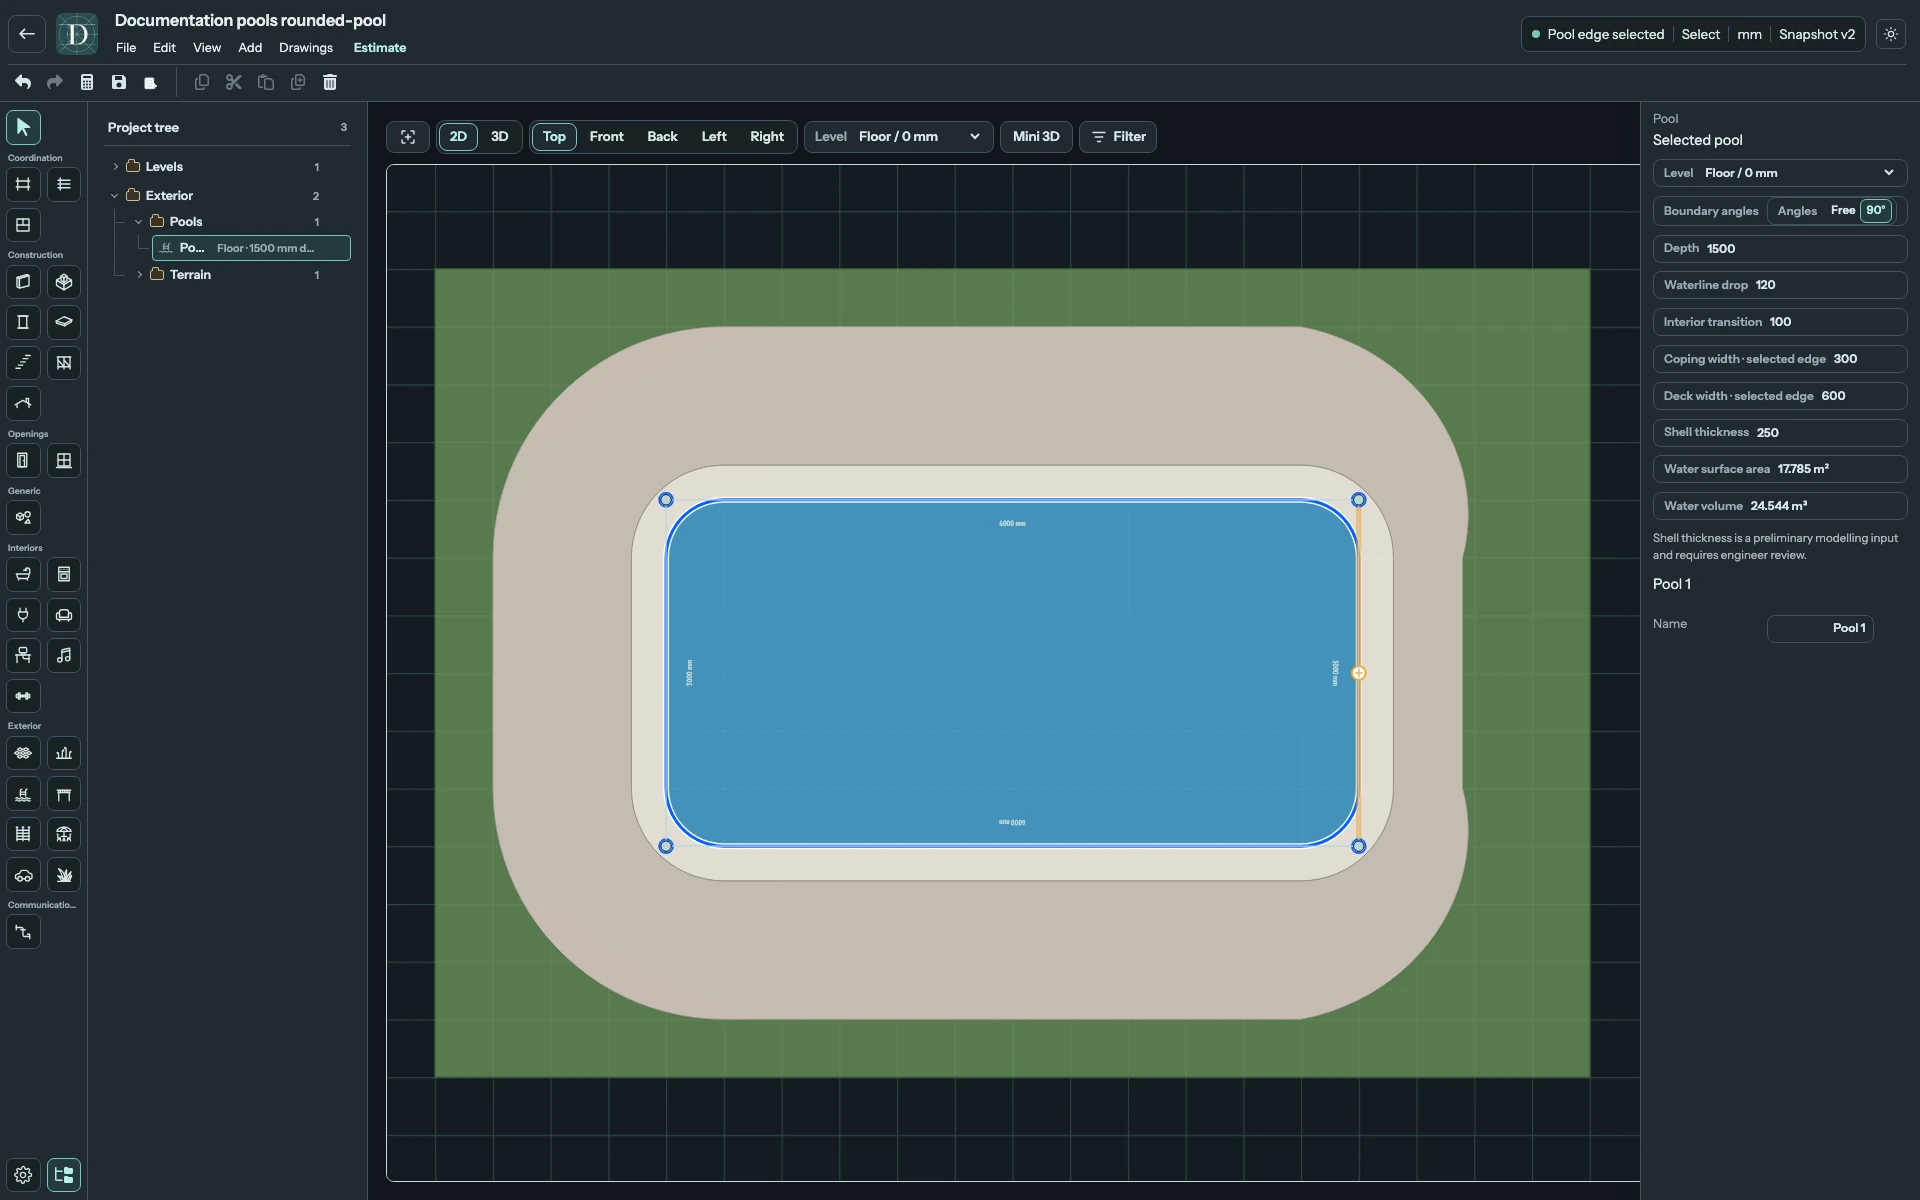
View the selected-edge controls at full size.
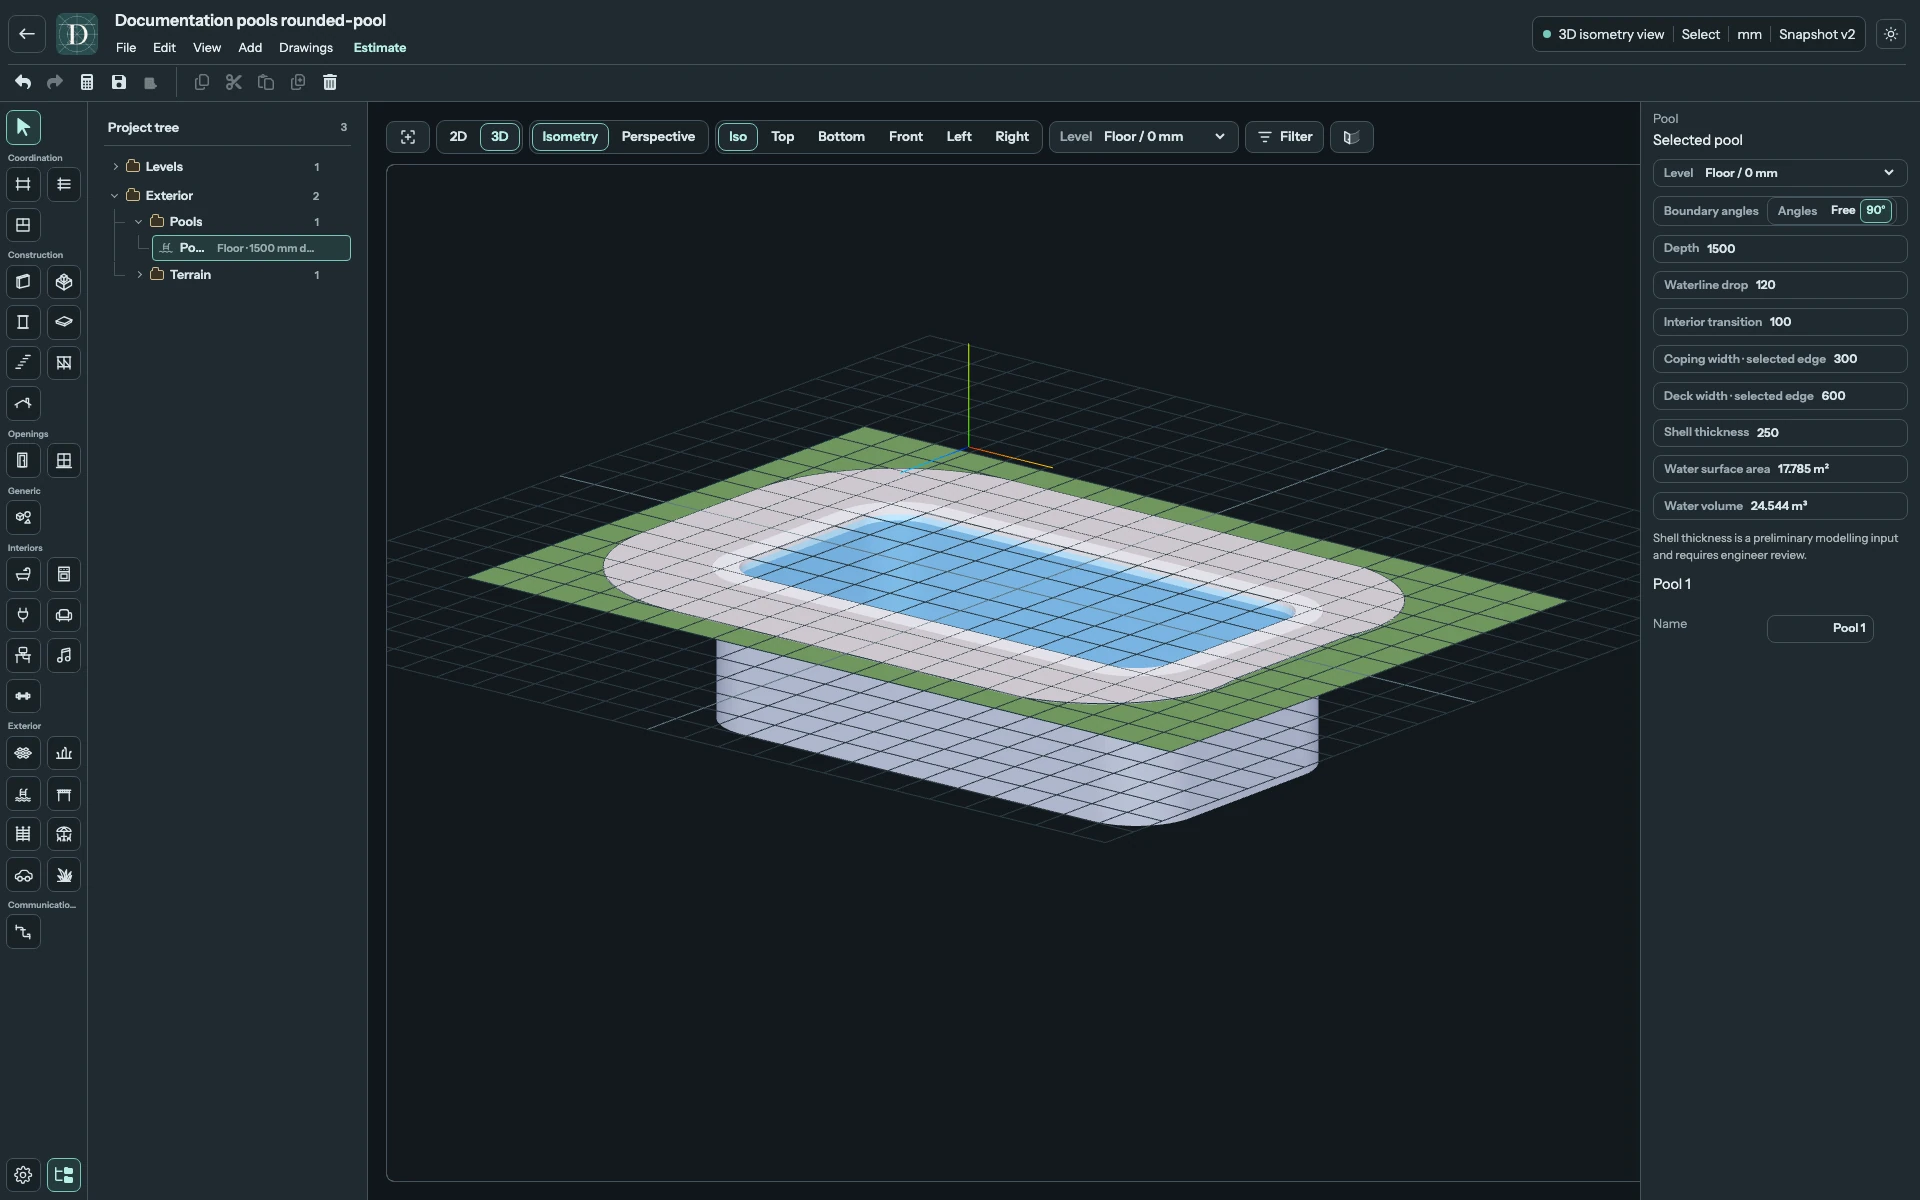
View the different deck widths at full size.
Whole-boundary edits change the default width. Existing individual edge overrides retain their own widths. To make a customized side match the default again, select that edge and enter the same width as the default.
Depth, water and quantities
Increasing Depth lowers the finished floor while leaving the rim and water surface at their current elevations. Increasing Waterline drop lowers the water surface while leaving the floor fixed.
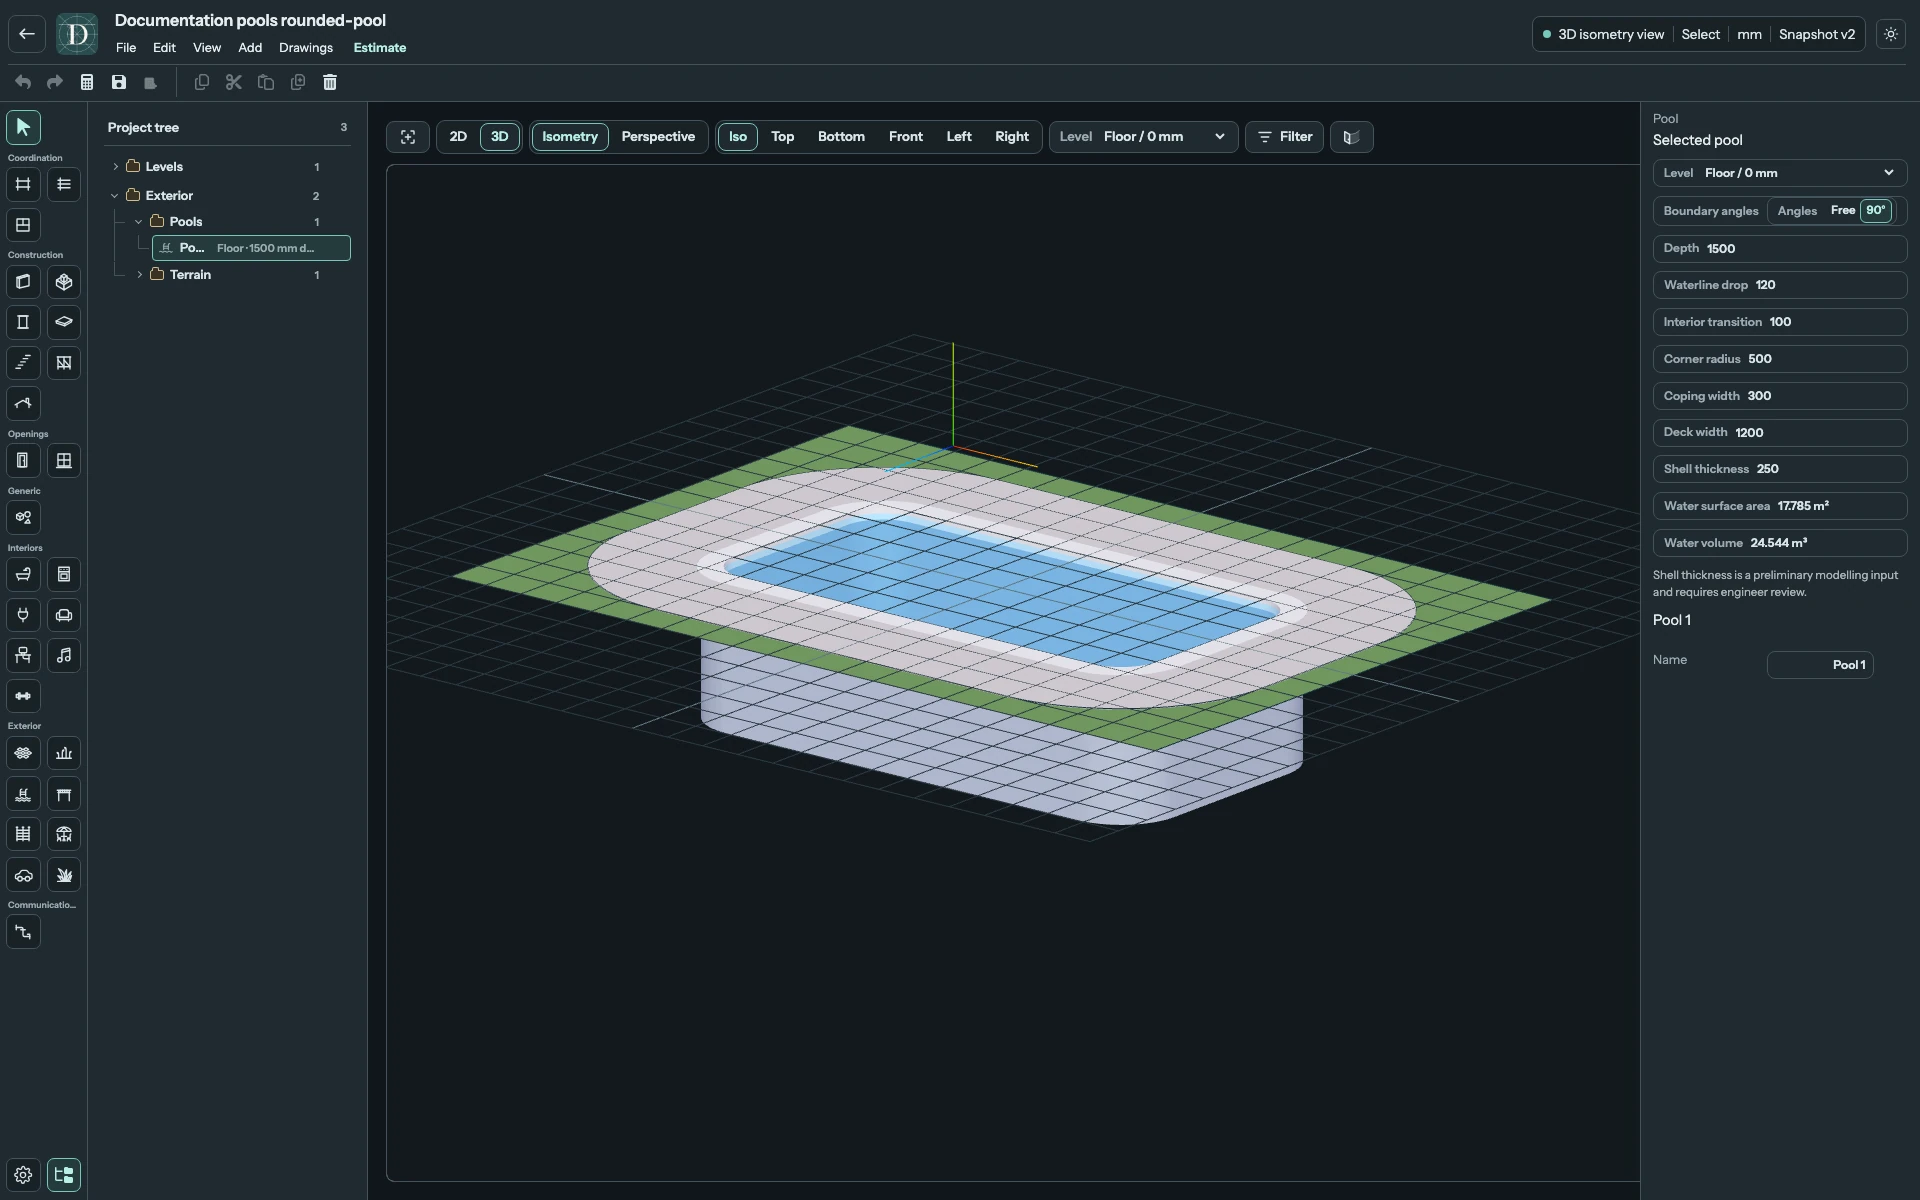
View the pool cavity at full size.
View the lower waterline at full size.
Water surface area and Water volume are read-only outputs. In a flat-bottom pool, volume is the rounded water-boundary area multiplied by Depth minus Waterline drop. Neither output is an excavation quantity or shell-concrete volume.
Fit the pool into Terrain and save
Use Top for boundary edits and 3D for the cavity, waterline and bands. Pools are omitted from architectural 2D side views.
A Pool can cut an opening in a flat Terrain surface. Its complete outer footprint, including coping and deck or a wider shell, must fit inside that Terrain. The Terrain must lie above the lowest outer shell bottom. A pool straddling the Terrain boundary, or overlapping pool-cut footprints, is unsupported; move or resize the boundaries to make the full footprint fit.
The deck belongs to the Pool. Use Pavement for an independently edited adjoining paved area. Nearby objects do not move when the pool changes.
Use Undo and Redo for accepted edits. Save and reopen to retain the boundary, corner radii, Level, depth, waterline, shell thickness and individual band widths. A modeled pool does not establish structural, waterproofing, drainage, filtration or safety design; Shell thickness remains a preliminary input requiring engineering review.