
A Fence is a boundary drawn as connected straight spans. Dravit adds posts and panels along that boundary. A Wicket is a pedestrian gate; Double swing gate and Sliding gate create vehicle entrances. Each opening belongs to one Fence span and stays attached when you edit the Fence.
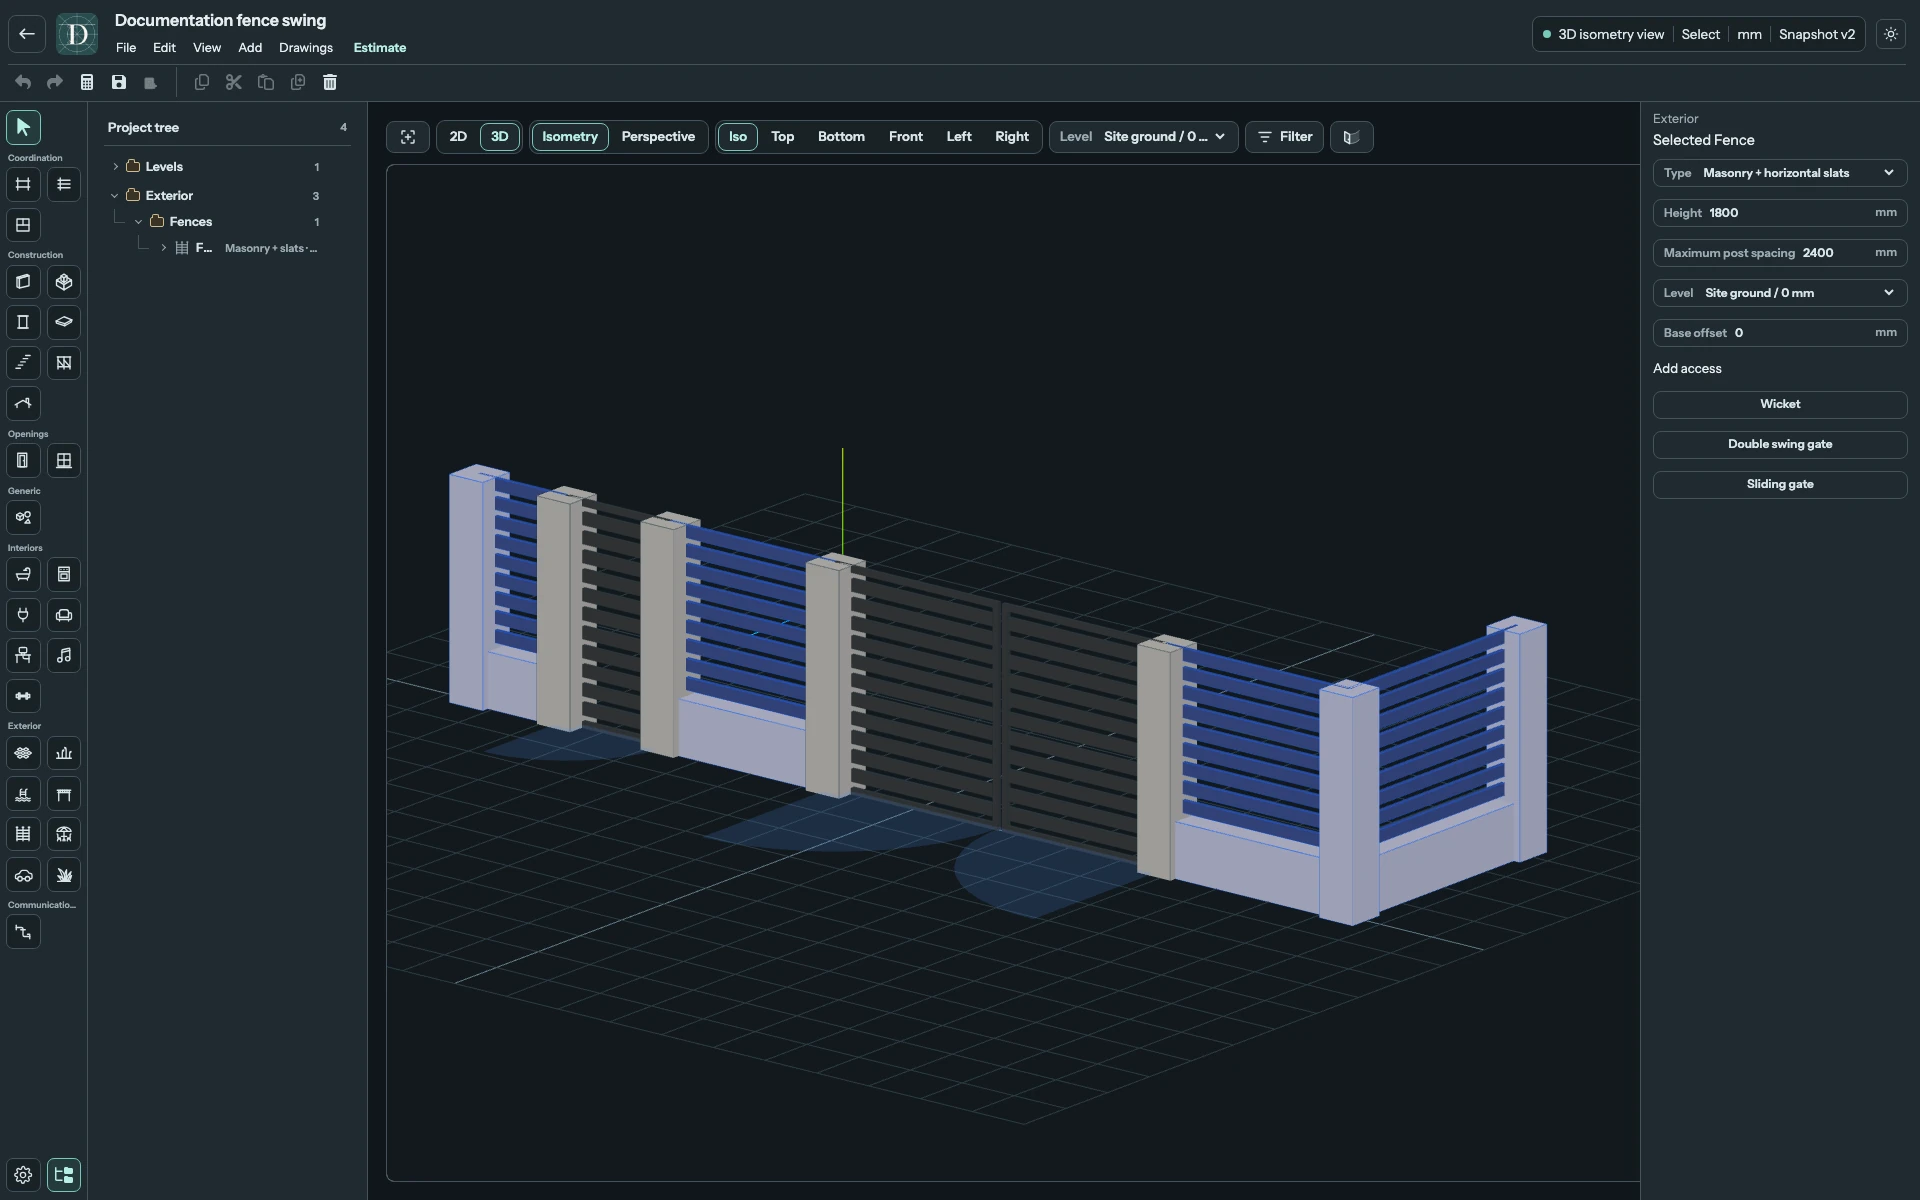
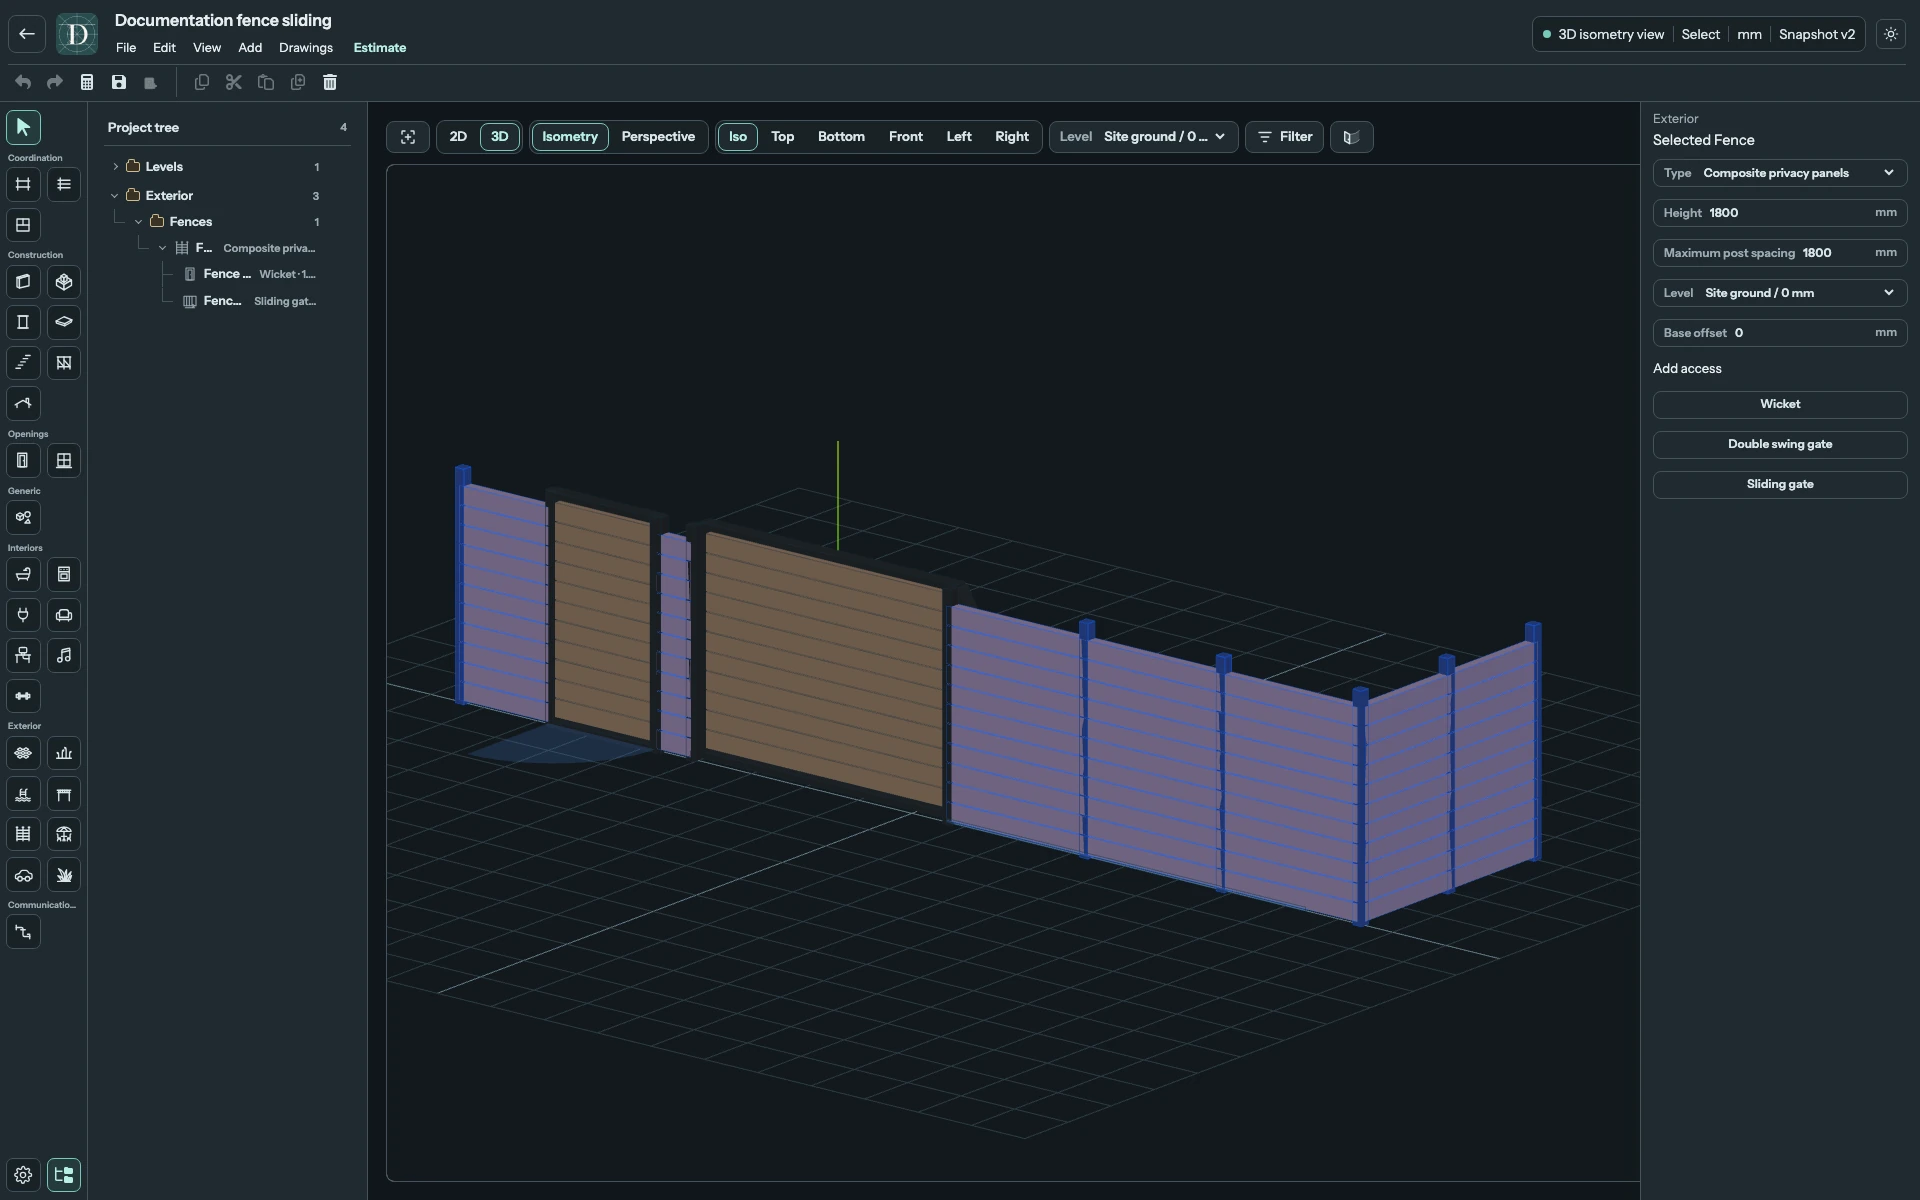
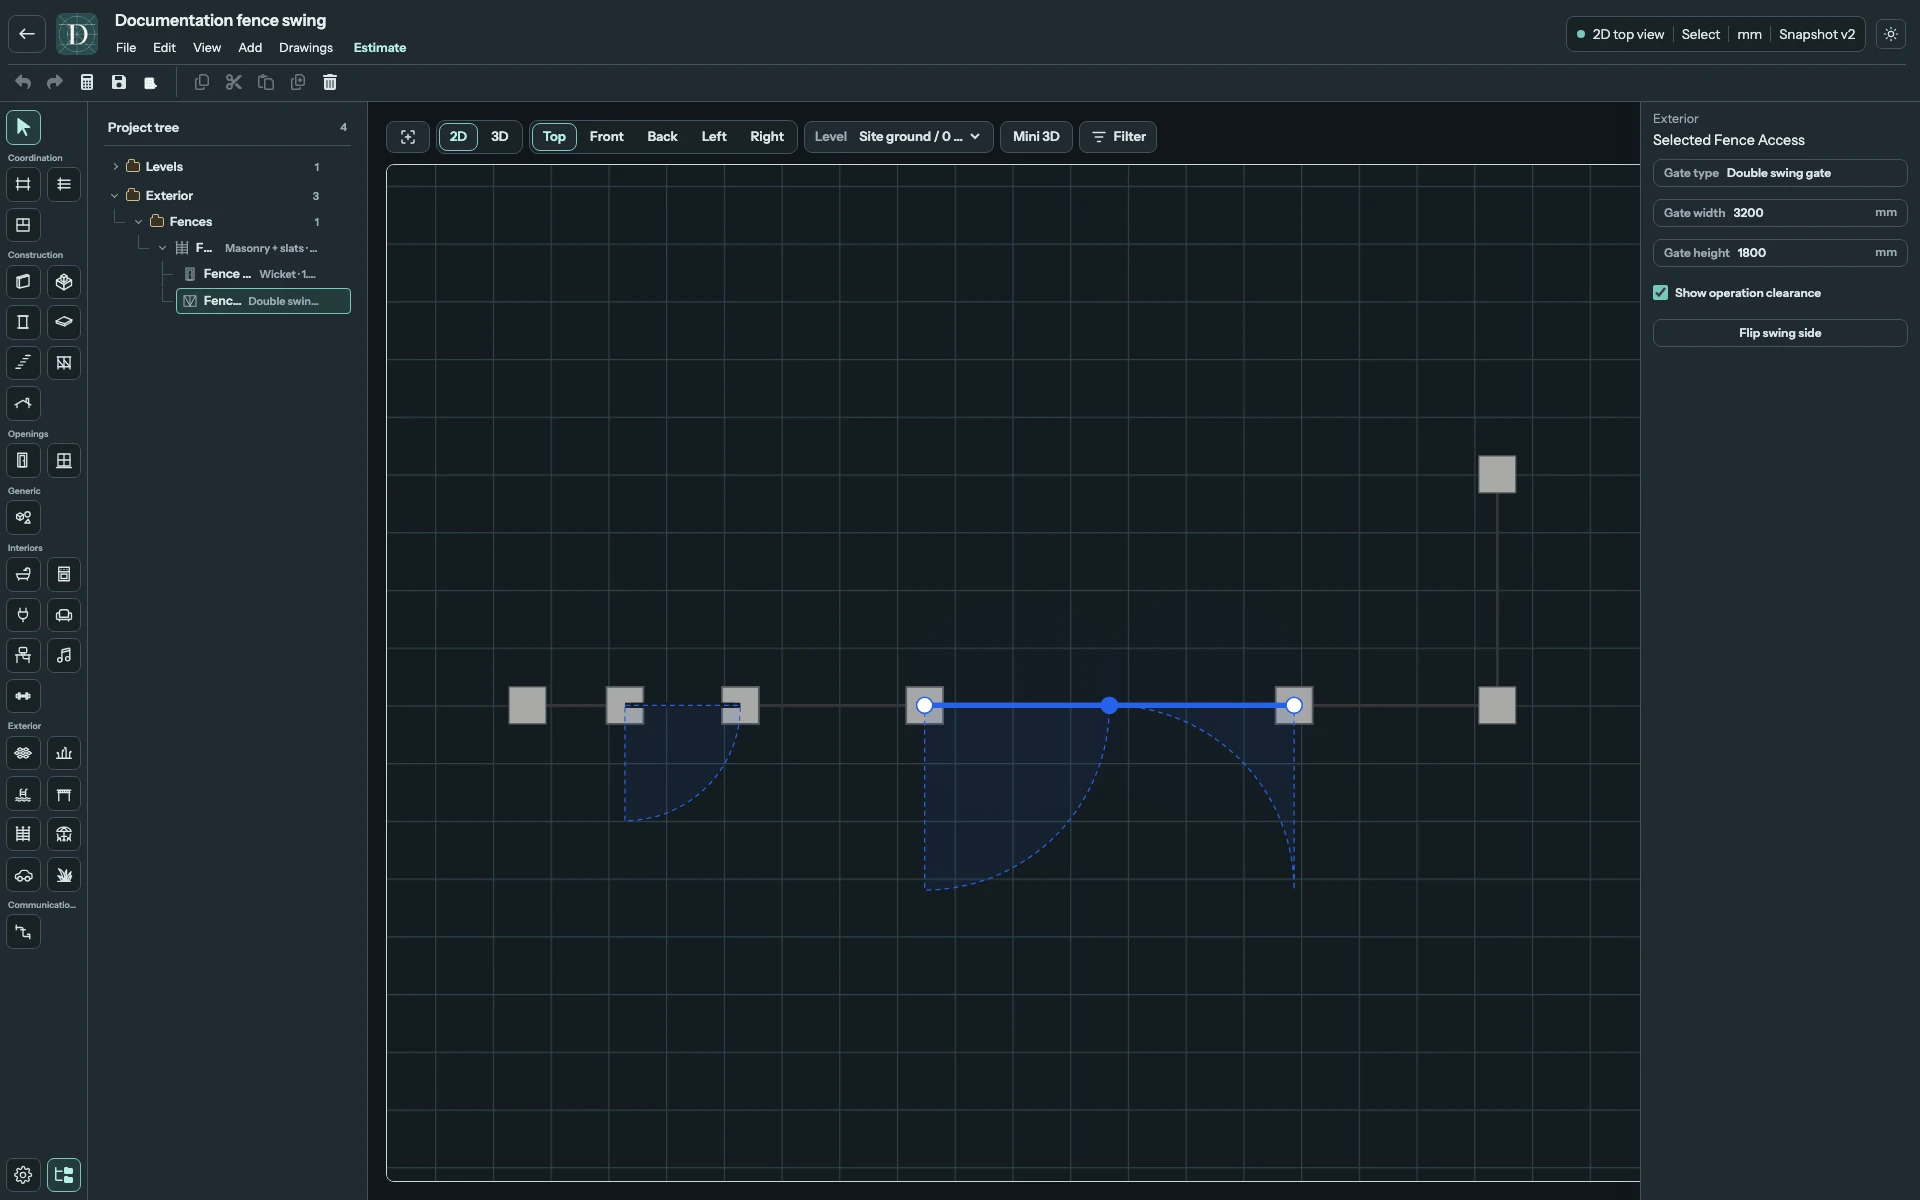
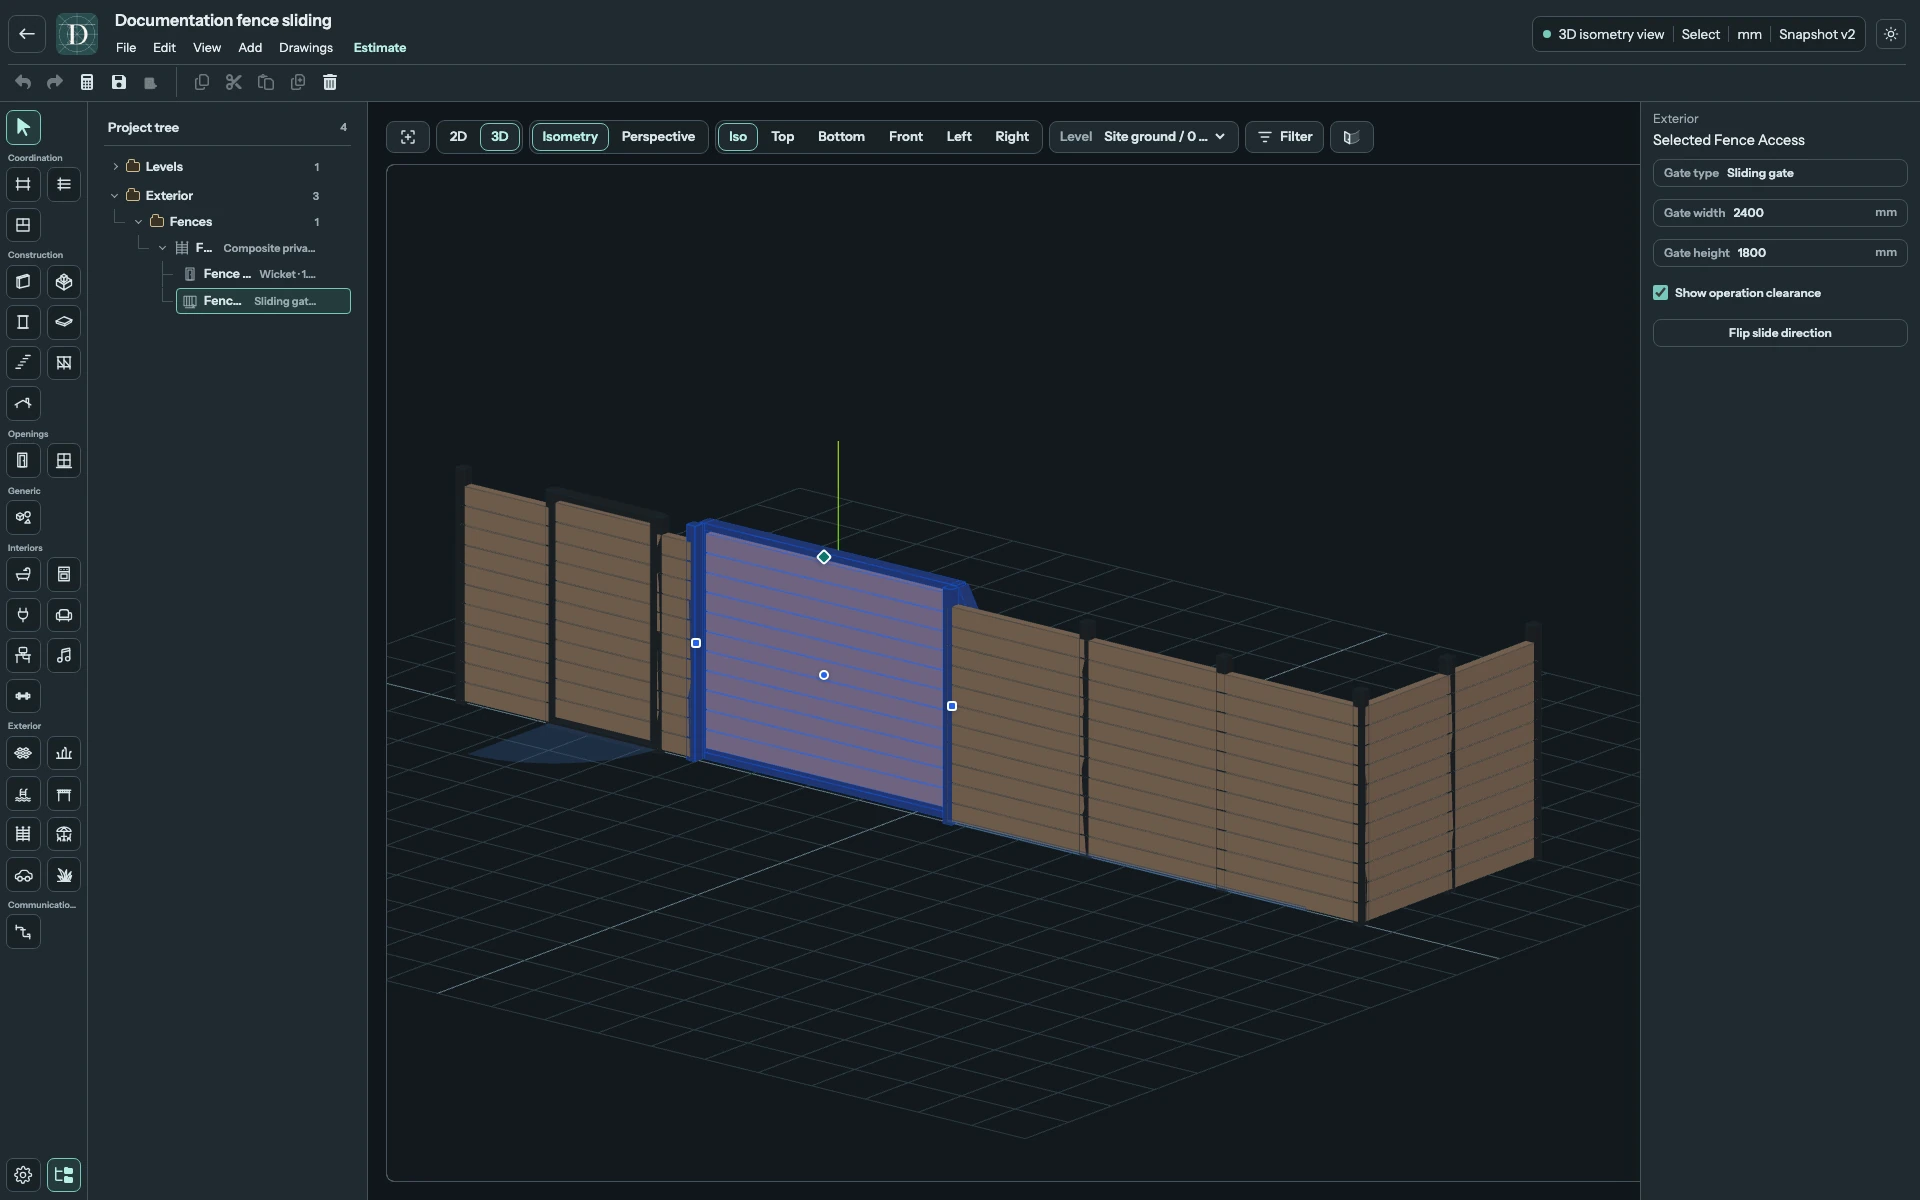
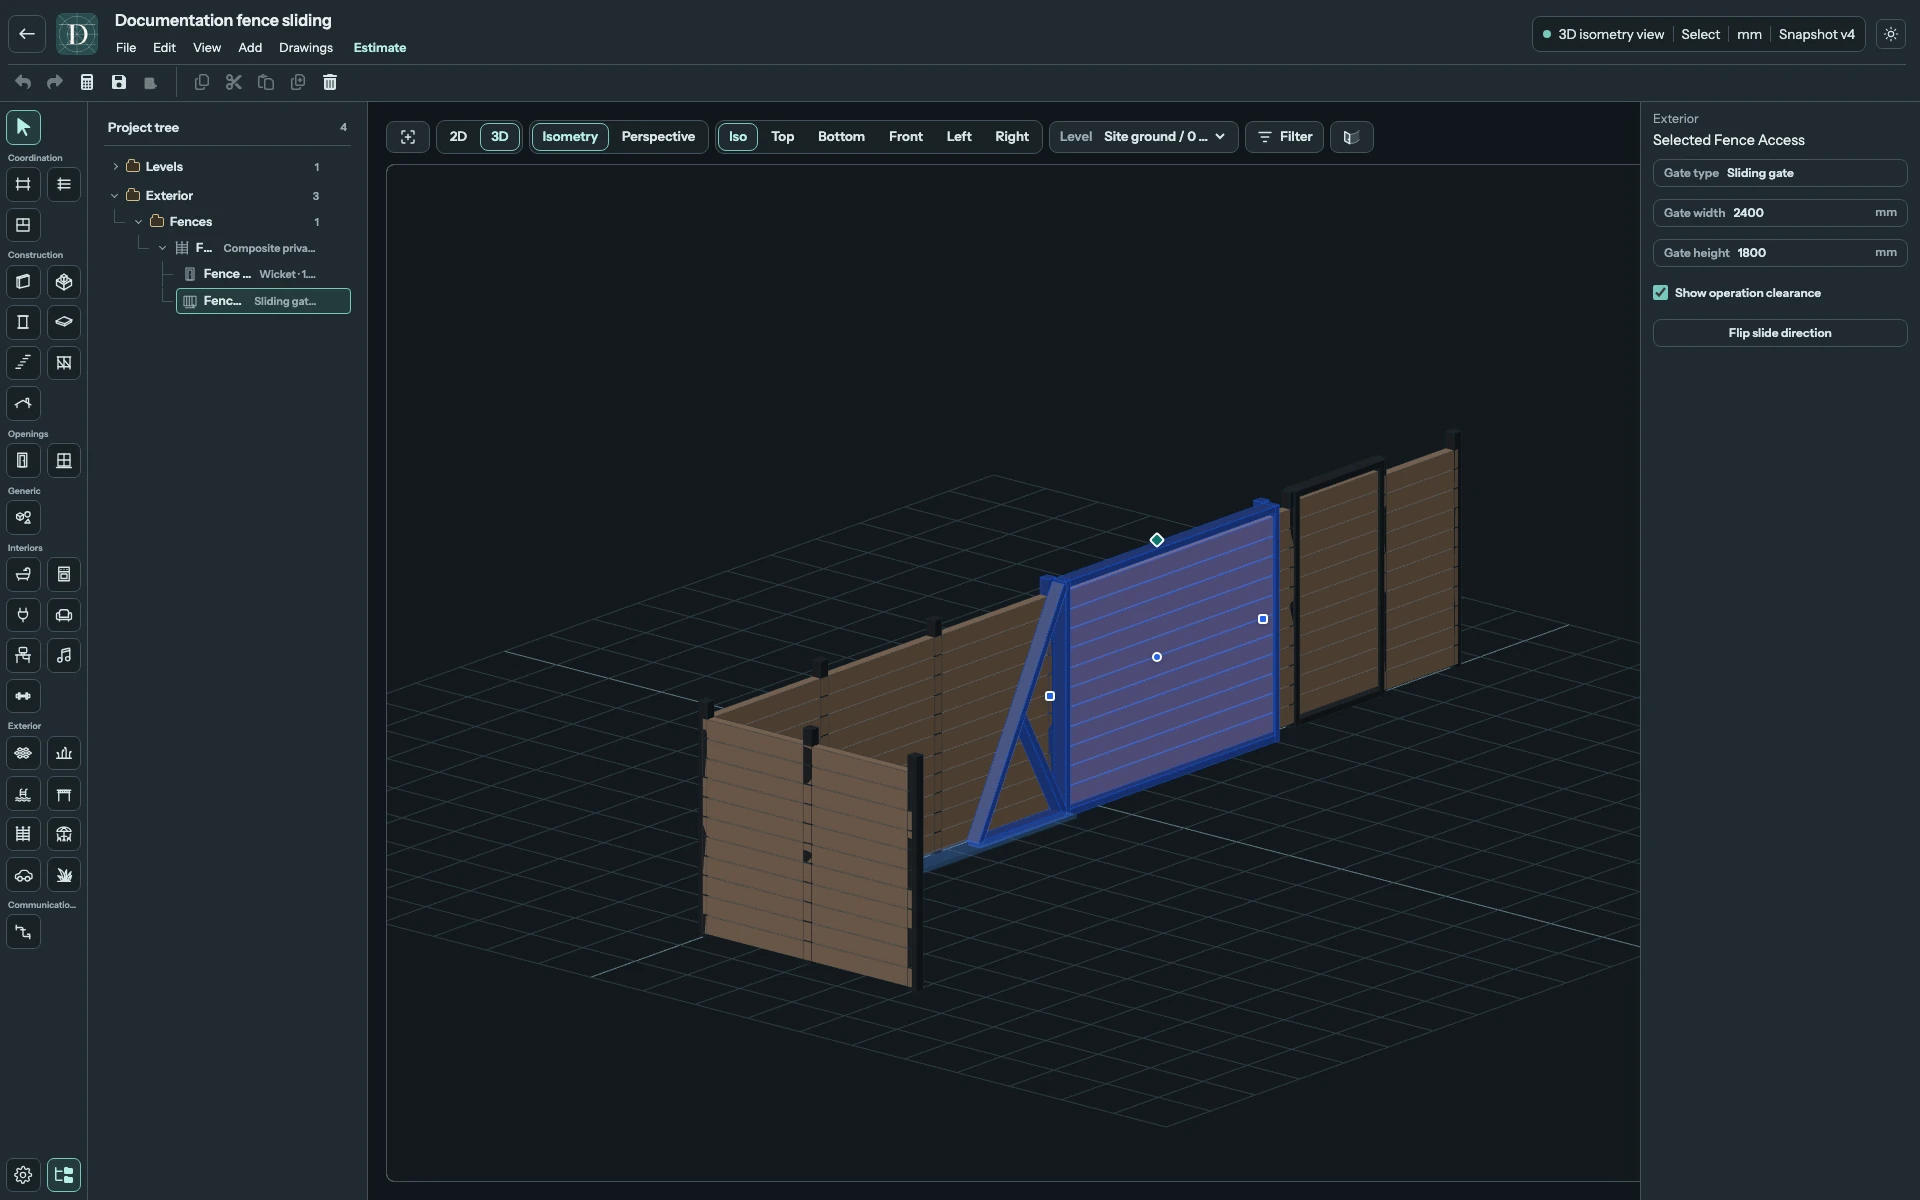
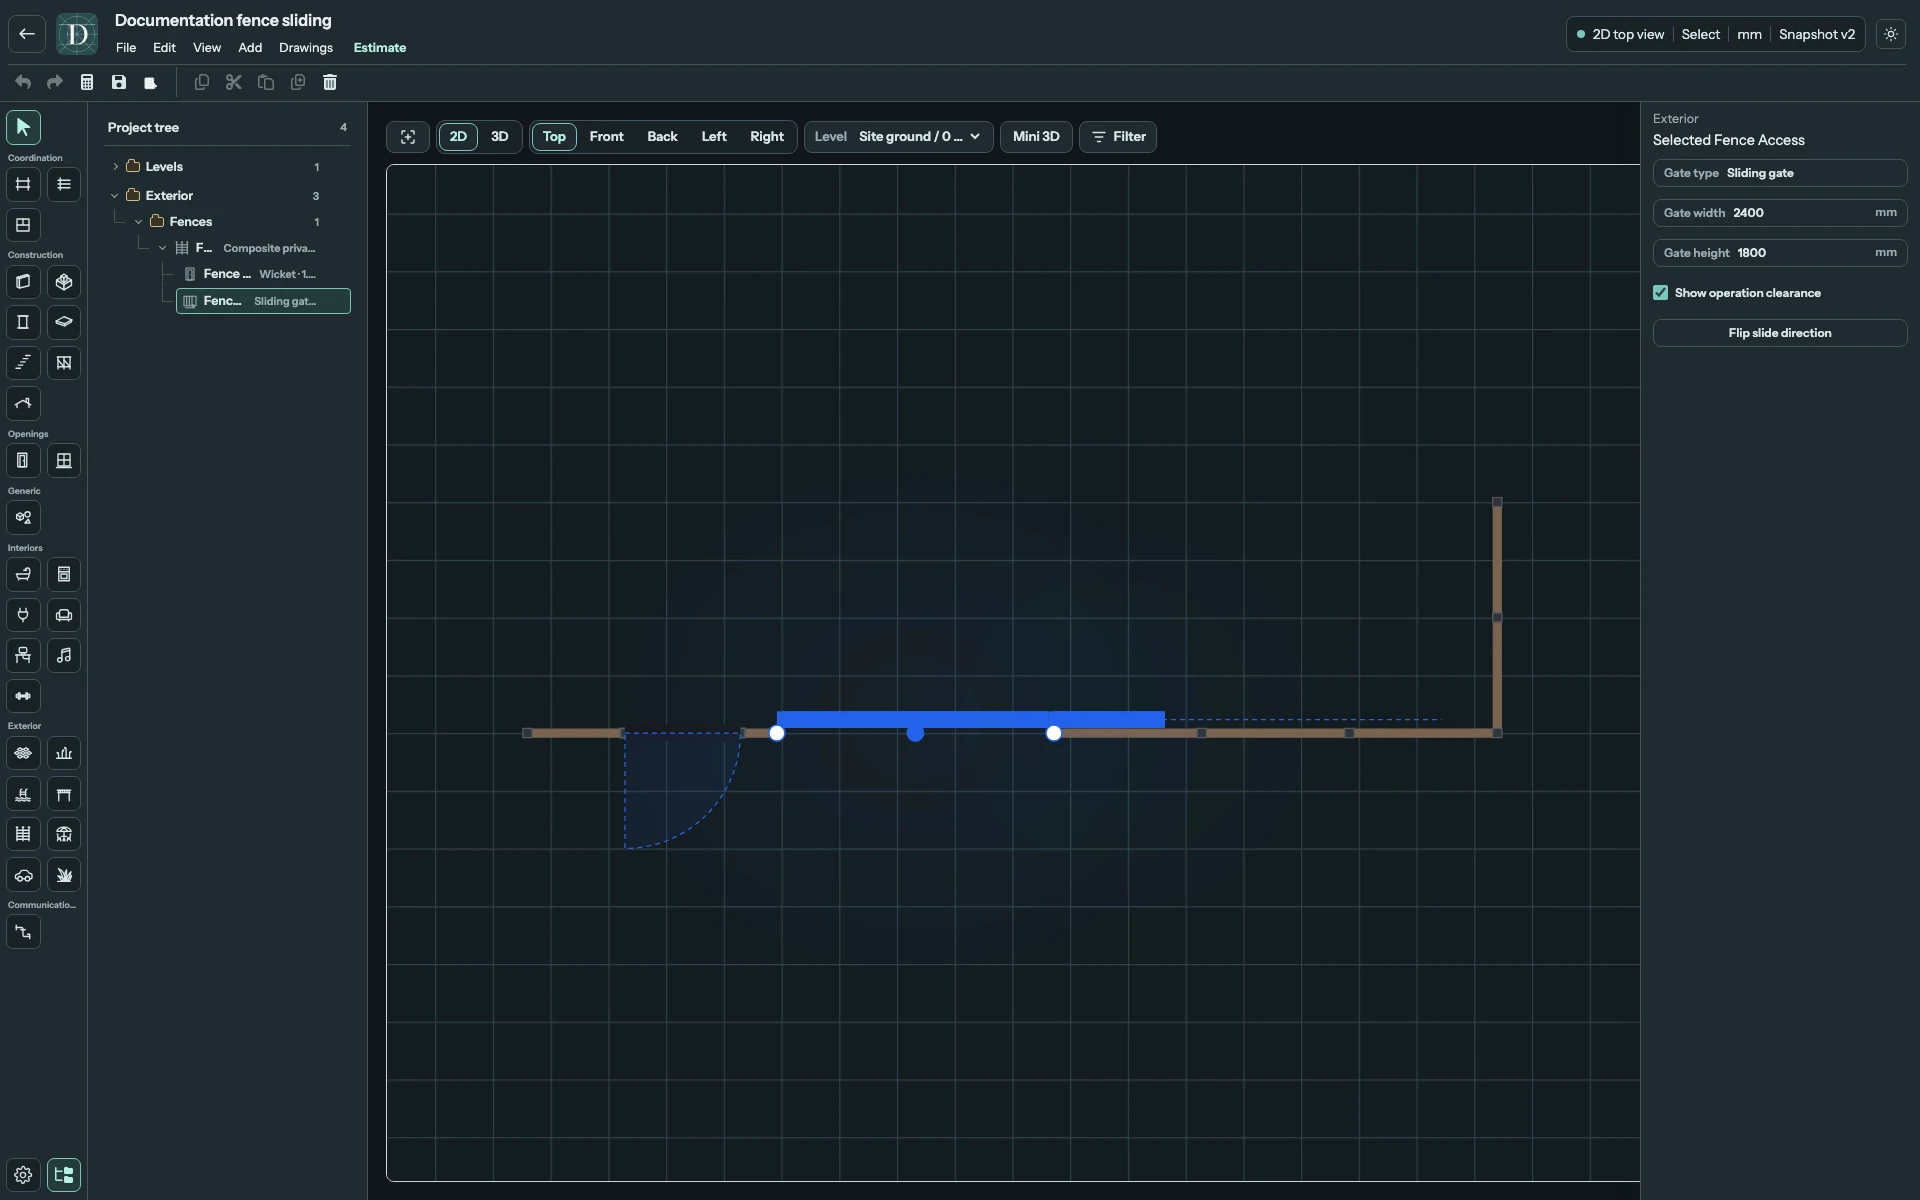
The first example has a Wicket on the left, a double swing gate in the middle and a short return on the right. The second uses closed composite panels and a sliding gate. Use 3D to inspect the construction and 2D → Top to understand the boundary, handles and space required for opening.
View the full-size screenshot.
Choose the Fence type
| Type | What the model shows | Example below |
|---|---|---|
| Masonry + horizontal slats | Masonry posts and a low masonry plinth, with horizontal slats above it. | Wicket and double swing gate. |
| Composite privacy panels | Slim posts with closed horizontal panel infill. | Wicket and sliding gate. |
The selected type also determines the appearance of its access leaves. Posts, infill and frames are generated parts of the Fence; they are not separate objects to place or select. Change Type on an existing Fence to rebuild its appearance while keeping the boundary and attached openings.
View the full-size screenshot.
Draw an open boundary or close the perimeter
- Choose 2D → Top, then Exterior → Fence.
- Set Type, Height, Maximum post spacing, Level and Base offset in the right panel.
- Click the first boundary point, then each corner. Each pair of consecutive points creates one straight span.
- To finish an open boundary, press Enter, double-click or right-click. To close the perimeter, click the first point instead.
- Choose Select and select the Fence in the viewport or under Exterior → Fences in the Project tree.
While drawing, Backspace removes the latest point. Escape finishes a valid open chain with at least two points; it discards a lone point.
Every Fence setting
| Setting | Effect and conditions |
|---|---|
| Type | Chooses either of the two infill assemblies above. |
| Height | Total Fence height above its base. Enter a positive length. |
| Maximum post spacing | Upper limit for the spacing between generated posts. A smaller positive value produces more bays and posts. |
| Level | Elevation reference for the whole Fence. Choose an existing Level. The Fence belongs to the Site. |
| Base offset | Signed distance above or below the selected Level. Its base is Level elevation plus this value; all attached access follows it. |
The initial height is 1800 mm. Before drawing, selecting the masonry type starts with a maximum post spacing of 2400 mm; composite starts with 1800 mm. Changing the type of an existing Fence keeps its current post spacing, so adjust that field separately when needed. These are editor starting values, not installation requirements.
For example, an uninterrupted 5000 mm span with a 2400 mm maximum is divided into three equal bays. The actual spacing is about 1667 mm, rather than two 2400 mm bays and a short remainder. Openings split the filled runs, which are divided separately and have posts at their edges.
Add a Wicket or gate
- In 2D → Top, select the Fence.
- Under Add access, click Wicket, Double swing gate or Sliding gate.
- Move over the intended straight span. The preview shows the opening and rebuilt surrounding panels. Choose a position where the opening fits within that span.
- Click to place it. The editor returns to Select, with the new access selected and its settings on the right.
- Set Gate width and Gate height, then check the result in 3D.
The starting Wicket width is 1000 mm; both gate types start at 3200 mm. Each starts with the Fence height. A span shorter than the starting width cannot accept that preview. To change a placed access, select its leaf in the viewport or expand the Fence in the Project tree and select its child.
Wicket: hinges and opening side
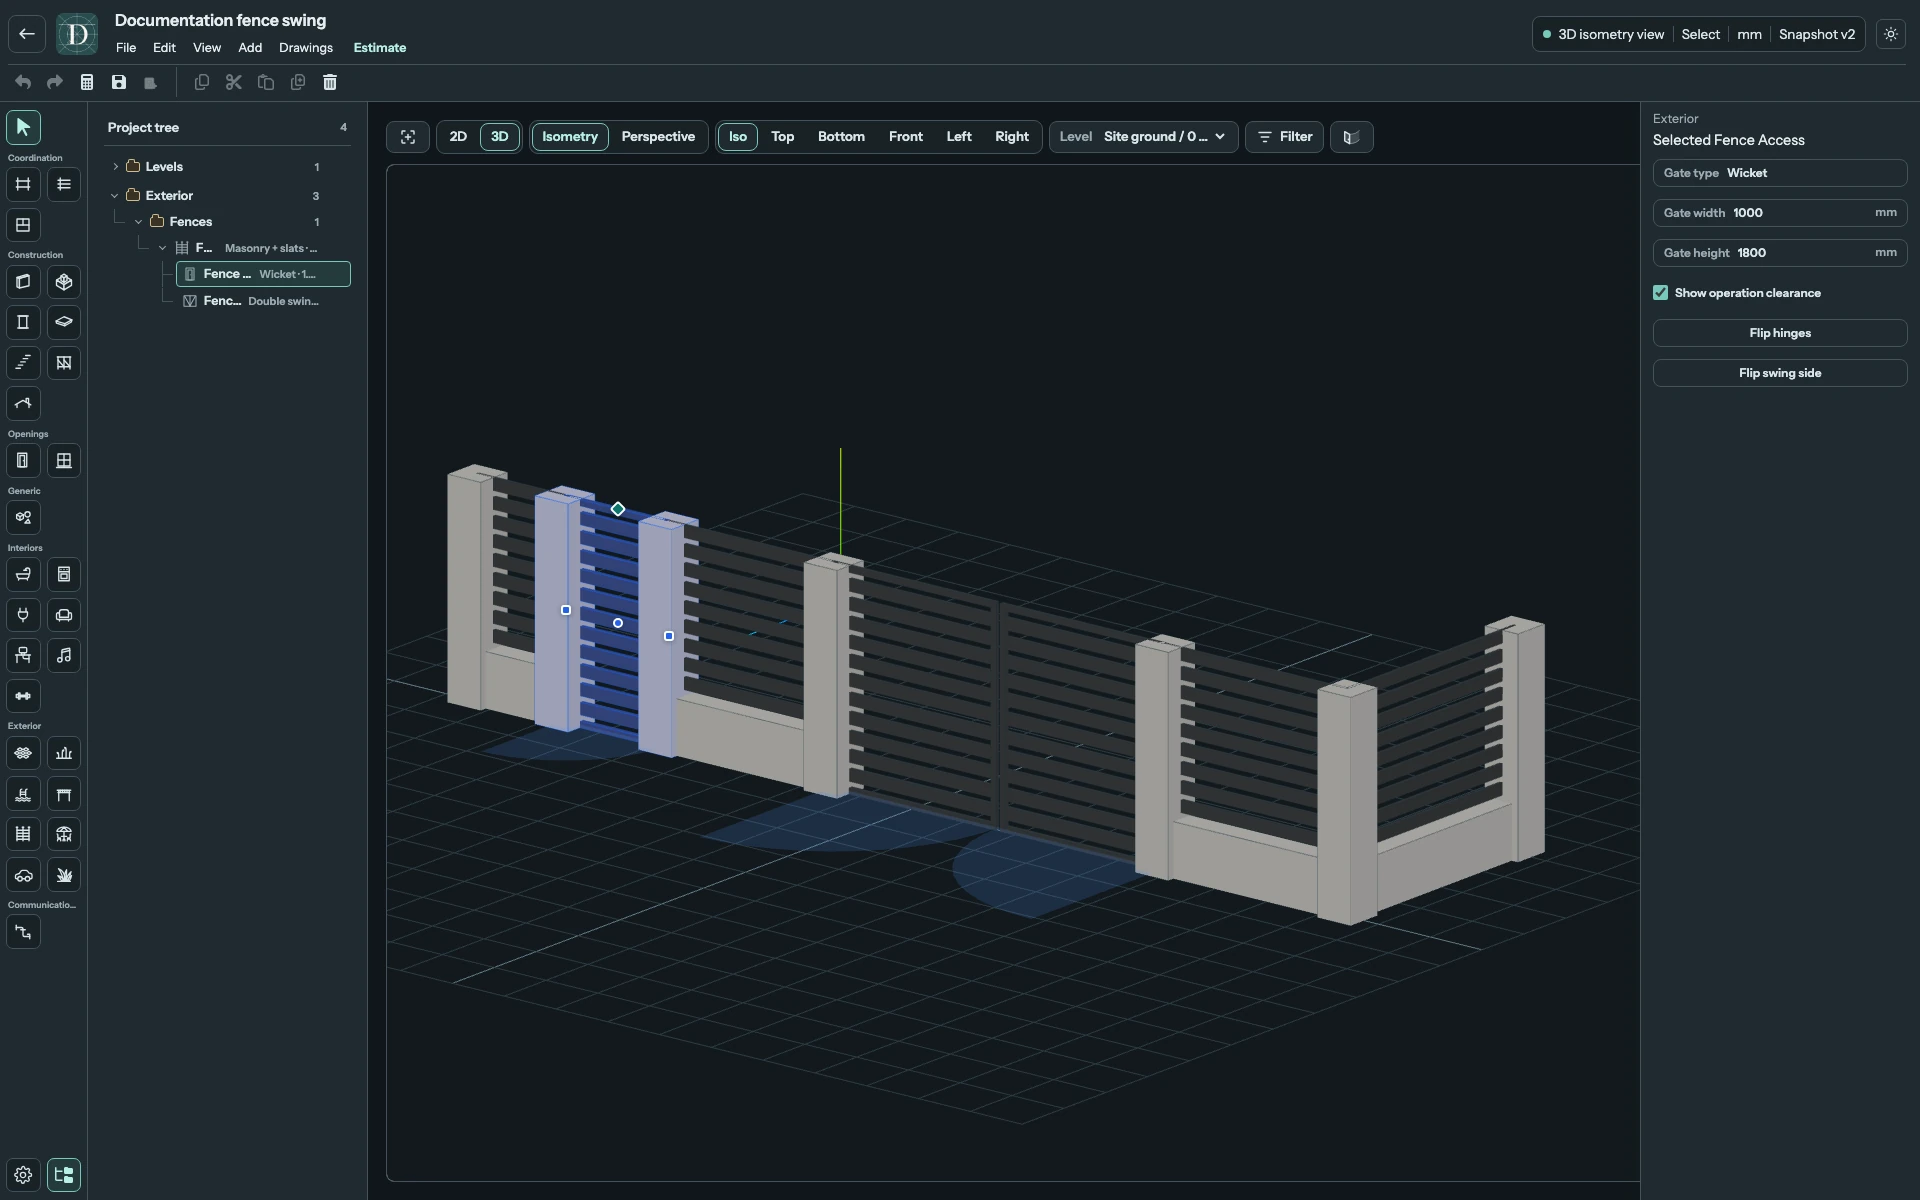
A Wicket has one leaf. Flip hinges moves the hinge to the other end of the opening; Flip swing side changes which side of the boundary the leaf opens towards. These are separate choices: changing the hinge does not choose the opposite side of the Fence.
View the full-size screenshot.
Double swing gate: two leaves
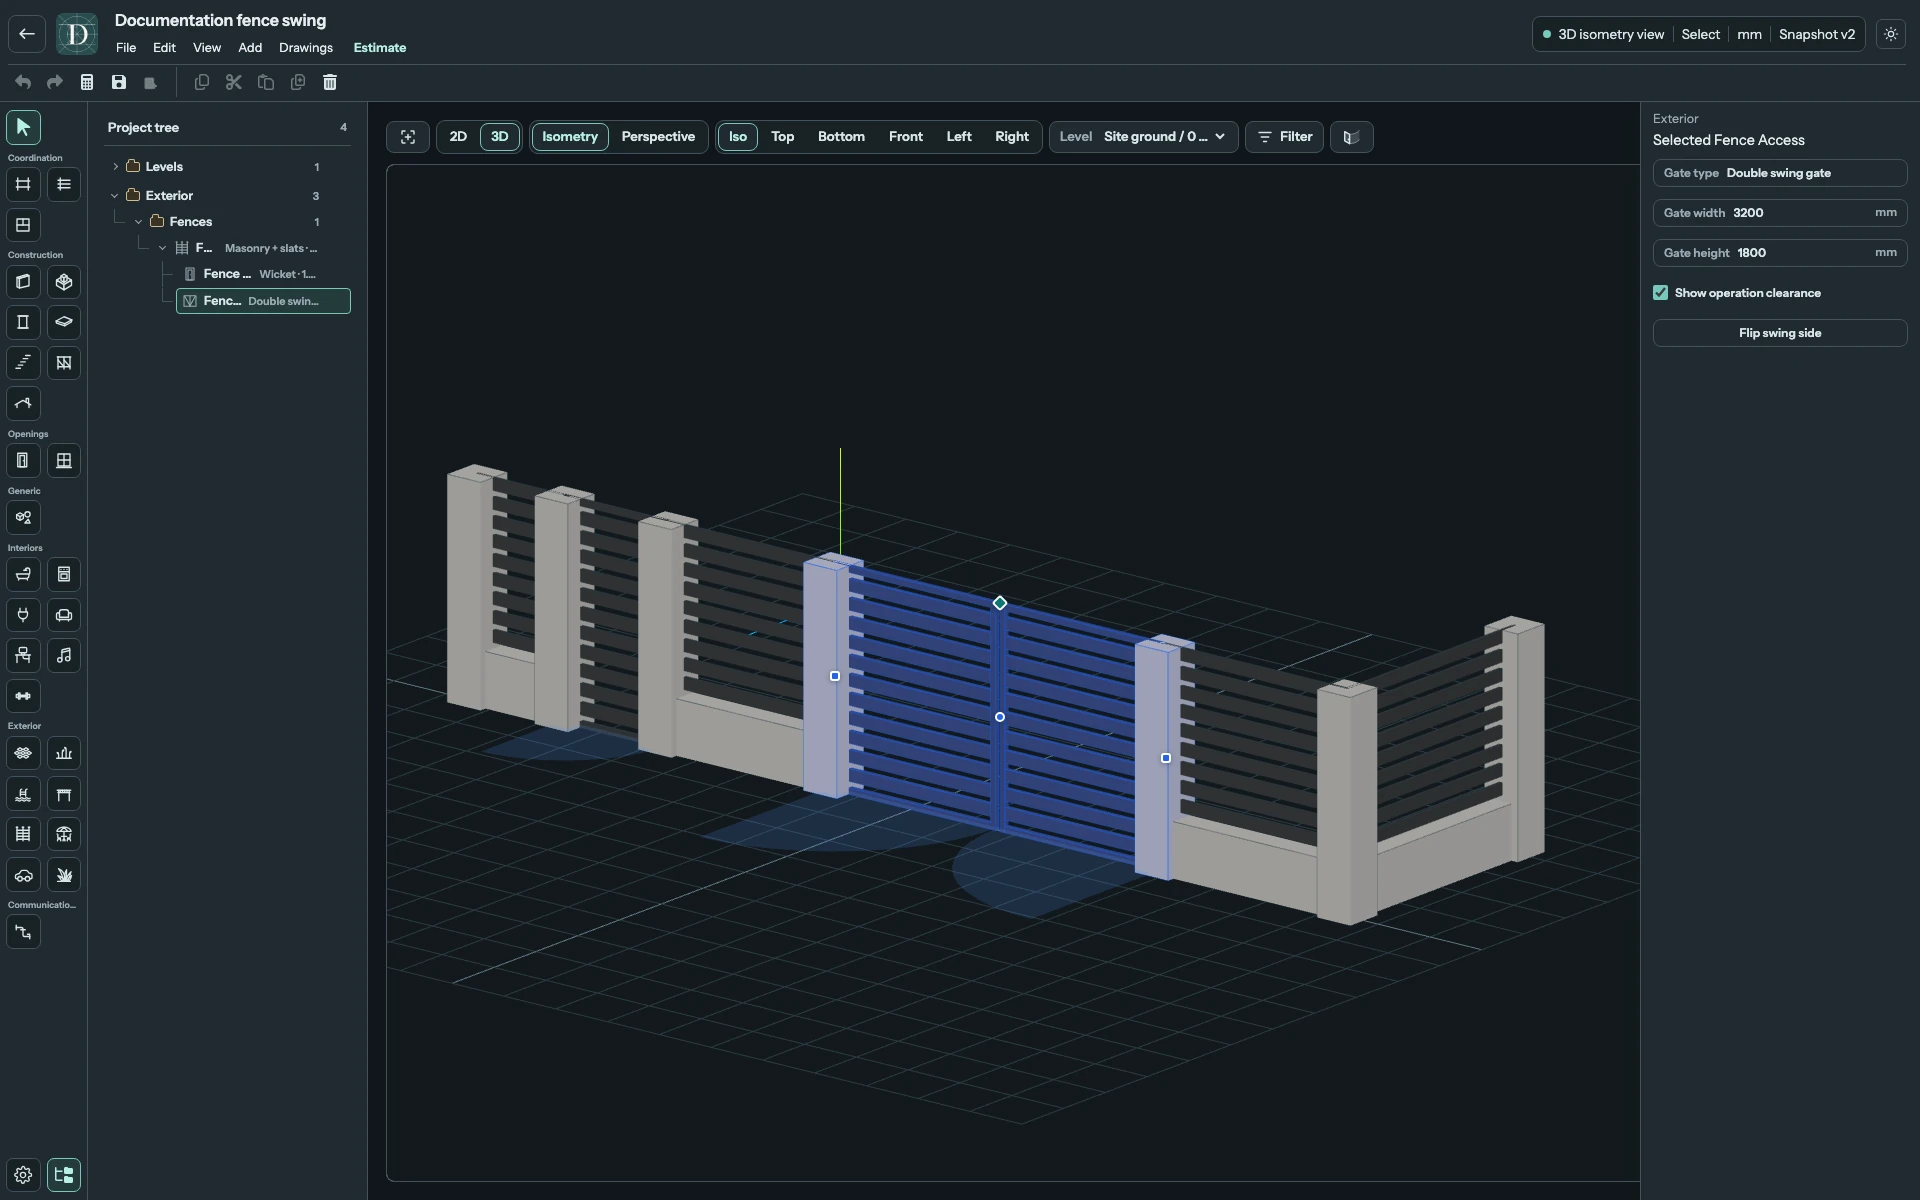
Gate width is the total opening width. The model divides it into two equal leaves. Flip swing side switches both leaves to the other side of the Fence. The example has a 3200 mm opening, filled by two equal leaves with a narrow centre gap. Gate width remains the total opening width.
View the full-size screenshot.
View the full-size screenshot.
Sliding gate: leave room along the Fence
A sliding gate has one moving panel. Flip slide direction switches the side it retracts towards. In Top, Show operation clearance reveals its required straight pocket along that side of the Fence.
The current model includes a counterbalance tail equal to 40% of the opening width. It therefore needs a pocket equal to 1.4 times Gate width, measured from the edge of the opening in the chosen direction. In this 2400 mm example, that pocket is 3360 mm. This describes Dravit's model geometry.
View the full-size screenshot.
View the full-size screenshot.
View the full-size screenshot.
A pocket may continue across consecutive collinear spans. It stops at a corner, the end of an open Fence or another access opening. After moving the gate, changing its width, flipping its direction or editing the boundary, check the pocket again. The editor can retain a gate with an unavailable pocket; placing the gate does not prove it has room to open.
Every access setting
| Setting or action | Applies to | Effect |
|---|---|---|
| Gate type | All access | Shows the selected type. This is read-only; replace the element to choose another type. |
| Gate width | All access | Total opening width. Must be positive and fit entirely within the host span. |
| Gate height | All access | Leaf height above the Fence base. Must be positive; it can differ from the Fence height. |
| Show operation clearance | All access | Shows or hides the swing envelope or sliding pocket. It does not change dimensions. |
| Flip hinges | Wicket | Exchanges the hinge and latch ends. |
| Flip swing side | Wicket, Double swing gate | Changes the opening side relative to the Fence. |
| Flip slide direction | Sliding gate | Chooses the opposite retraction direction along the Fence. |
Move, resize and change the boundary
In Top, select access and drag the centre grip along its host span. Drag an end grip to change the width. In 3D, the top grip also changes height. Access stays on its original span: there is no free rotation or transfer to another span. Delete it and add another access to relocate it to a different span.
To reshape the Fence, select it in Top and drag an existing vertex. Posts and panels rebuild for the new span lengths, while access keeps its relative position within its host span. A boundary edit that makes an opening too wide is rejected. Reduce its width or remove it before shortening that span. Keep separate openings apart; the current editor does not automatically resolve overlapping entrances.
The current Fence has no whole-object move or rotation and no insertion or deletion of intermediate vertices. Its base is one elevation, so it does not automatically step along sloping Terrain. Use Level and Base offset to set its vertical position.
Save or remove elements
Save the project, reopen it and check the same Fence and its access children in Top and 3D. Removing one access restores the filled run; removing the Fence also removes its access children. Use Undo to reverse a removal before continuing.
The leaves are shown in their closed positions. The operation envelope is a layout aid; the current editor does not animate gates or check vehicles, people and nearby objects for collisions.