
A plan sheet presents a floor or roof with its own drawing settings. Save the model, choose a Level and plan kind, then save the sheet. This example uses a copied Willow House model; choose your own Level, paper, scale and project text.
Choose the plan you need
- Save the model and switch the editor to 2D → Top; both commands below are unavailable in 3D and in side views. Choose Drawings → New drawing sheet…, or Create drawing from current view in the editor toolbar.
- In Documentation and Drawings, choose Level, View → Top and a descriptive Name.
- Choose Sheet using the table below. Check that the selected Level contains the intended construction.
- Choose Standard, Scale, Paper and Orientation. Read the preview's Draft reasons and resolve them before saving. See view and layout settings when content does not fit.
- Fill the title block, then select Save drawing. Select its row under Sheets to reopen and check it.
| Sheet | What it shows and requires |
|---|---|
| Floor plan | The selected floor or foundation Level, with supported outlines, openings, dimensions, Axes and Room labels. A foundation drawing still uses this kind; identify it in Name. |
| Roof plan | The Roof covering, resolved slope outlines and supported pitch annotations. Choose the Roof's Level. Framing is excluded from this plan. |
| Rafter plan | The Roof's resolved framing rather than its covering. It needs framing geometry; configure the Roof's materials and framing before capturing this view. |
Selecting a Level may suggest a sheet name and roof-plan kind. Your explicit Sheet choice takes precedence. The model remains the source of the geometry; these choices do not create another Roof or floor.
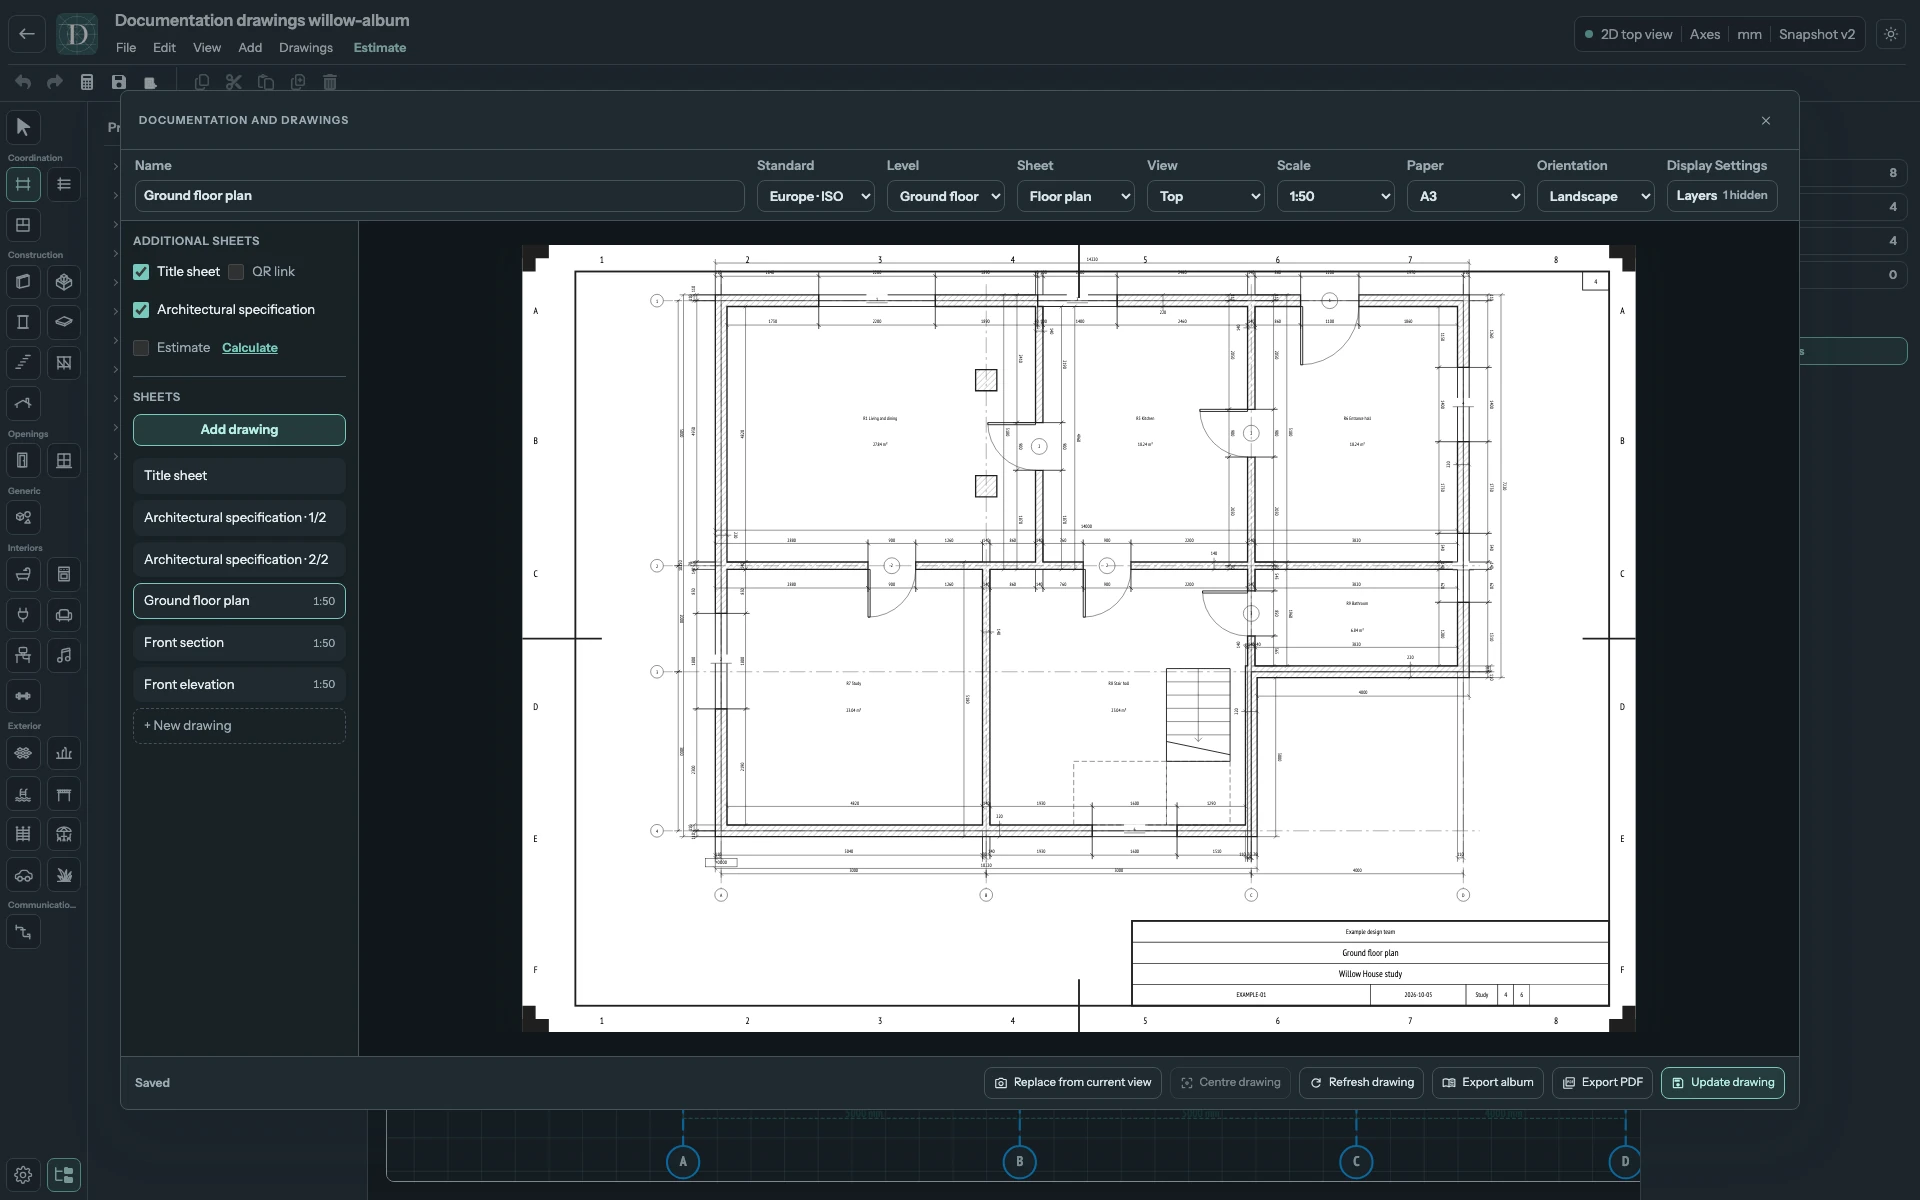
View the full-size screenshot.
Compare a Roof plan and Rafter plan
The next two previews use the same Roof datum. Change Sheet to compare covering and framing. Check the dimensions and labels at the chosen scale; crowded framing labels may require another paper size or scale.
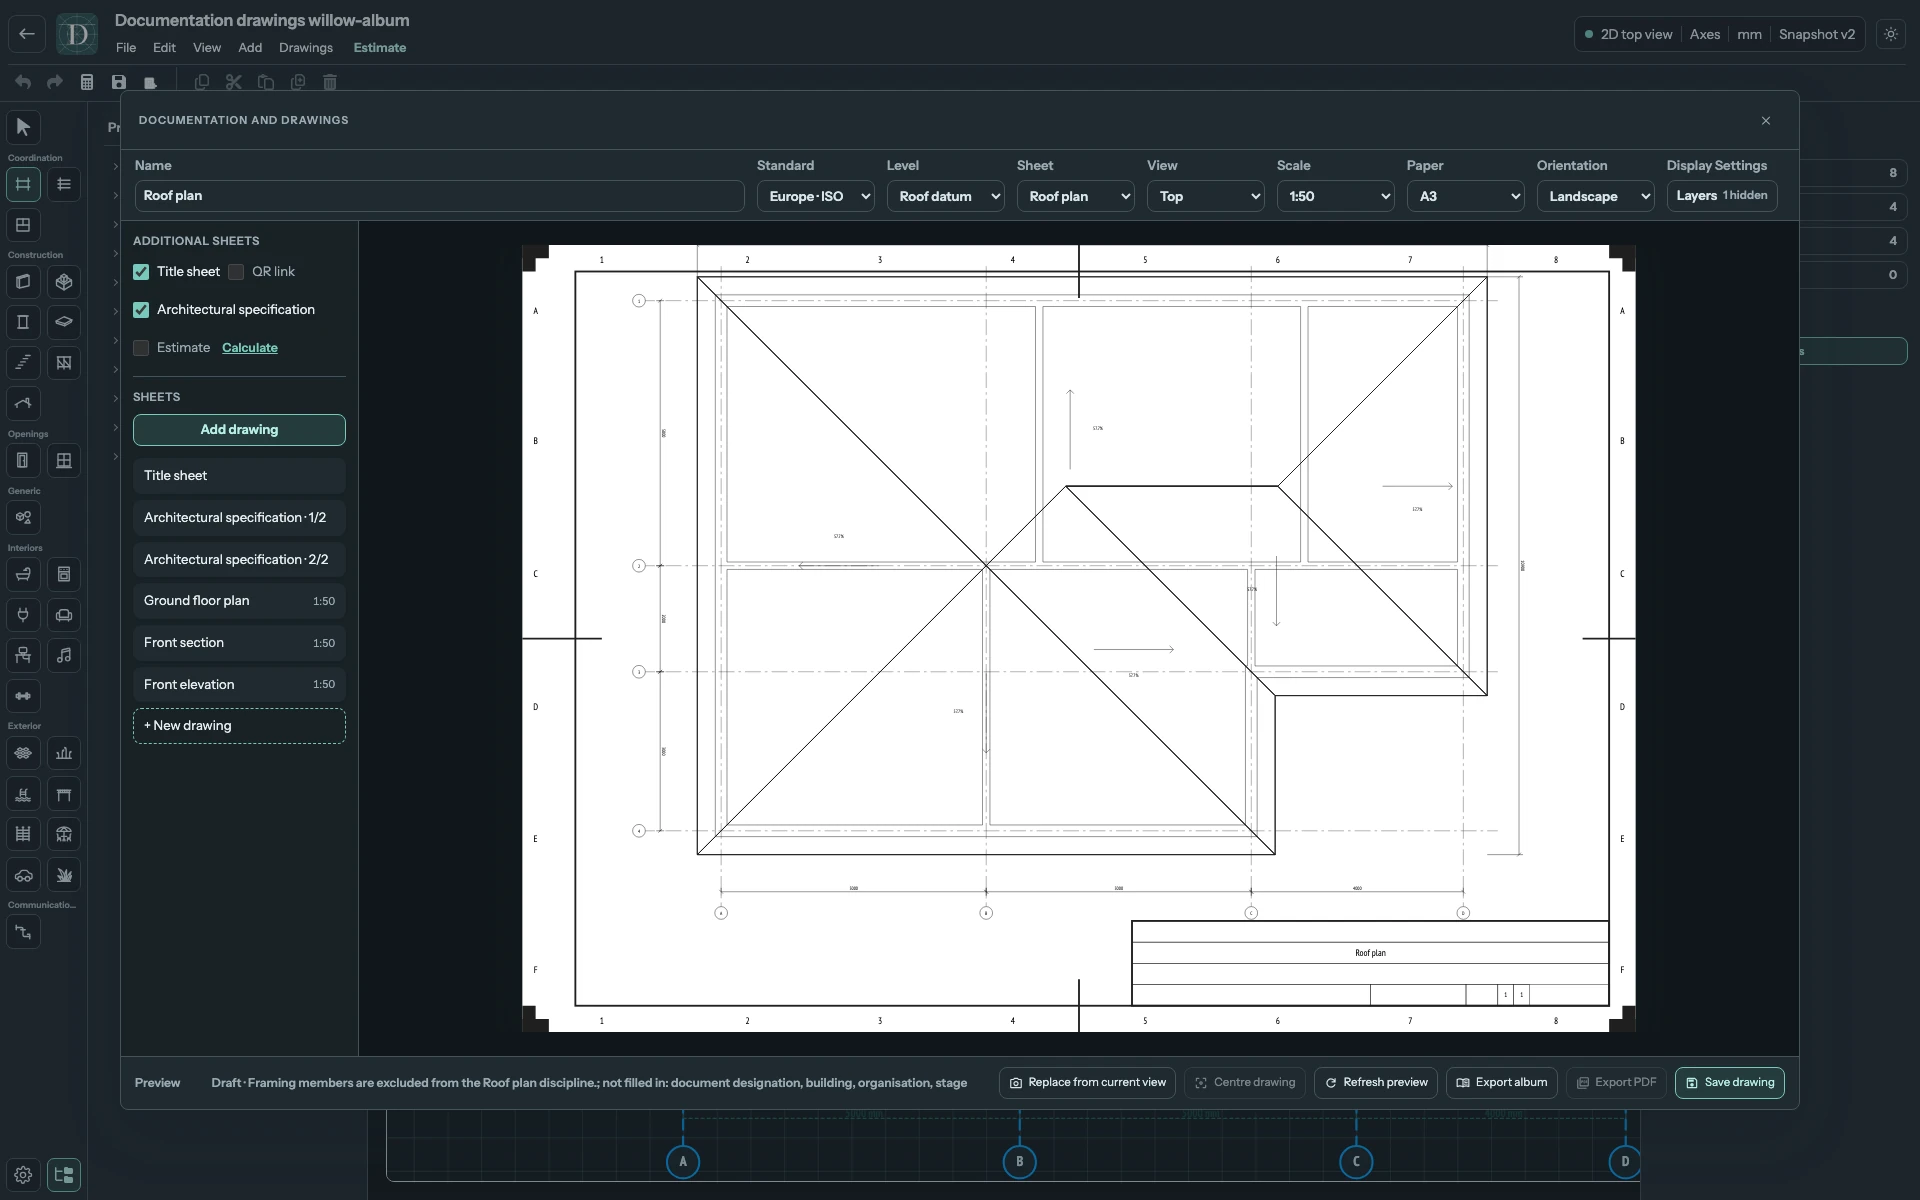
View the full-size screenshot.
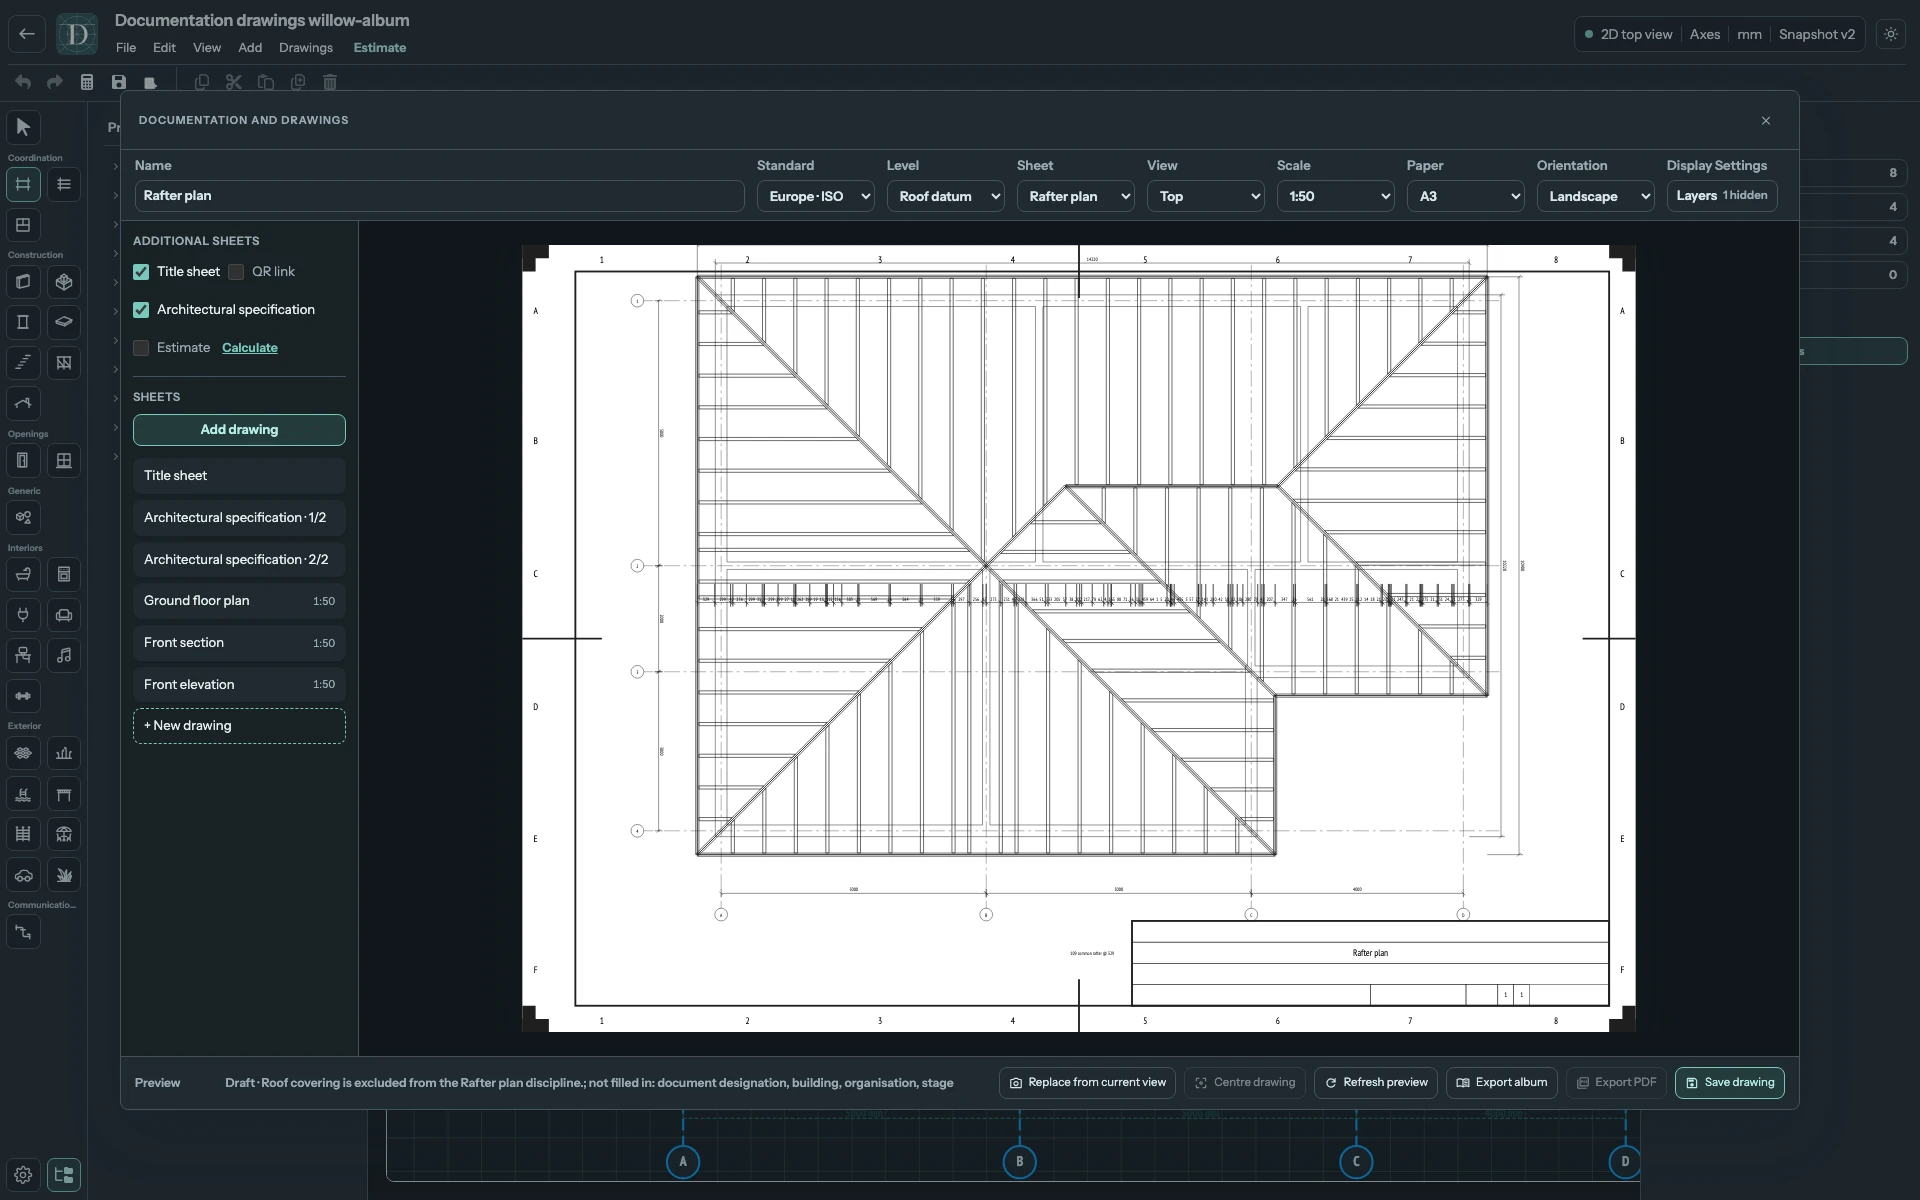
View the full-size screenshot.
Draft reasons appear while you compose or change a sheet. After Save drawing, the footer and the Sheets row show Saved even if a title-block or layout reason remains. A saved drawing is separate from the editor viewport. Inspect its dimensions, labels, project text and required content before exporting. A Rafter plan is a model projection, not a structural approval.