
A Door is hosted by an authored Wall. A filled preset cuts an opening and carries a modeled leaf, frame and operation. Opening without door keeps the cut without a supplied Door. Use filled Doors to study access, opening direction and the space occupied by the leaf. A Door inherits its Level from the host; it has no independent Level selector.
Place a Door
- Switch to 2D → Top and choose the host Wall's Level. Select Door under Openings, or press D.
- Choose Preset. The list includes interior, entrance and garage sizes, plus project presets you have created.
- Move the ghost along the intended Wall face and click once to place a fixed-size preset. The selected face becomes the Door's reference for hinges and swing.
- Select the Door in the plan or under Doors in the Project tree. Check the inherited Level and host Wall name.
For a filled Door with a custom width, enable Custom size before placement, then click two points on the same Wall face. After placement, you can enter Width and Height. Empty space, a Floor or a generated Roof closure cannot host this Door.
Make an opening without a door
Choose Preset → Opening without door. Width and Height remain editable without enabling Custom size. Enter positive dimensions in the project's displayed unit, or click two points on the same Wall face to draw the width. The opening must satisfy the host's geometry and neighbouring-opening constraints; it has no fixed product-size minimum. Set Bottom offset relative to the Wall bottom, then inspect the cut in a side view and 3D.
This variant has no frame, leaf, handle, glazing or swing volume. Its panel omits those filling controls and the installed-product price. It does not request a supply price for a nonexistent Door. The Wall quantities account for its cut; no separate opening-construction price is introduced.
Select it under Doors in the Project tree or by its Top/side contour, then use its fields and grips to edit it. Empty air inside the hole is not a clickable 3D filling. Save, reopen and use ordinary Undo/Redo as with other hosted openings. Selecting a filled preset replaces the empty variant with that preset's assembly and dimensions.
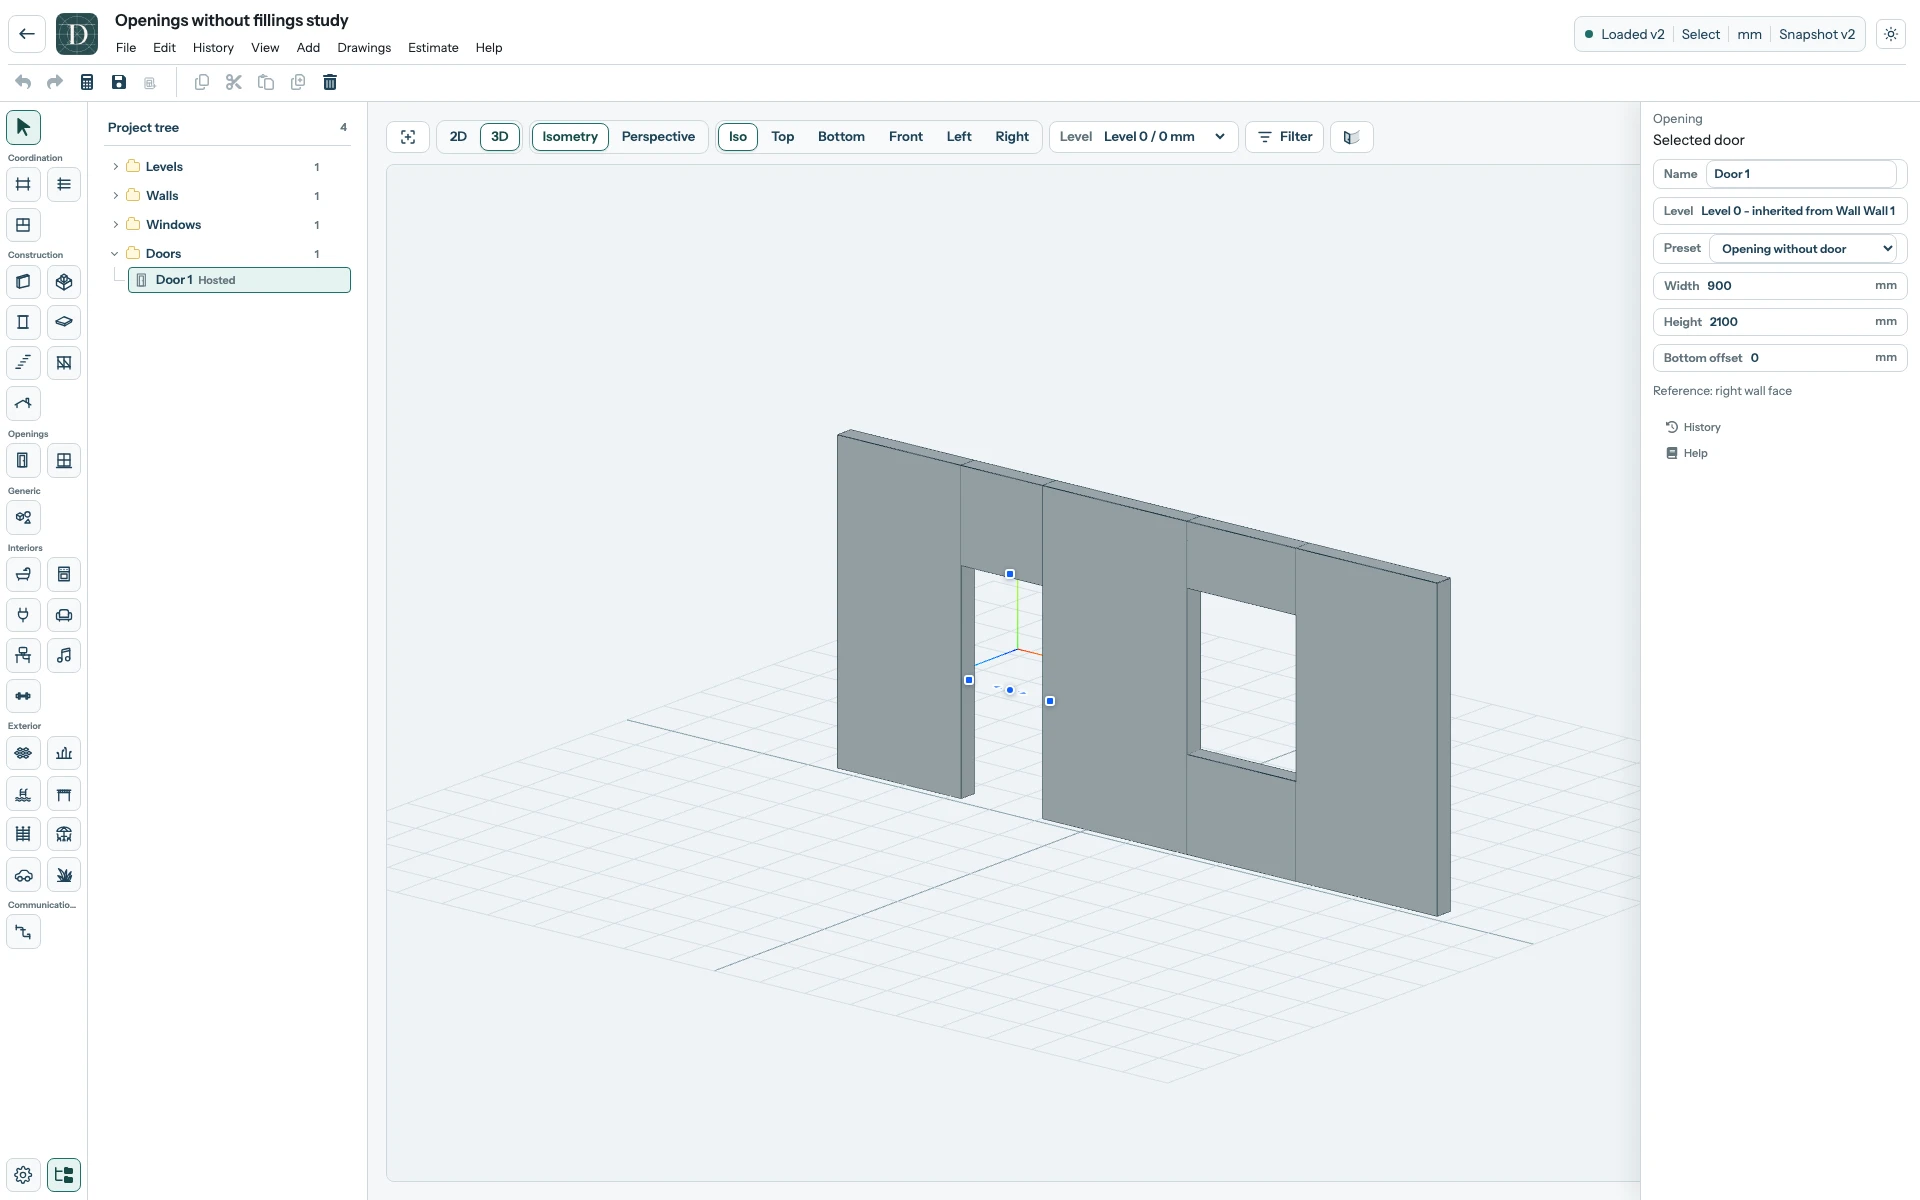
View the full-size unfilled-Door screenshot.
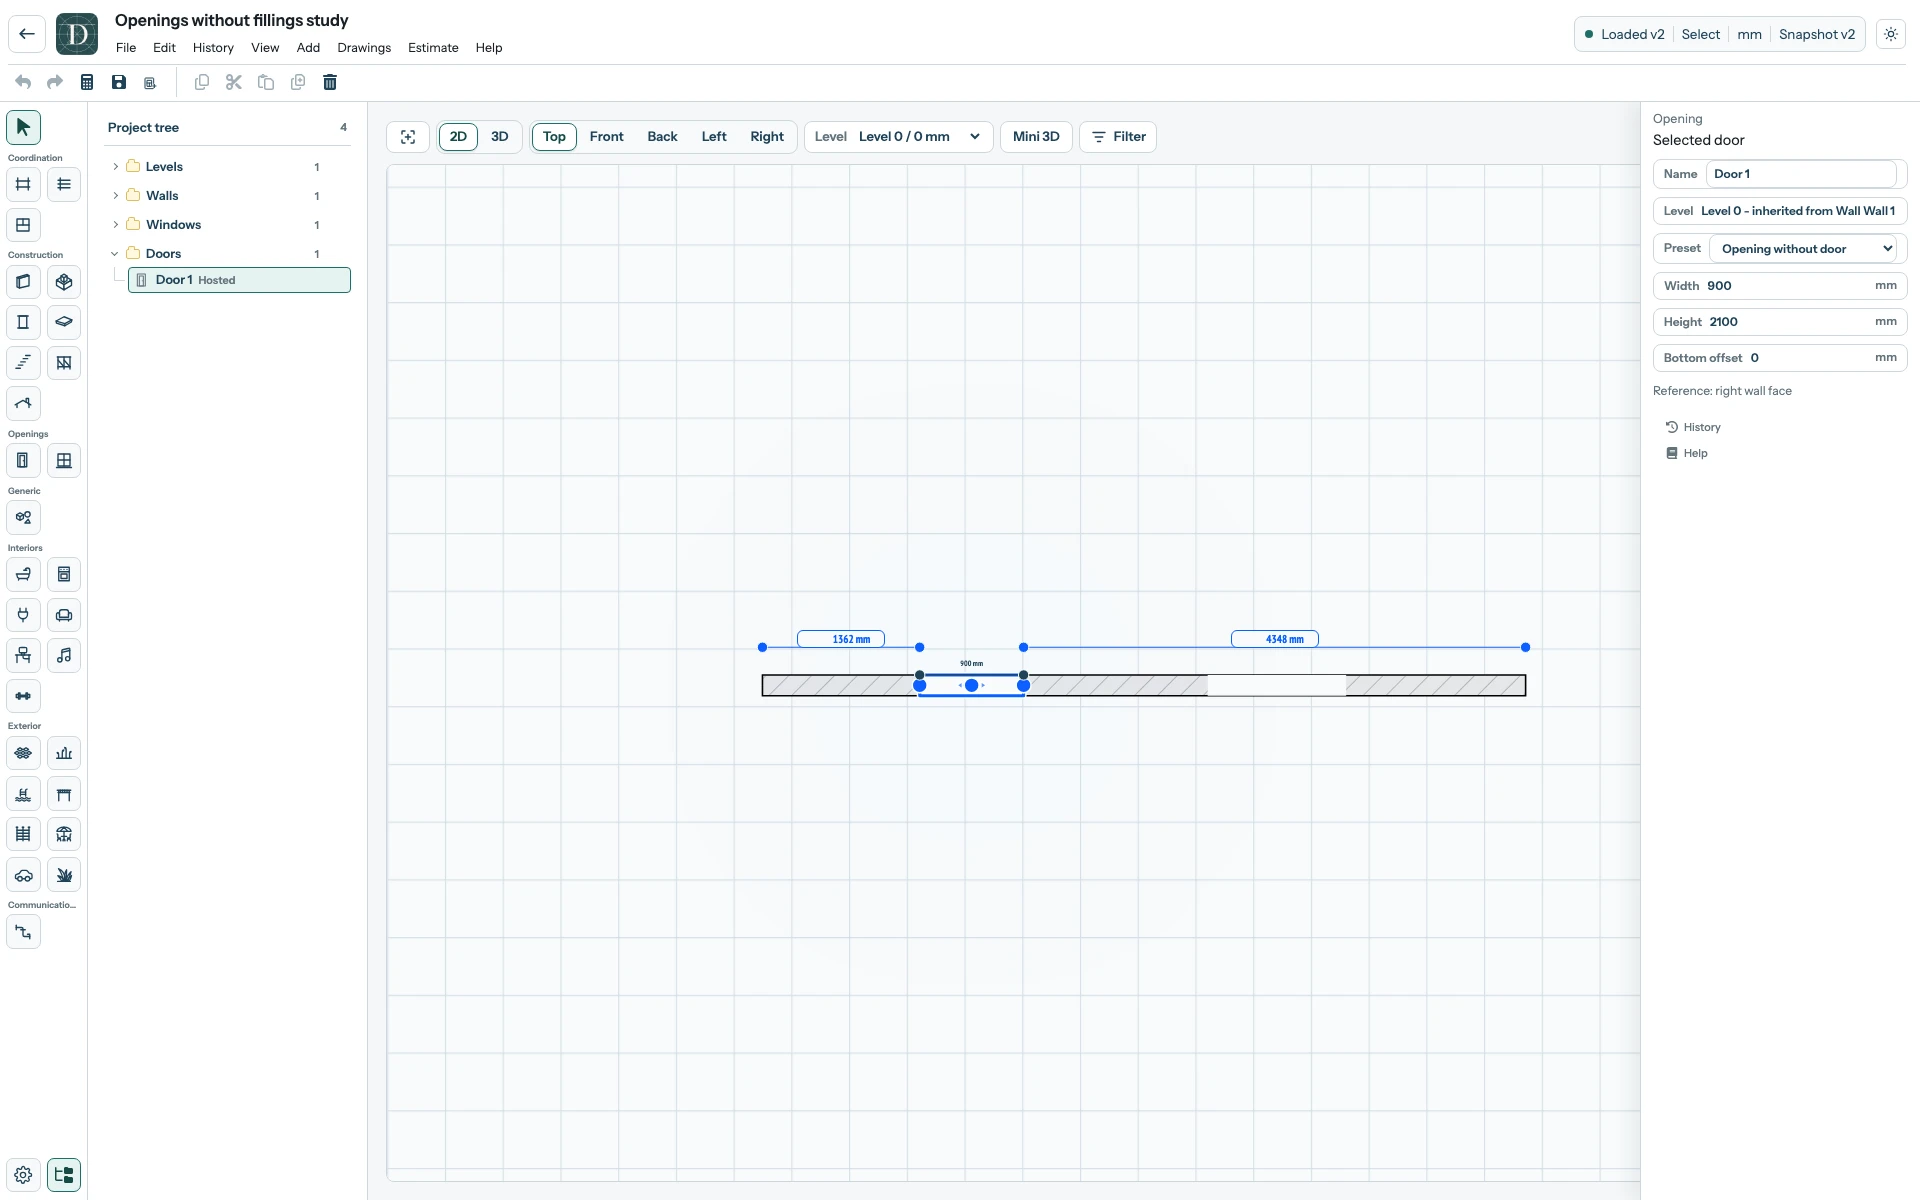
View the full-size unfilled-opening plan.
Choose operation and construction
For a filled Door, a fixed preset determines Type, size and construction. Enable Custom size to edit Type or Construction for this occurrence.
| Type or construction | What it models |
|---|---|
| Single-swing | One hinged leaf with a plan swing arc. |
| Sectional garage | An overhead sectional Door with Closed and Open states. |
| Solid timber | Opaque timber single-swing leaf. |
| Solid steel | Opaque steel single-swing leaf. |
| Security steel · rating required | A steel planning configuration; the preset supplies no verified security rating. |
| Timber · upper glazed | Timber leaf with upper glazing and an adjustable Opaque bottom. |
| Steel · upper glazed | Steel leaf with the same upper-glazing arrangement. |
| Aluminium frame · full glass | Glazing across an aluminium framed leaf. |
| PVC frame · full glass | Glazing across a PVC framed leaf. |
Changing the construction updates its modeled materials and glazing family. The tool does not offer arbitrary leaf geometry or a general multi-leaf Door designer.
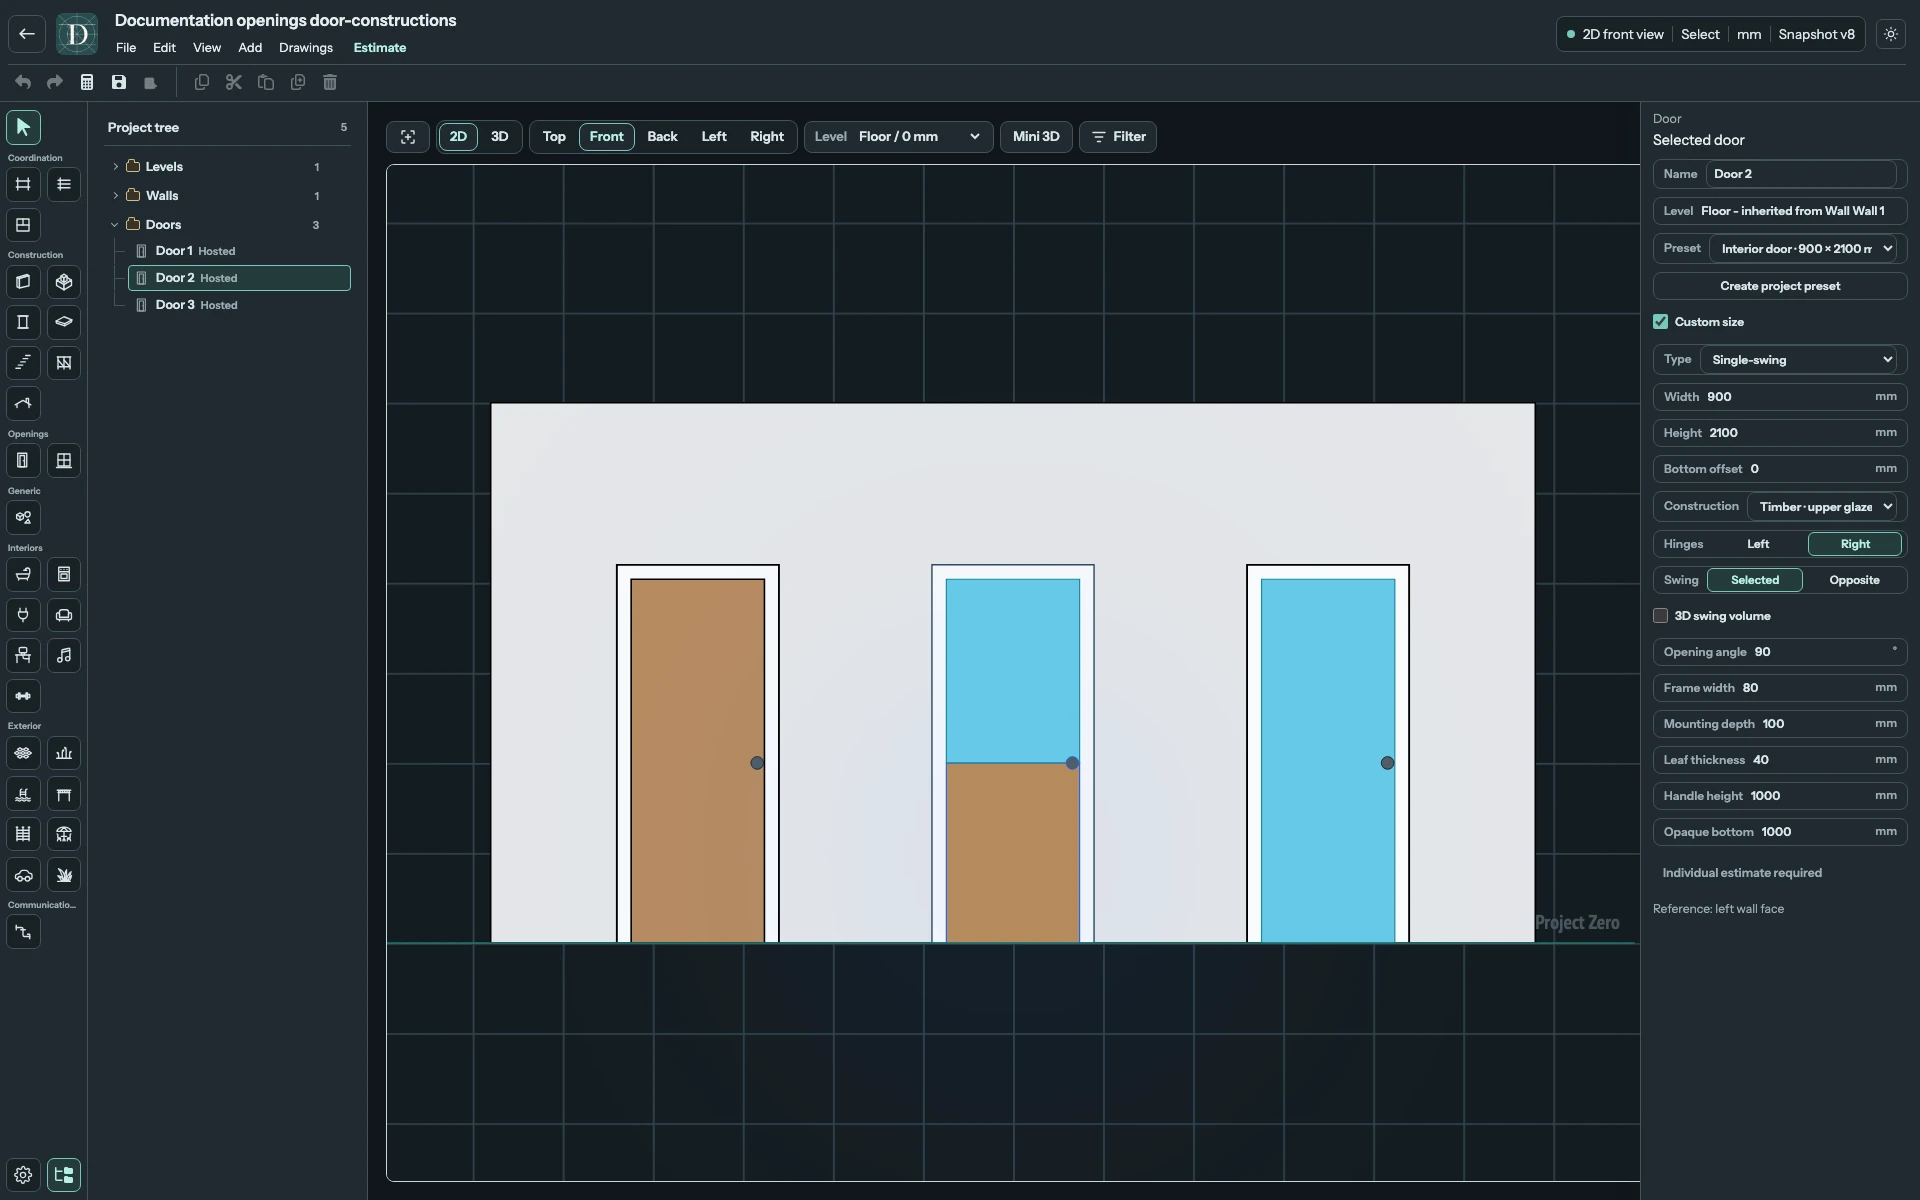
View the full-size screenshot.
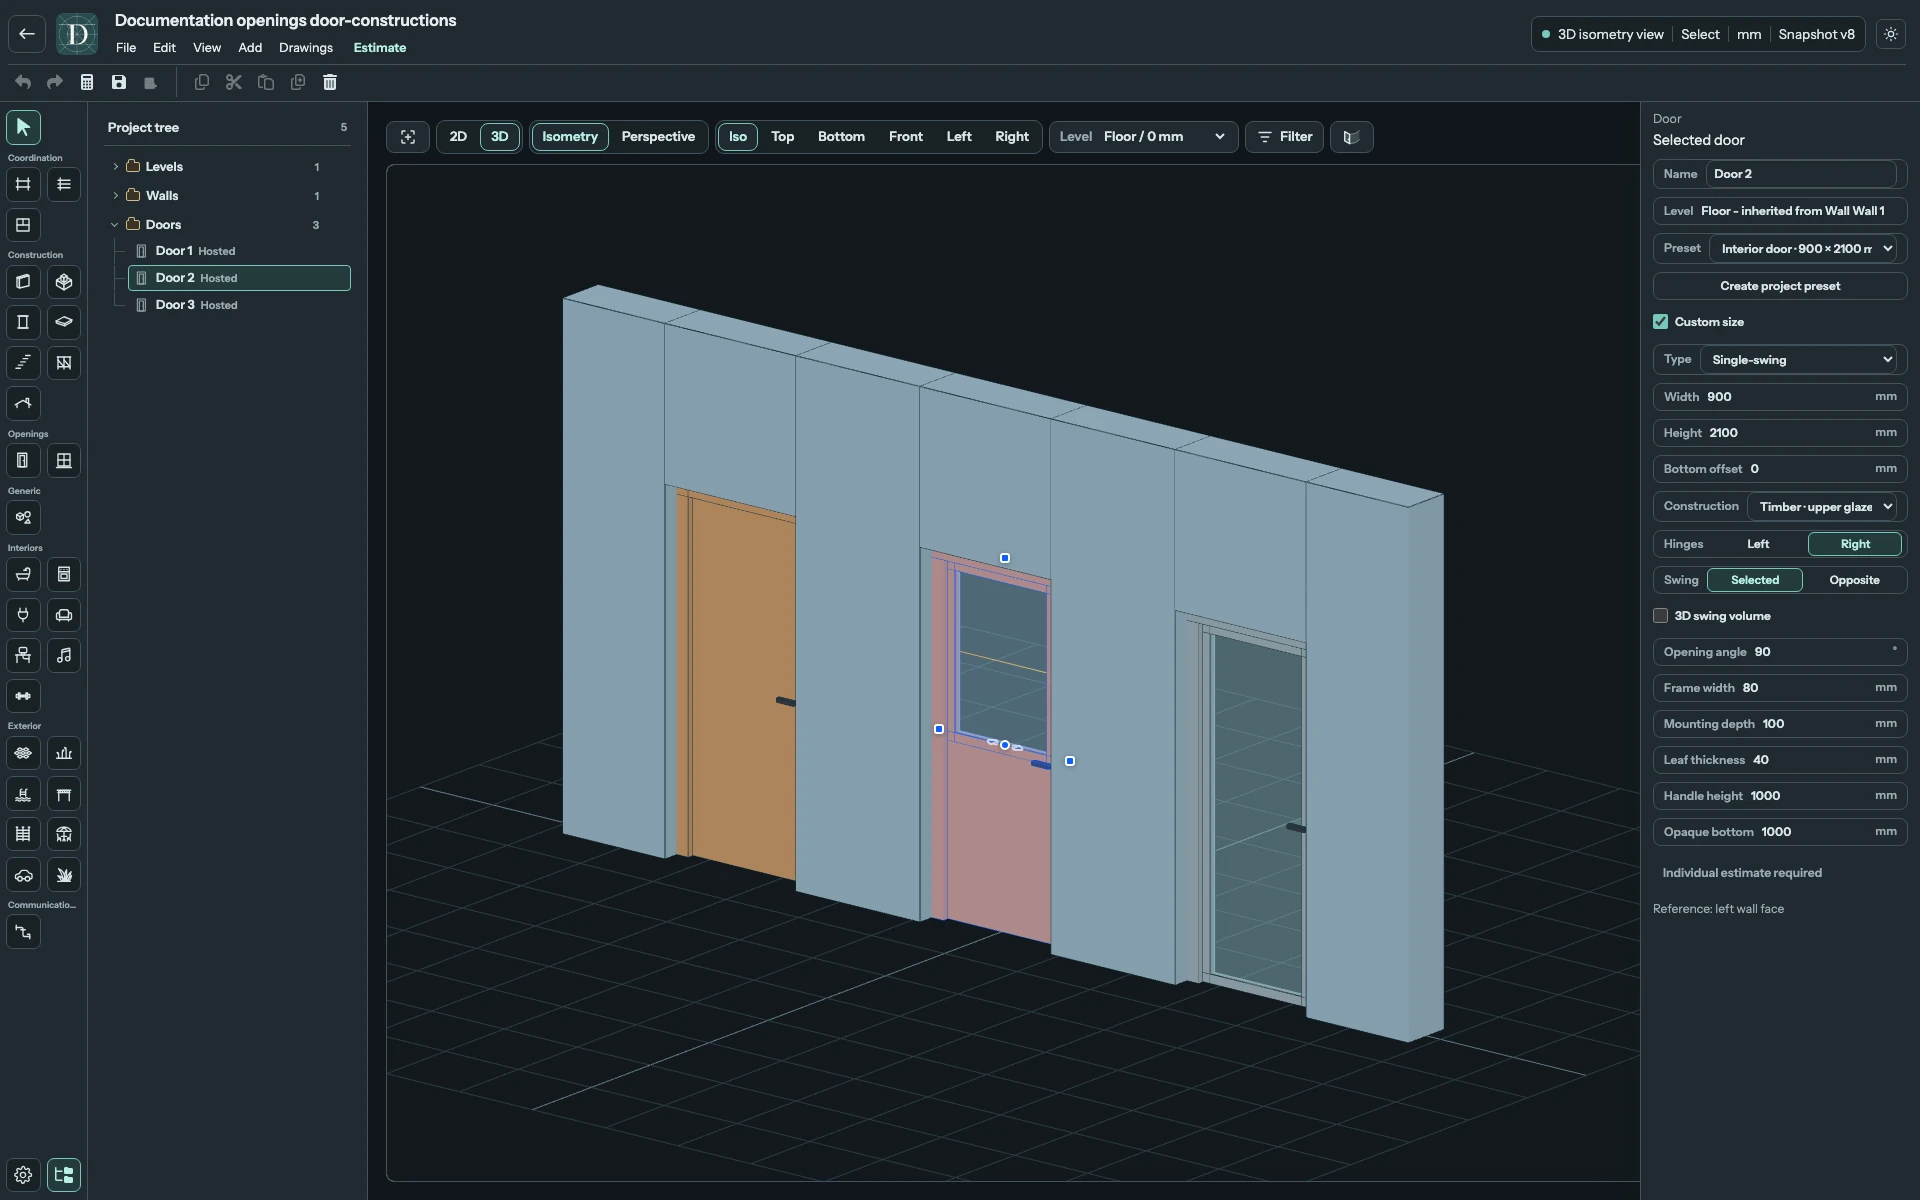
View the full-size screenshot.
Set swing and vertical position
For Single-swing, set Hinges to Left or Right, viewed from the selected Wall face. Swing → Selected opens toward that face; Opposite opens away from it. Enter Opening angle and inspect the arc. 3D swing volume shows the space swept by the leaf in 3D.
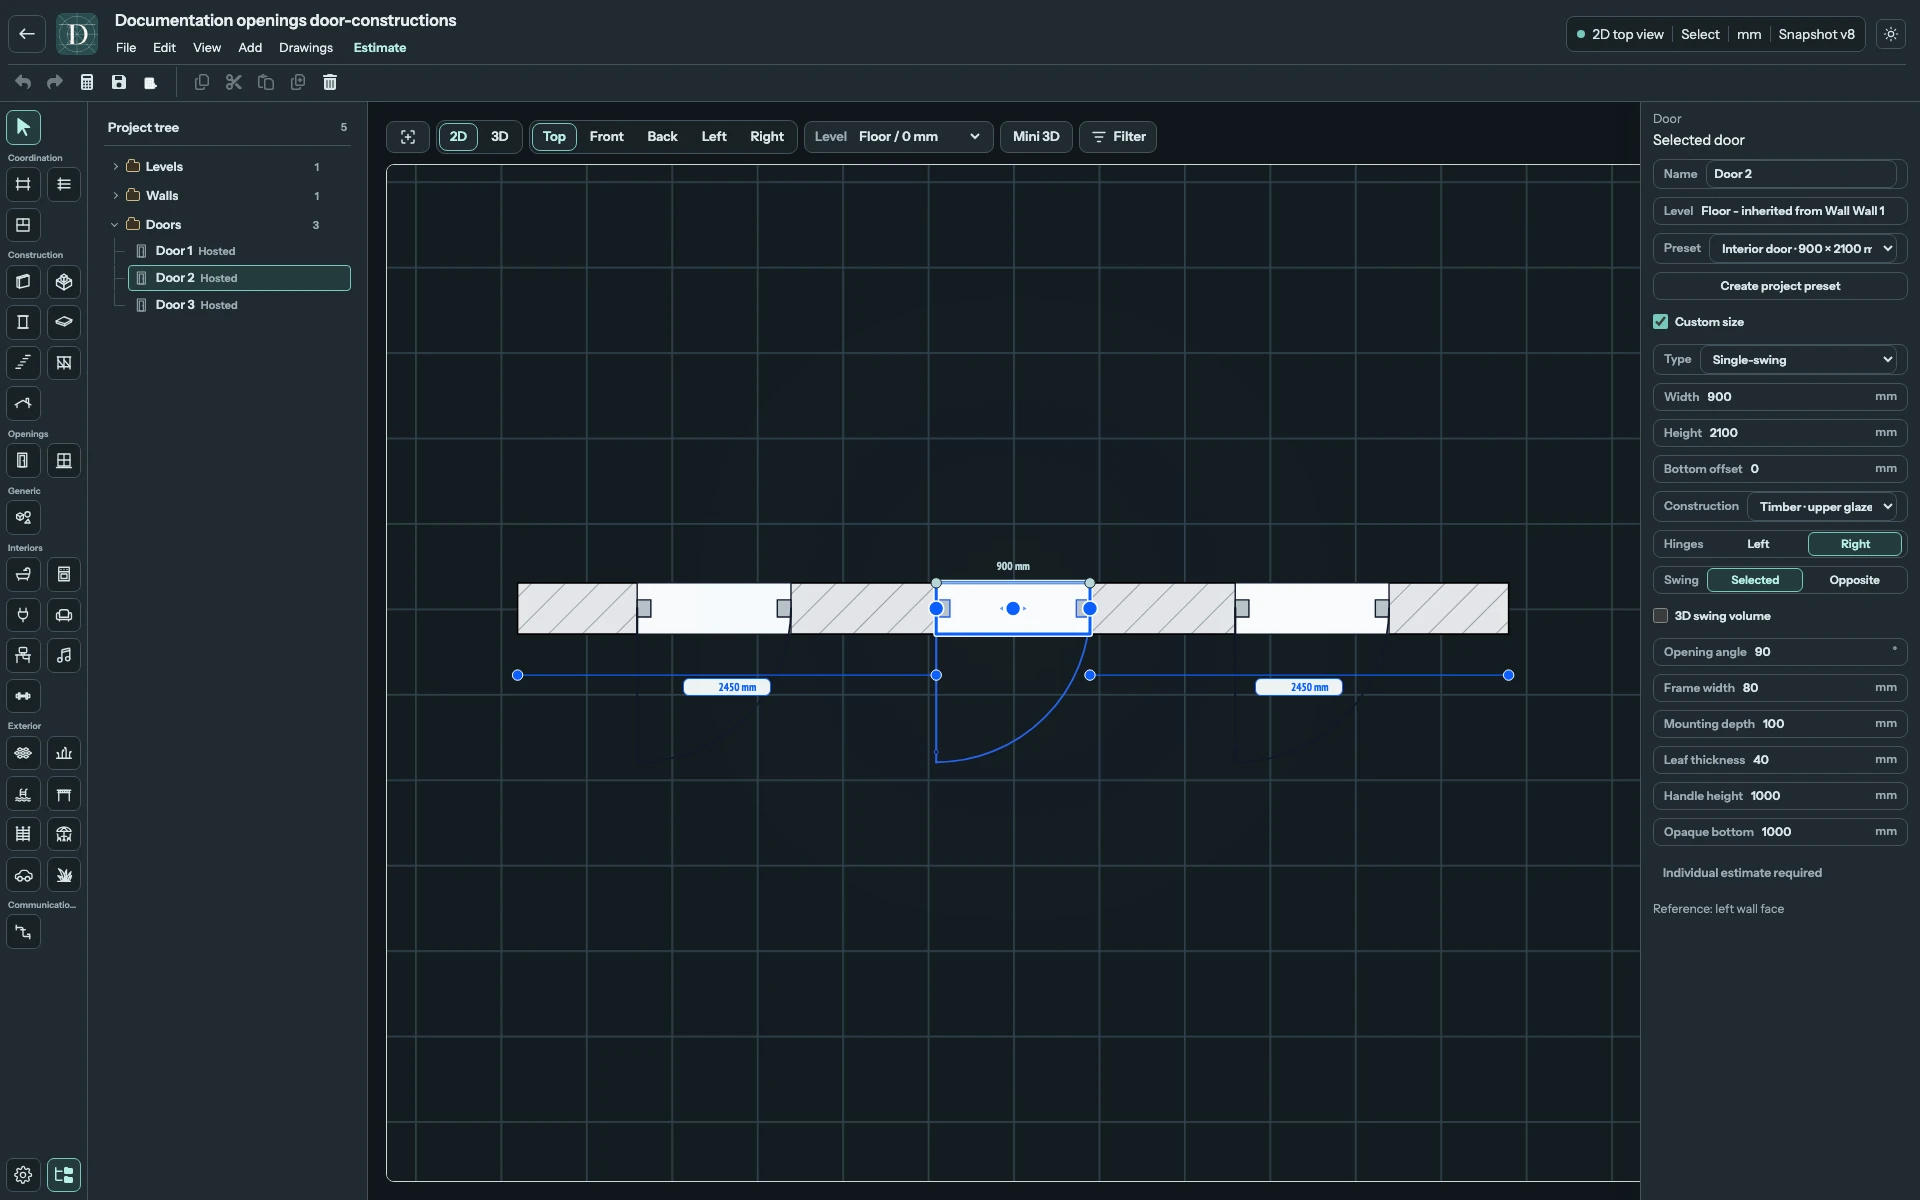
View the full-size screenshot.
Bottom offset is measured from the host Wall's bottom. Positive values raise the Door; negative values lower it. When the Wall base moves, a zero-offset Door follows that base. Use a side view or 3D to check the vertical result.
Filled Door settings
The fields use the project's displayed length unit. These mm values are editor limits and model examples, rather than a recommendation for a particular building or product.
| Field | Effect and availability |
|---|---|
| Name | Instance label for a selected Door. See rename an element. |
| Level | Read-only inherited Wall datum. To change it, edit the host Wall's Level. |
| Preset | Fixed catalog or project configuration. Selecting one reapplies its size and construction. |
| Custom size | Unlocks Width, Height, Type and Construction for this occurrence. It also changes its estimate mode to Individual estimate required. |
| Type | Single-swing or Sectional garage. Available to change in Custom size. |
| Width, Height | Opening envelope. Single-swing minimum is 400 × 500 mm; Sectional garage minimum is 2000 × 1800 mm. Fixed preset dimensions are read-only. |
| Bottom offset | Signed height from the Wall bottom to the opening bottom. |
| Construction | The seven single-swing material/glazing arrangements above. Available to change in Custom size. |
| Hinges, Swing | Single-swing only; hinge side and opening side relative to the chosen Wall face. |
| Opening angle | Single-swing only, 15° to 180°. Changes the swing arc and swept volume. |
| 3D swing volume | Shows or hides that swept volume, without changing the authored opening angle. |
| Frame width | Single-swing visible frame width, minimum 10 mm. It must leave a positive leaf opening; the two side widths cannot consume the opening. |
| Mounting depth | Single-swing frame depth through the Wall, minimum 20 mm. It does not change Wall thickness. |
| Leaf thickness | Single-swing leaf depth, minimum 10 mm; separate from frame depth. |
| Handle height | Single-swing handle height above the Door base, minimum 100 mm and below the Door head. Raising Bottom offset moves the handle with the Door. |
| Opaque bottom | Upper-glazed constructions only. Nonnegative lower opaque panel height; enough height must remain above it for glazing and frame. |
| State | Sectional garage only: Closed fills the opening; Open raises the panels onto the overhead tracks. |
For example, keep a 2100 mm upper-glazed Door's opening fixed and change Opaque bottom from 1000 to 800 mm. The opaque part becomes shorter and the glazed part taller. Changing Mounting depth instead changes the frame through the Wall, which is best checked in 3D.
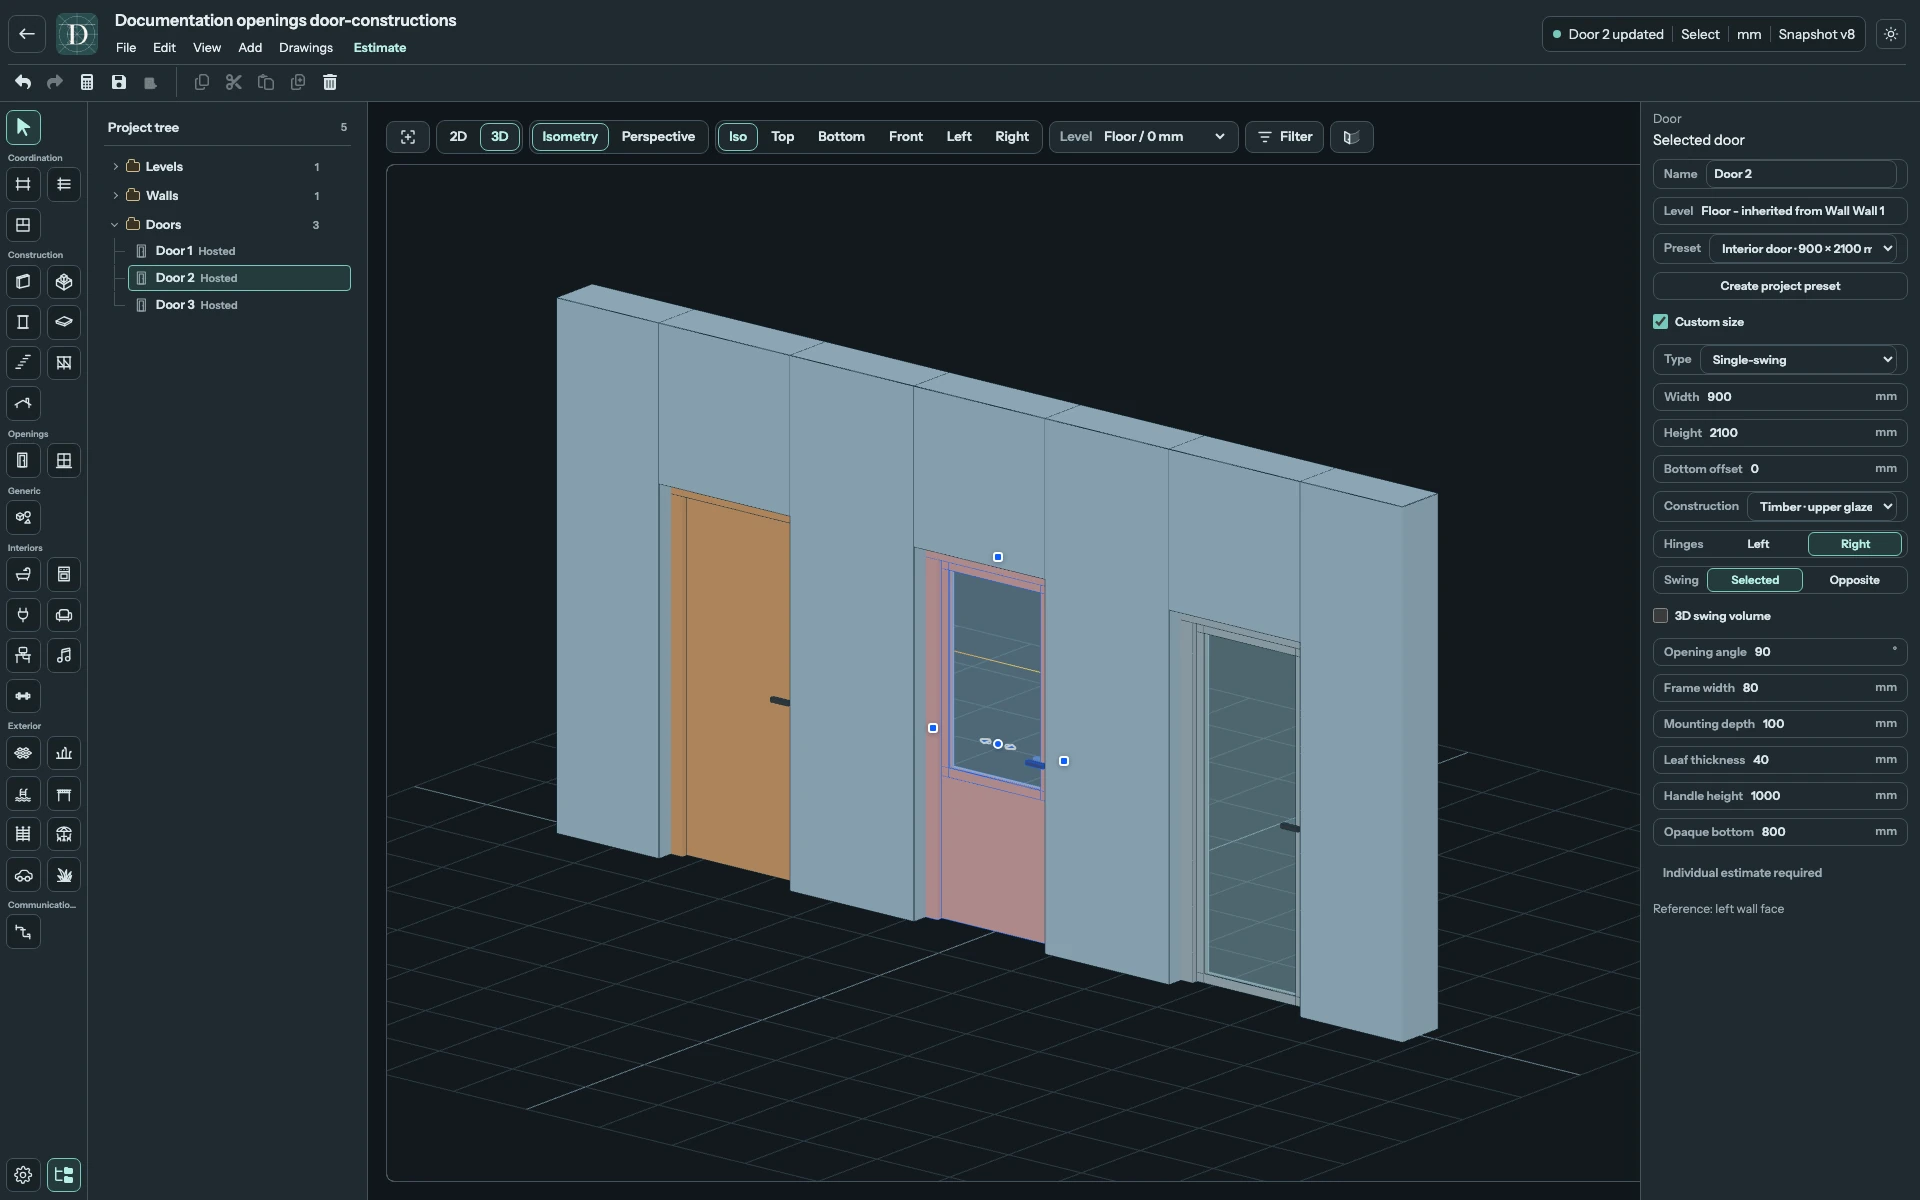
View the full-size screenshot.
For Sectional garage, use State → Closed/Open to inspect the leaf and overhead tracks; check the required overhead space in your design.
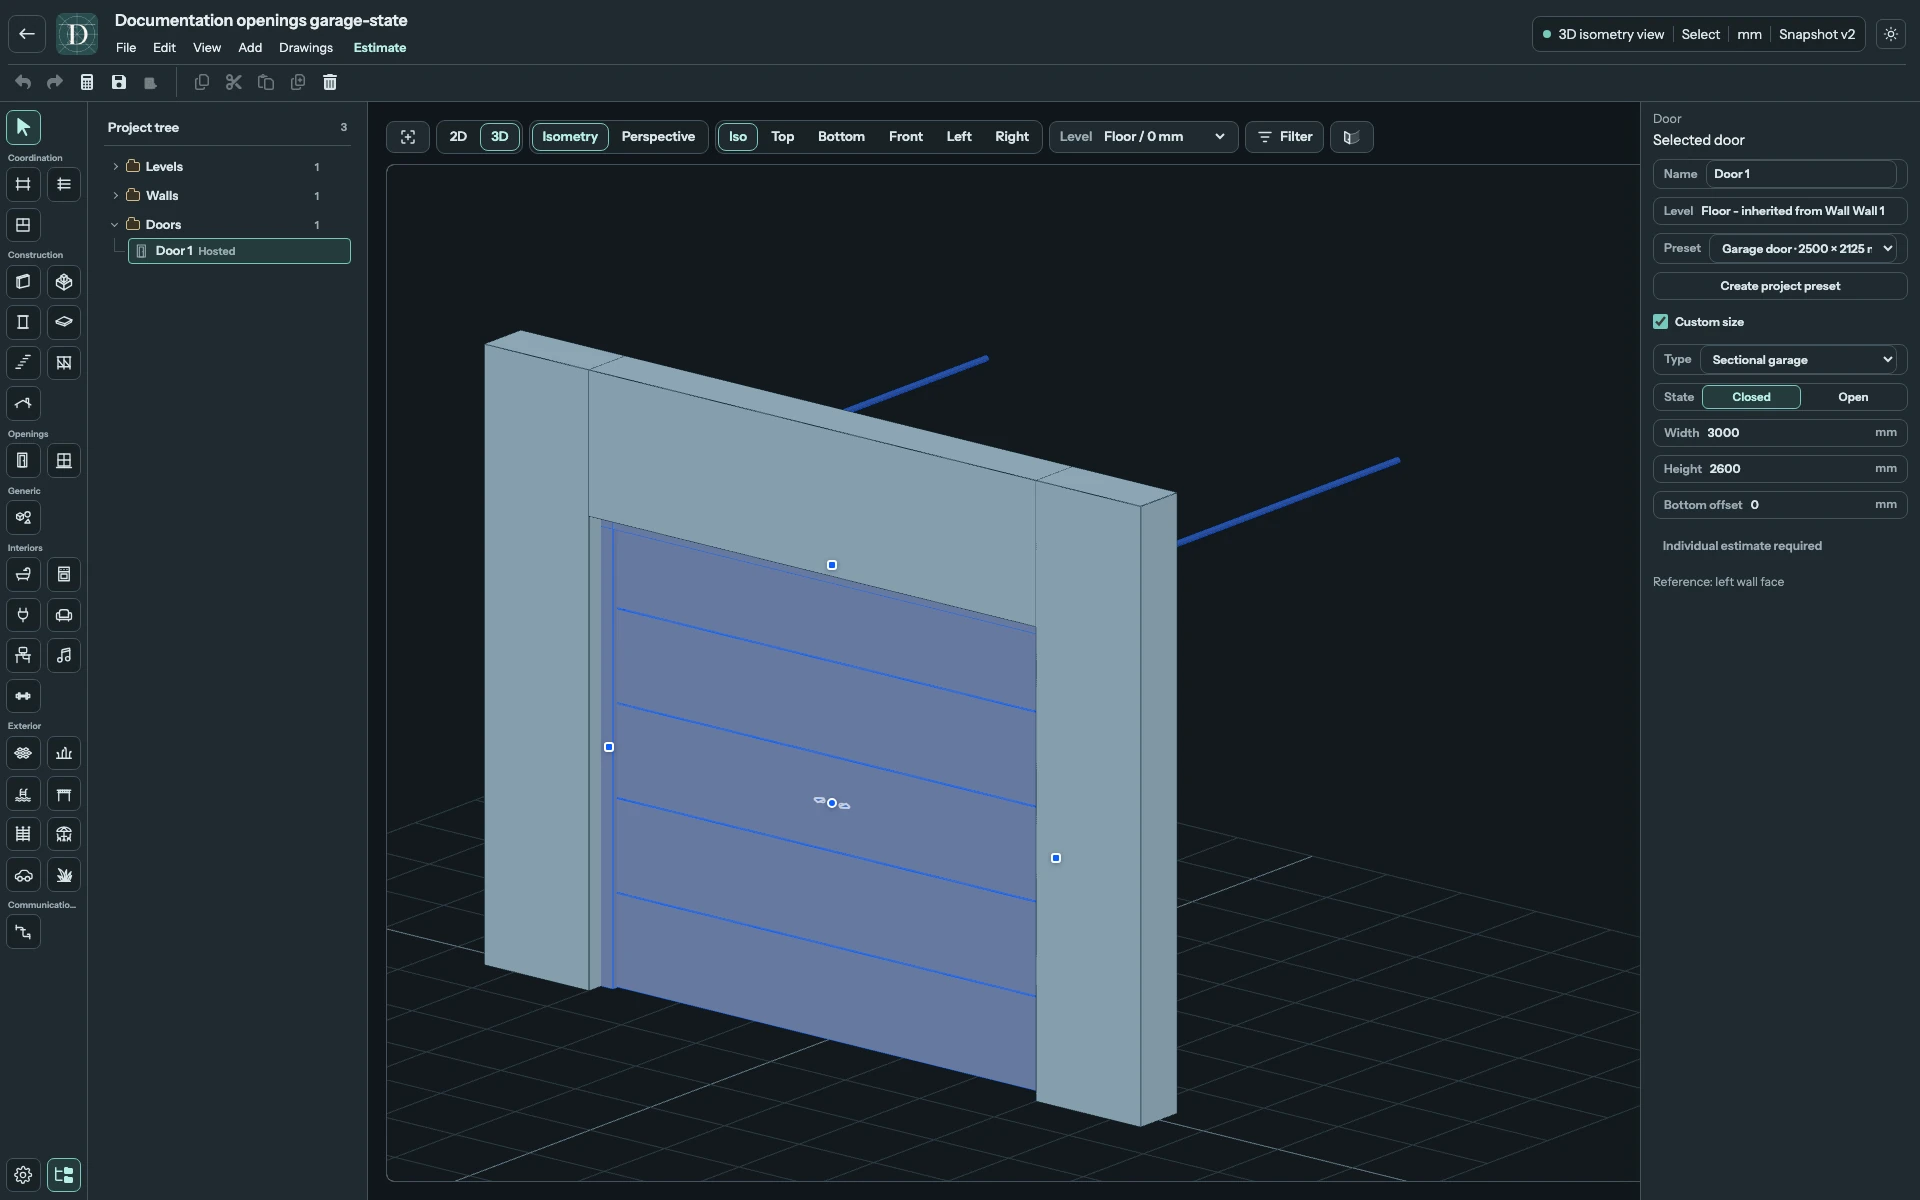
View the full-size screenshot.
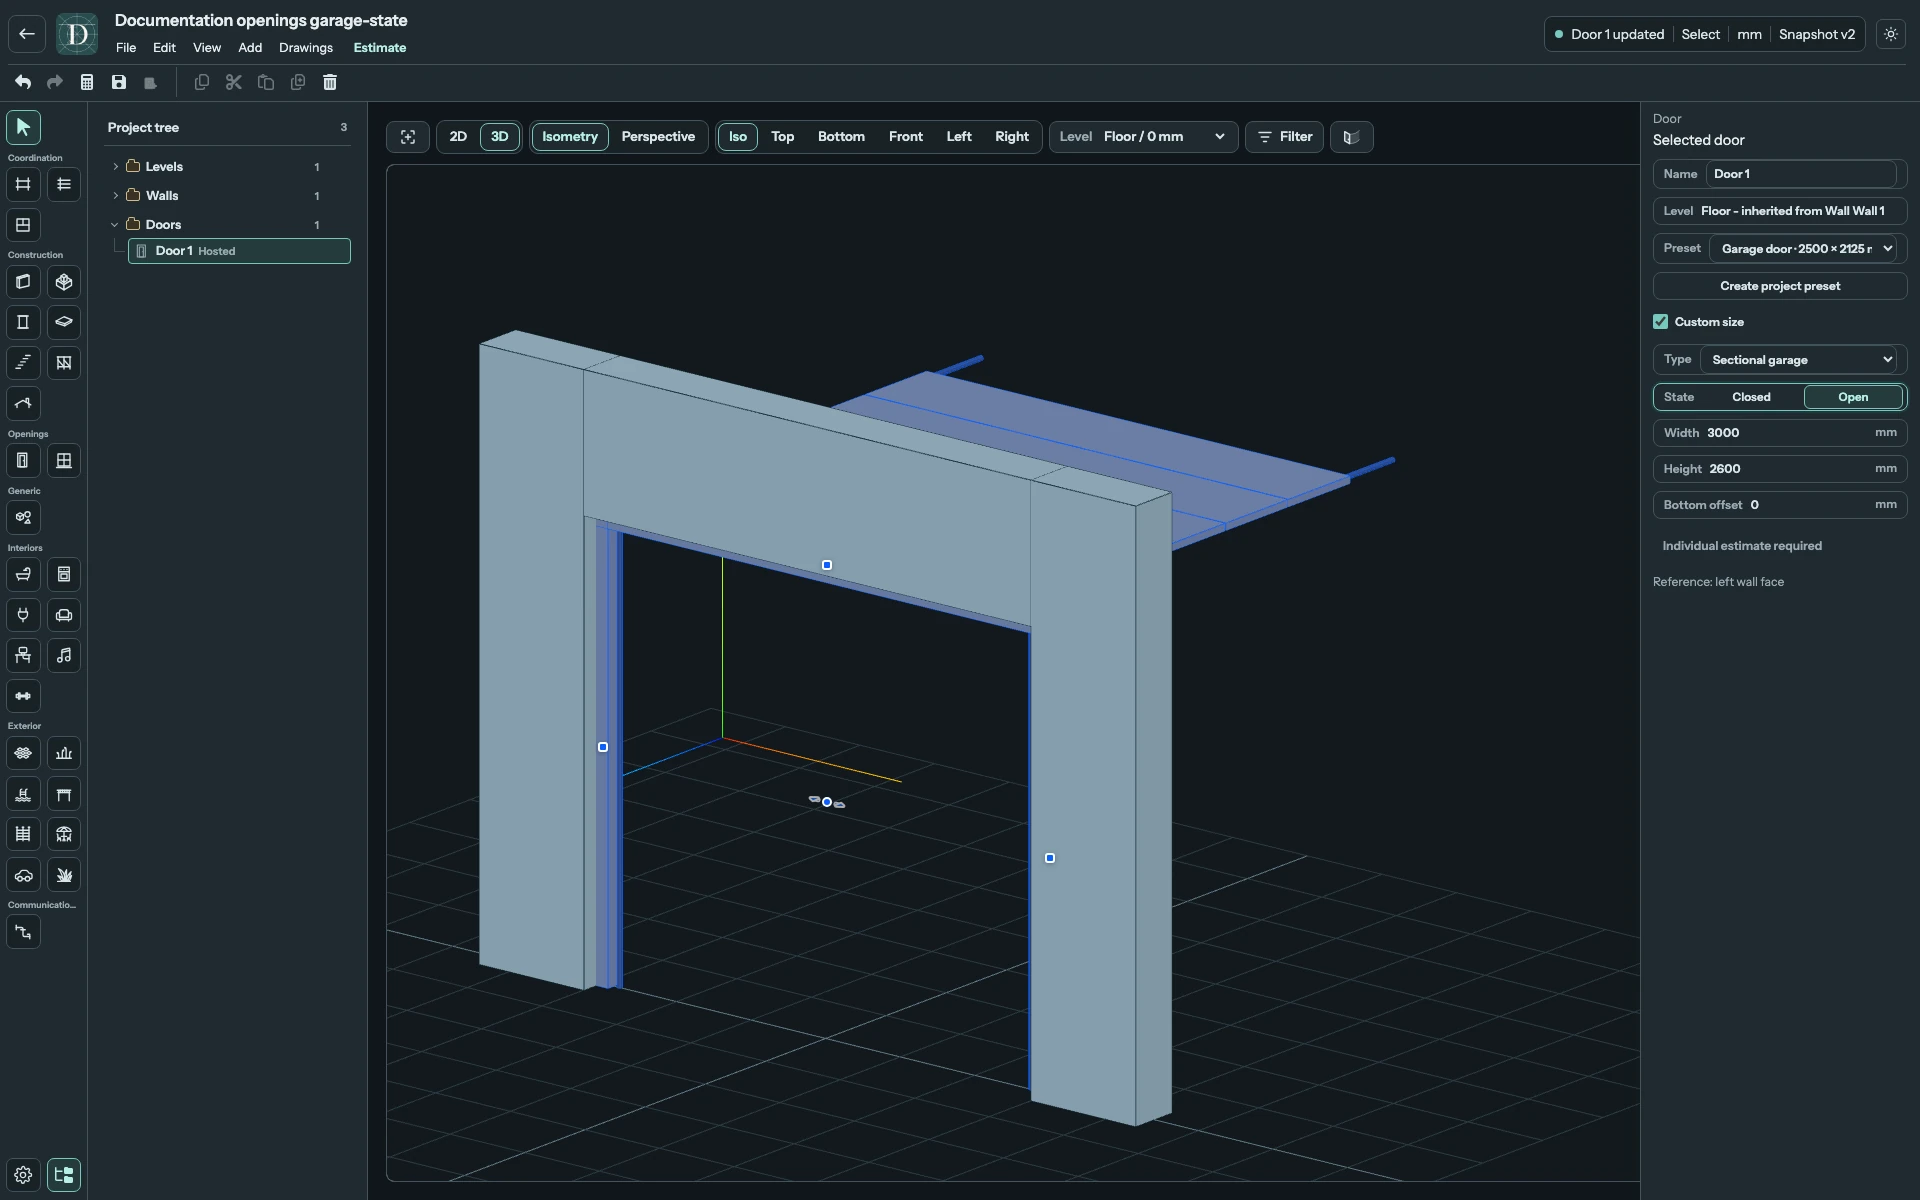
View the full-size screenshot.
Move, resize and check the opening
In Top, drag the center grip to move the Door along its Wall. For a filled Door, enable Custom size to resize it with an end grip or Width; an unfilled opening already allows these edits. The operation remains wall-hosted; it is not a free furniture move. See move and reshape for controls in other views.
Read any diagnostics about Wall ends, neighbouring openings, height or Roof intersections. An opening can be authored even when the visible cut is clipped by the Wall body or Roof profile; placement is not proof of clearance. Check the Door and opening in a side view and 3D.
Create a reusable project preset
Use Create project preset for a reusable fixed configuration in this project. Name and Description are required, up to 120 and 500 characters respectively. Based on selects the built-in configuration and fills its Fixed width and Fixed height; enter your dimensions after selecting the base.
Set Complete price per installed item to one nonnegative finished Door price including installation, and Currency to its three-character code. EUR is the initial currency. The preview shows the complete item price when the fields are valid. Create preset creates it; Cancel closes without creating it. Choose the new entry from Preset to apply the fixed configuration. The Door operation still has to satisfy the Single-swing or Sectional garage size limits listed above.
A Custom size occurrence shows Individual estimate required and does not inherit the fixed preset's price. Save and reopen to verify the host, dimensions, swing and construction.
Use Delete on a selected Door to remove that object and its hosted opening. The Wall remains. Undo restores an accidental deletion.