
In 2D → Top, choose the relevant drawing tool and working Level. Move the pointer near an Axis, Axis intersection or supported element edge or endpoint. Watch for the snap marker or temporary horizontal and vertical guide, then place the point. The marker shows the location the tool will use; inspect the resulting coordinates or geometry before continuing the chain.
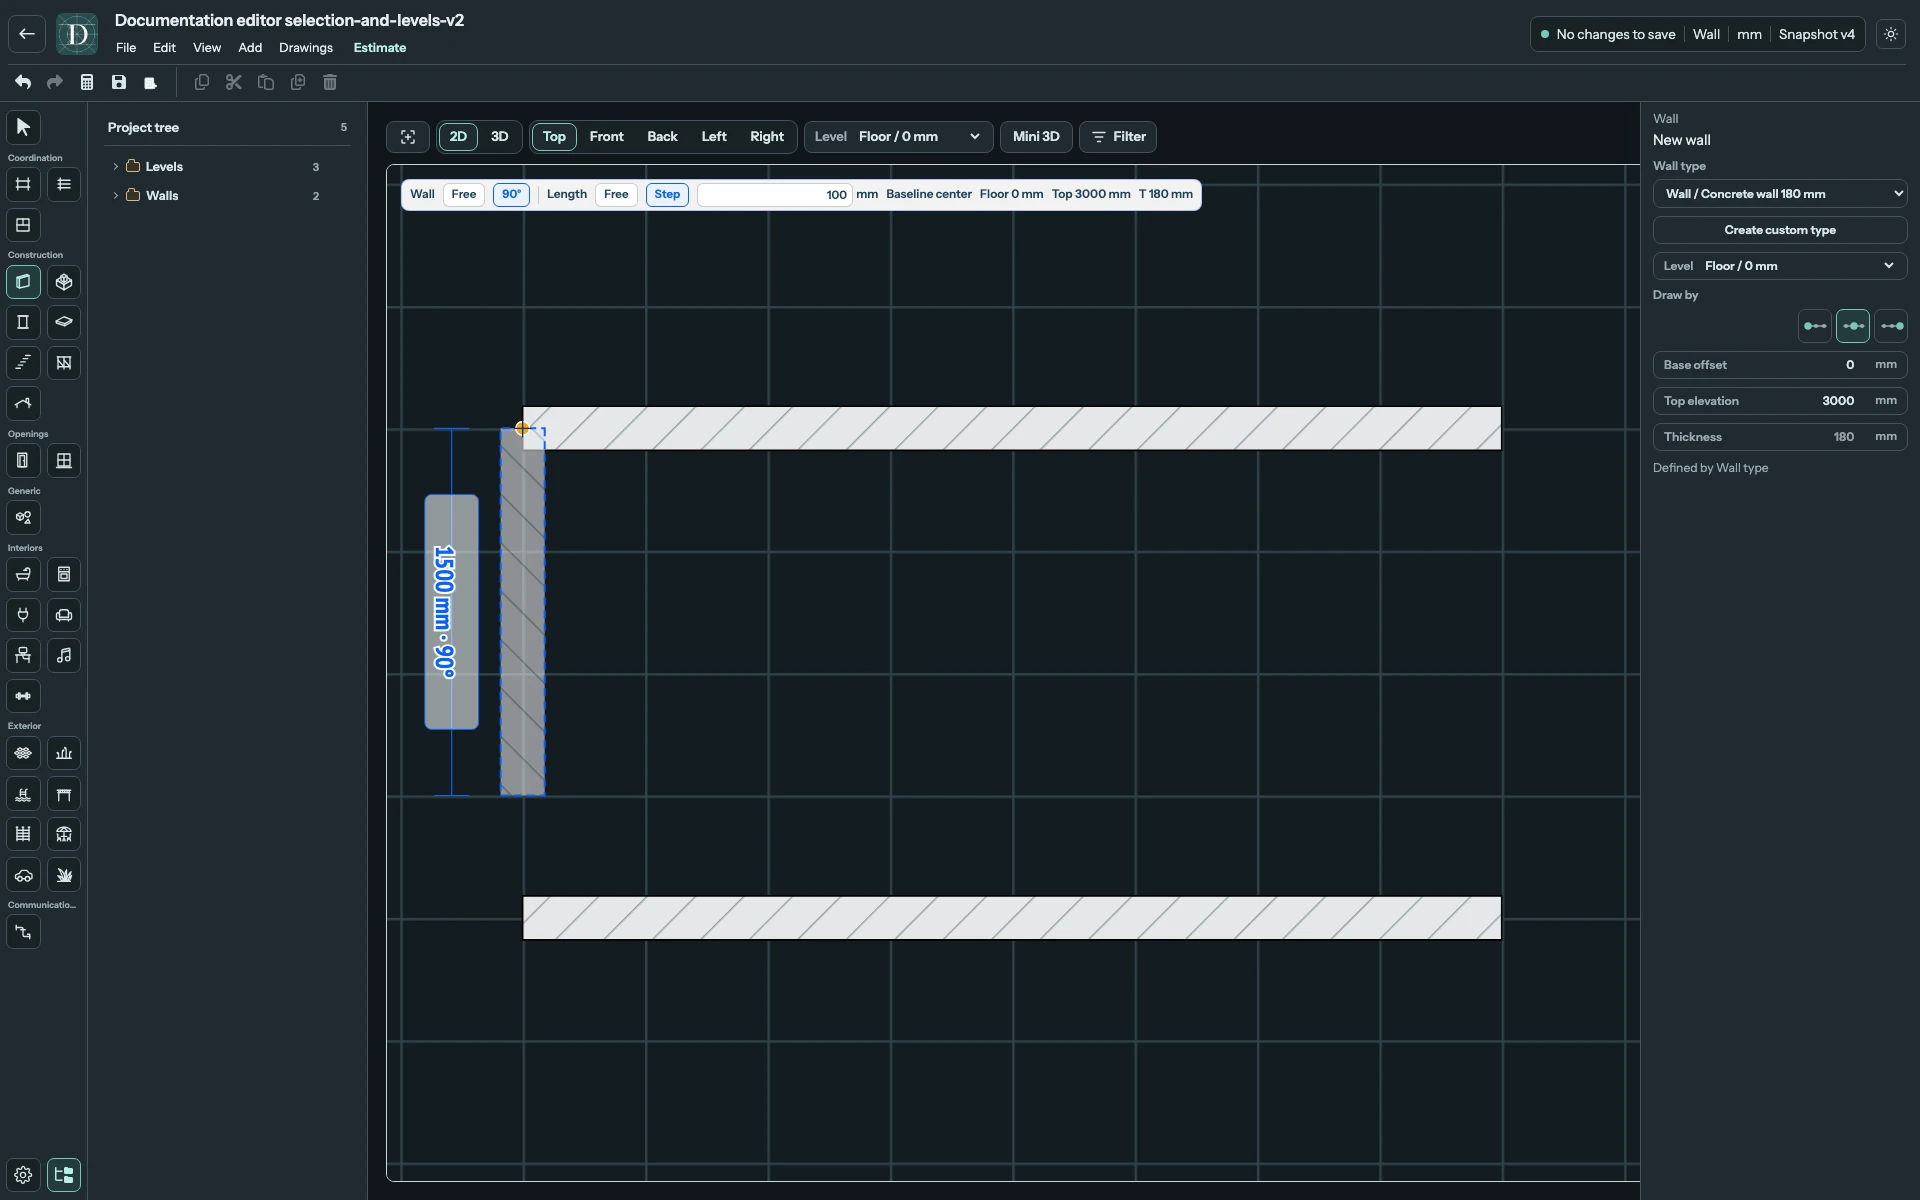
View the full-size snap-guide screenshot.
Snap targets and guide lines vary by tool. A Wall can use Wall endpoints, sides and Axes; point-chain tools can show temporary alignment from previous vertices. A temporary guide is drawing assistance, not a new permanent Axis. If a marker does not appear, zoom in and verify the reference is visible and available for that tool. After placement, select the object and check its geometry; snapping does not by itself create an explicit durable Axis binding.
Constrain direction and length separately
Wall, Foundation, Floor and Railing drawing tools expose separate direction and Length choices in the viewport's drawing controls. These choices constrain a segment while you draw; they do not change an already placed object when switched.
| Control | Effect |
|---|---|
| Direction Free | Allows arbitrary segment directions, with that tool's available snapping and alignment assistance. |
| Direction 90° | Constrains the segment to an orthogonal direction. For a Wall or Foundation, this follows the horizontal or vertical plan direction. |
| Length → Free | Allows continuous segment lengths; the Step input is inactive. |
| Length → Step | Uses the positive increment entered beside it, in the displayed project length unit. |
For example, choose 90° and Length Step 100 mm to draw an orthogonal Wall with its length in 100 mm increments. Free direction with the same Step keeps the angle free while stepping its length. Direction and length are independent choices. Enter or confirm the increment before placing the endpoint, then check the displayed dimension.
Furniture and appliance catalogs use free positioning; these construction controls do not add automatic Wall-edge snapping to their placement previews.
Snapping versus binding explains later movement. Build the first room shows a complete placement sequence.