
Select the object in the viewport or Project tree. In its right panel, open Level and choose the intended existing Level. This example temporarily moves a Chair from Ground floor to First floor; it does not change the house structure. The available control and effect depend on the object family: a Wall's base, a Roof's datum and a Room's plan assignment are different uses of a Level.
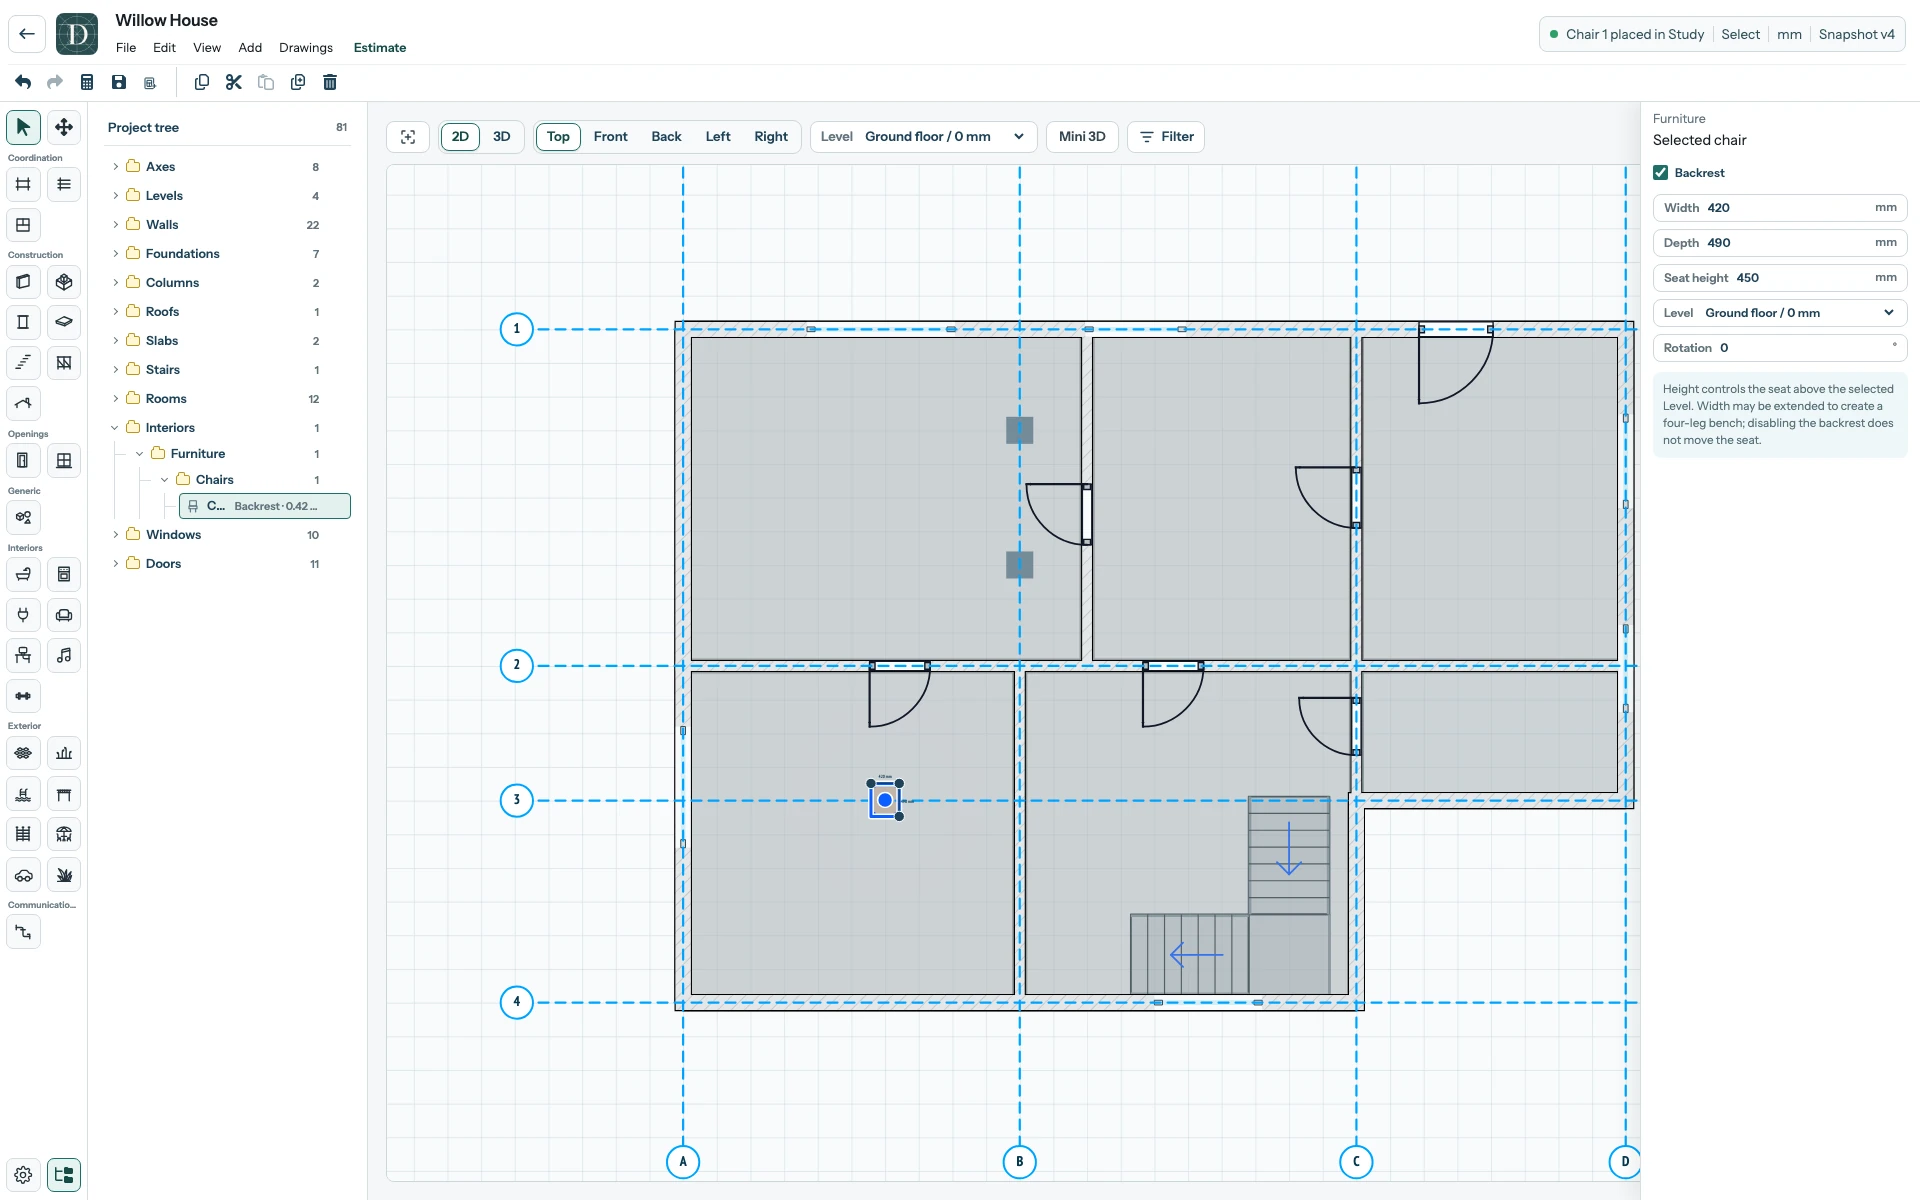
View the full-size before screenshot.
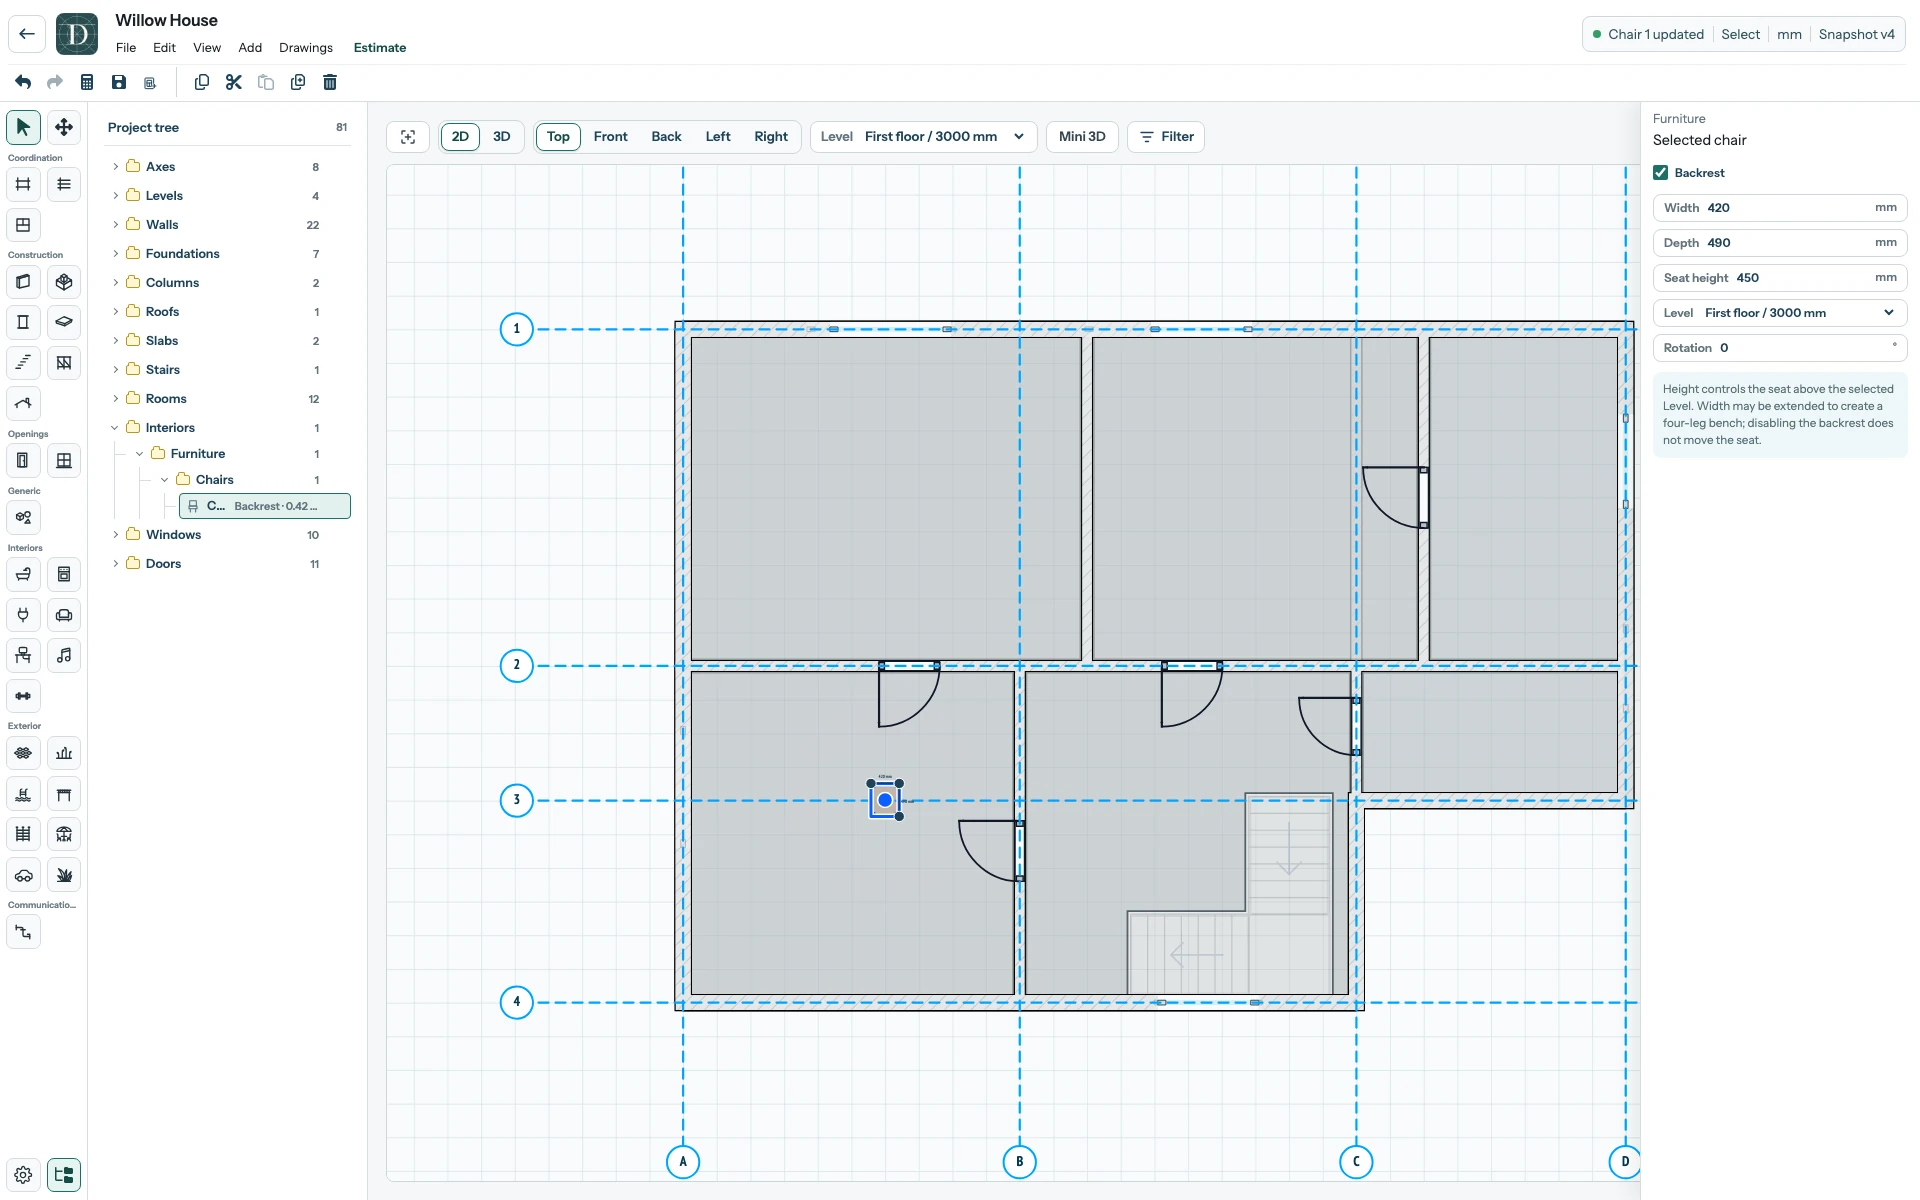
View the full-size after screenshot.
Choose the object's new active Level before checking Top or full 3D: higher Levels are hidden at the old active Level. Top's limited underlay comes only from the nearest lower Level; it is not a complete view of lower objects. Then inspect the resulting height in a side view or 3D. Review hosted openings and any upper constraint or offset before selecting Save. The Level selector above the viewport changes where you work; it does not reassign the currently selected object. What a Level controls explains these two settings.