
A material describes the substance assigned to an element. An assembly describes a construction system. A project type is a reusable definition with its own dimensions and complete project price. Use the element's dedicated fields first, because each family exposes different construction choices.
Choose the right control
| Element | Control to use |
|---|---|
| Wall | Wall type fixes construction and thickness. |
| Foundation | Foundation type fixes the section components. |
| Floor | Material chooses the primary material; Assembly chooses the floor system. |
| Column | Material chooses its material; Profile chooses its section geometry. |
| Door or Window | Preset selects a fixed product configuration; Custom size changes the occurrence. |
| Room | Separate Floor finish, Wall finish and Ceiling finish selectors. |
A material change does not define every layer, connection or member of an assembly. A color in the viewport is not a complete product specification. See types and object settings for the shared concepts.
Use the Material Catalog
For supported selected elements, the right panel includes Material Catalog below the primary settings. Scroll down if necessary.
- Select the element in the viewport or Project tree.
- Choose a category, such as Concrete, Steel or Timber, or use All.
- Select a material row to inspect its properties, source and render appearance. Selecting a row previews that catalog item; it does not assign it yet.
- In Assignment, check the selected object and choose Assign Material. Read the resulting Material, Validation, Impact and Recalc fields.
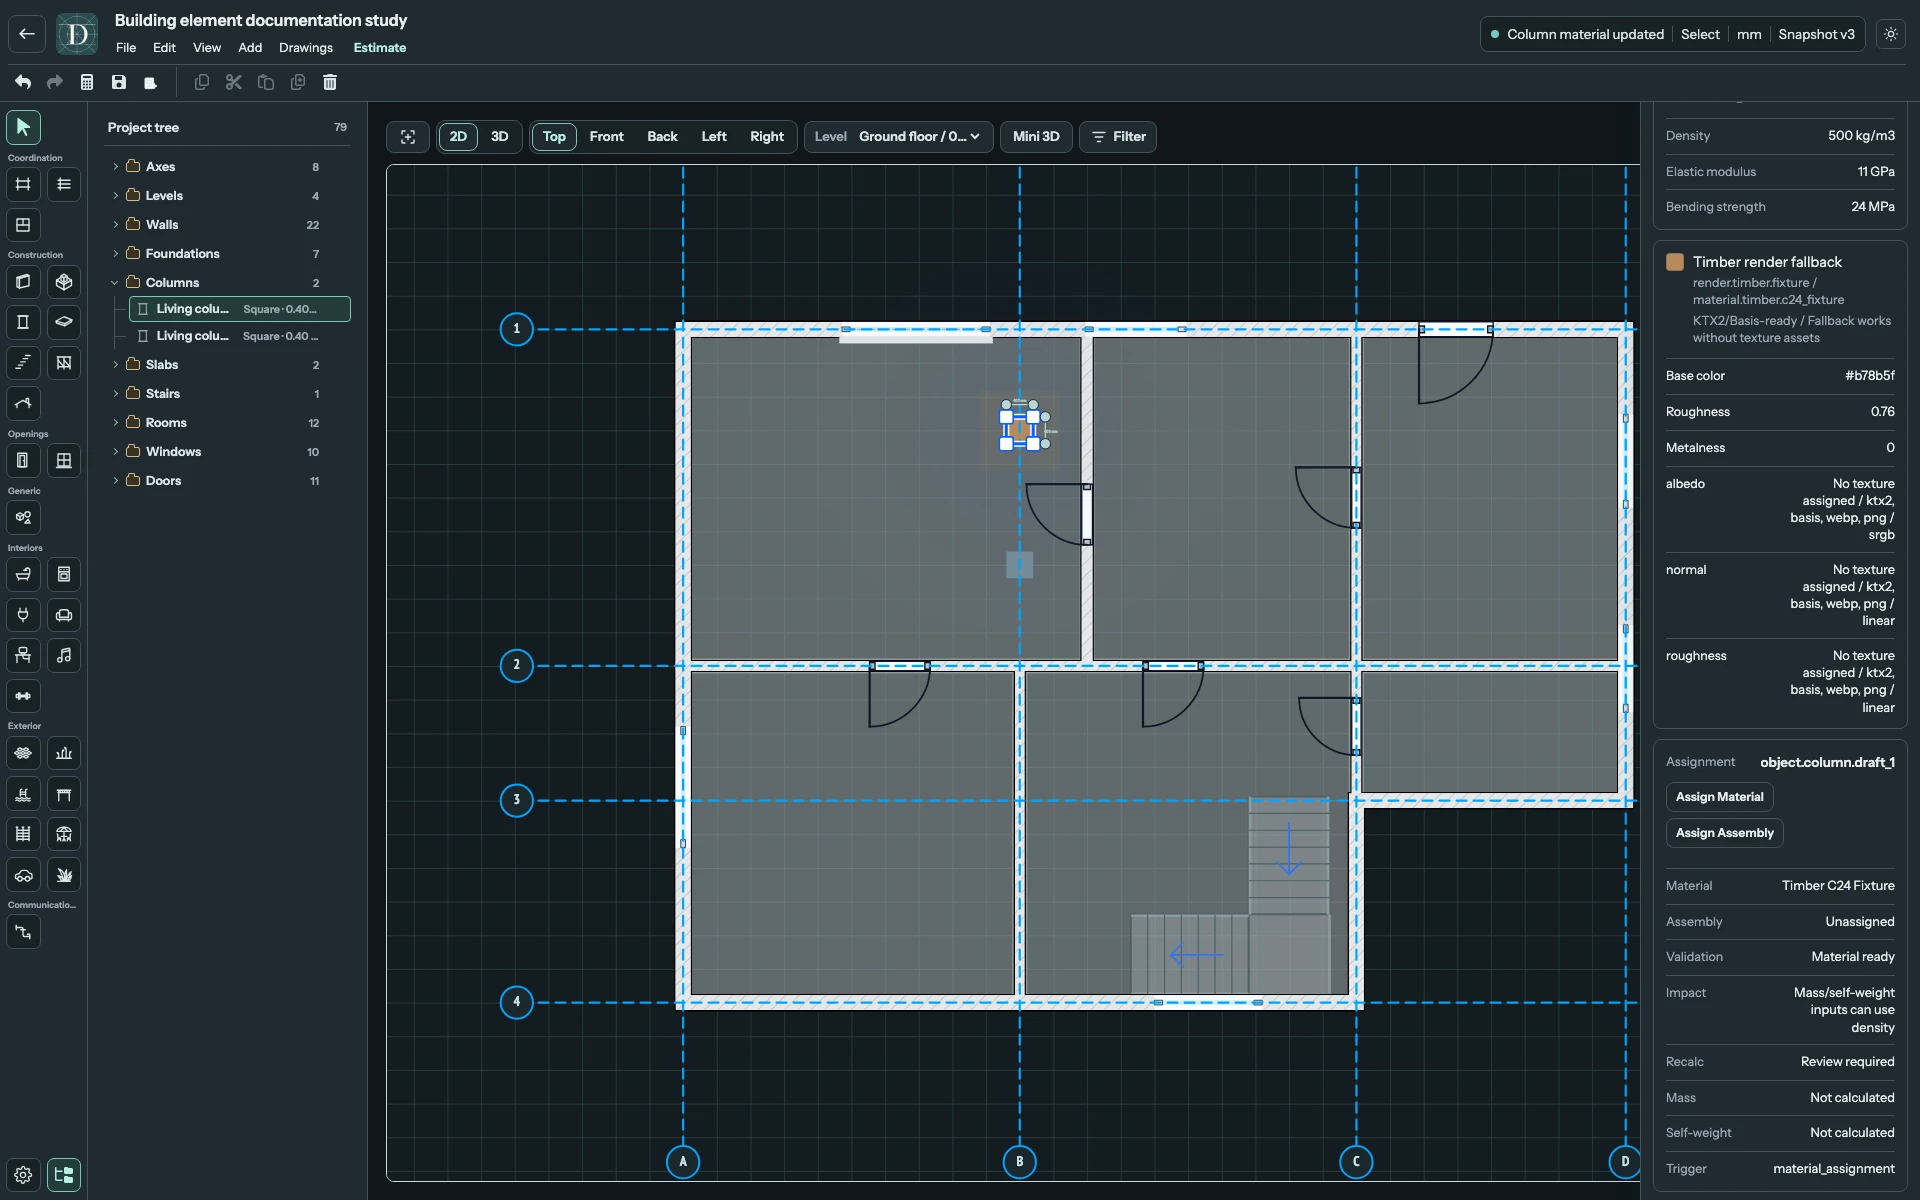
View the full-size material assignment screenshot.
The catalog identifies preliminary or fixture entries and missing properties. Read those labels when interpreting its calculations. A result shown for a supplied fixture is not independent verification of a real product. If an element reports a missing assignment, choose a suitable material or assembly and inspect the resulting status.
For an available assembly, choose an entry in Assembly options, then select Assign Assembly. Only use a construction compatible with the selected element. On a Floor, the dedicated Assembly field is the direct way to choose its supported system.
Create a reusable project definition
Use the family's own dialog rather than a generic material name:
- Wall types store role, construction family, thickness, currency and a complete rate in the family's required unit.
- Foundation Types store stem, footing and blinding dimensions and a complete rate per m³.
- Door and Window project presets store a fixed configuration, size and a complete supplied-and-installed item price.
Changing the selected instance to another type affects that instance. Edit type changes the shared project definition and updates all Walls or Foundations assigned to it. A custom-sized Door or Window requires its own estimate instead of silently retaining the fixed-size price.
After assignment or a shared type edit, inspect the affected geometry and status, then Save and reopen the project. Use estimate settings when you are ready to calculate project costs.