
Continue from the Walls and Room exercise. A Door needs a host Wall: placing it in the empty viewport will not create one.
- In Top 2D, choose Door under Openings. Select a Preset in the right panel, then click the Wall at the intended position. The Door appears in the plan and under Doors in the Project tree.
- Select the Door to inspect its settings. Its Level comes from the host Wall. For a single-swing Door, use Hinges, Swing and Opening angle to set the opening direction; inspect the plan arc as you change them.
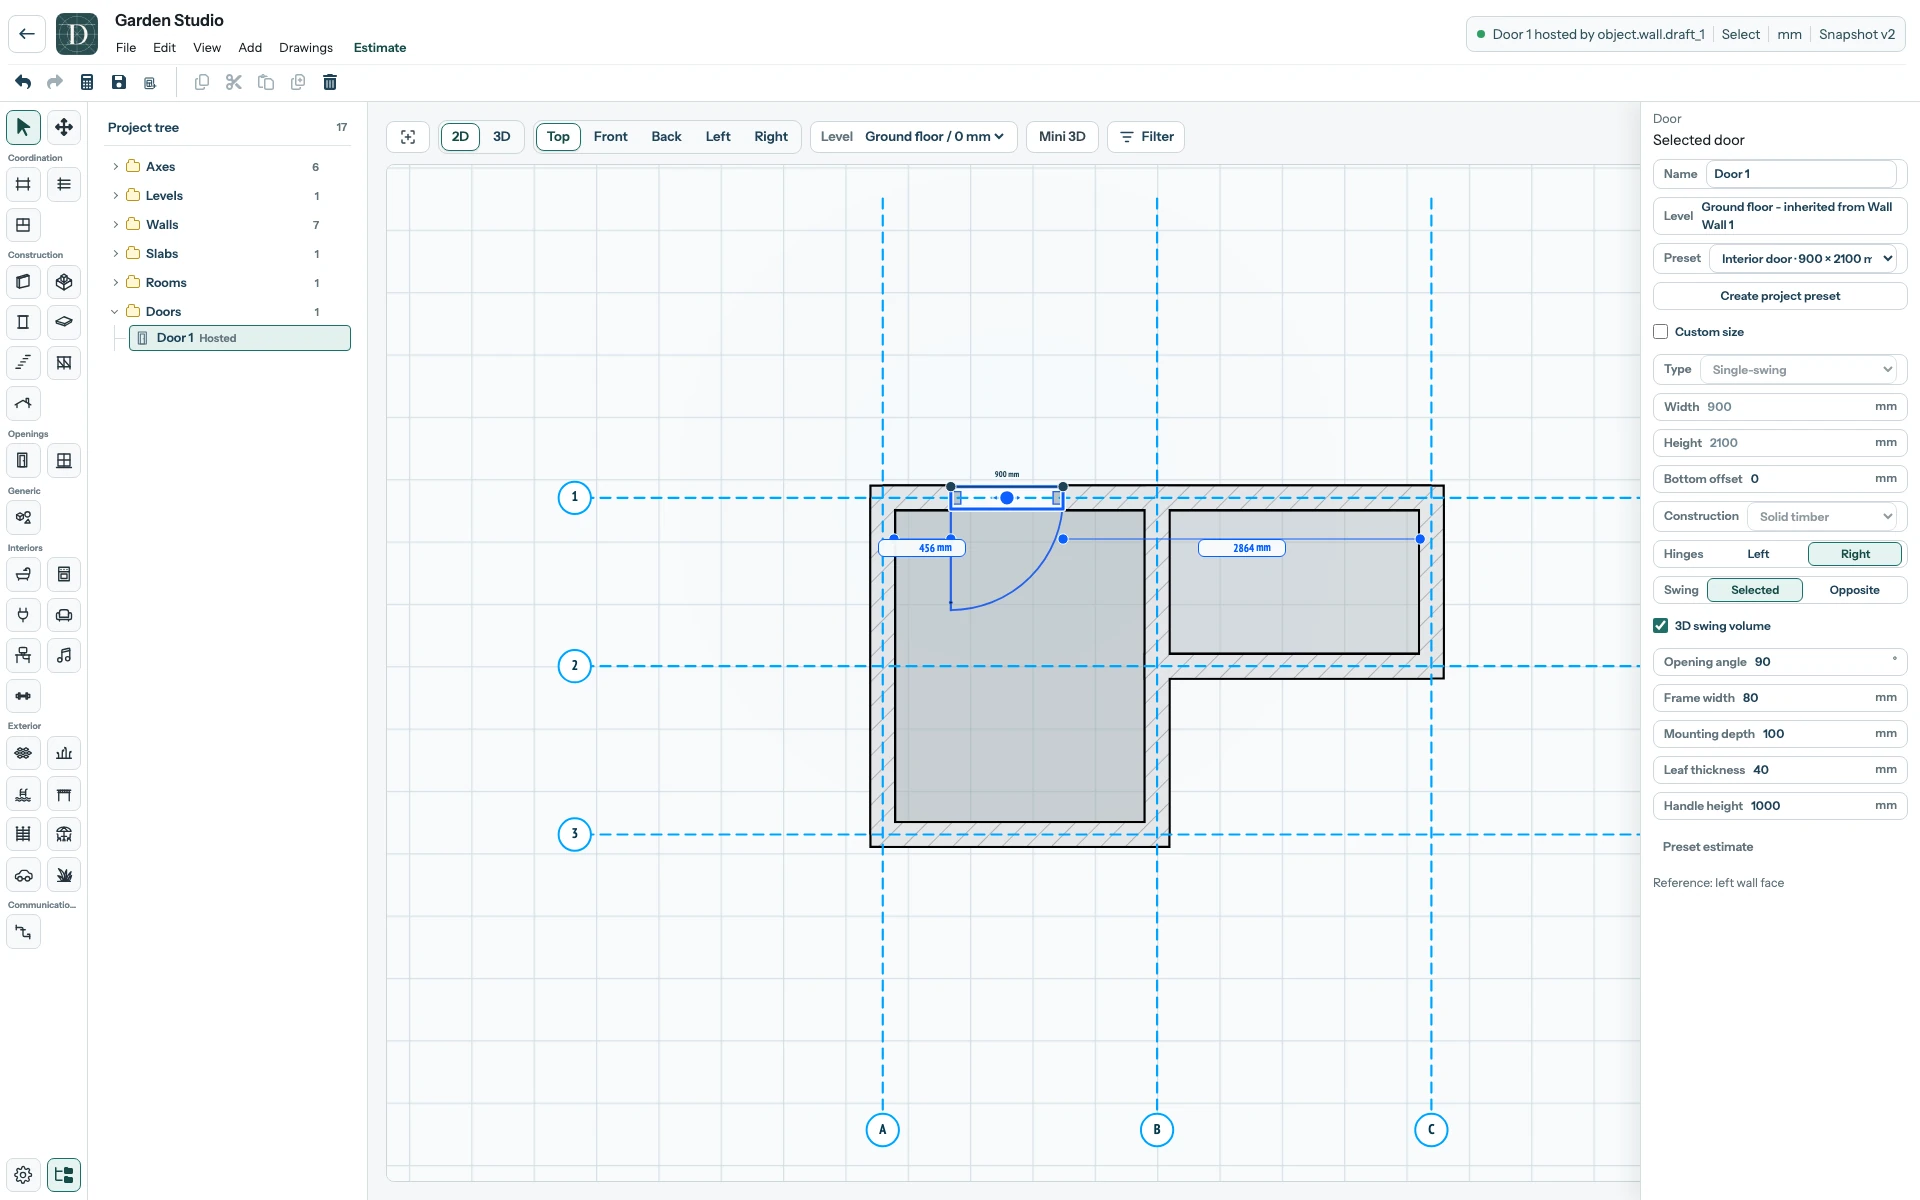
Inspect the full-size Door screenshot.
Use a different size
Select Custom size to edit Width and Height for this Door. The screenshot's dimensions belong to Garden Studio; enter dimensions suitable for your project and check that the Door remains within its Wall and clear of other openings. A custom-sized occurrence needs its own estimate price; it does not inherit the fixed preset's price. Type also becomes editable in this mode; the available operations are Single-swing and Sectional garage.
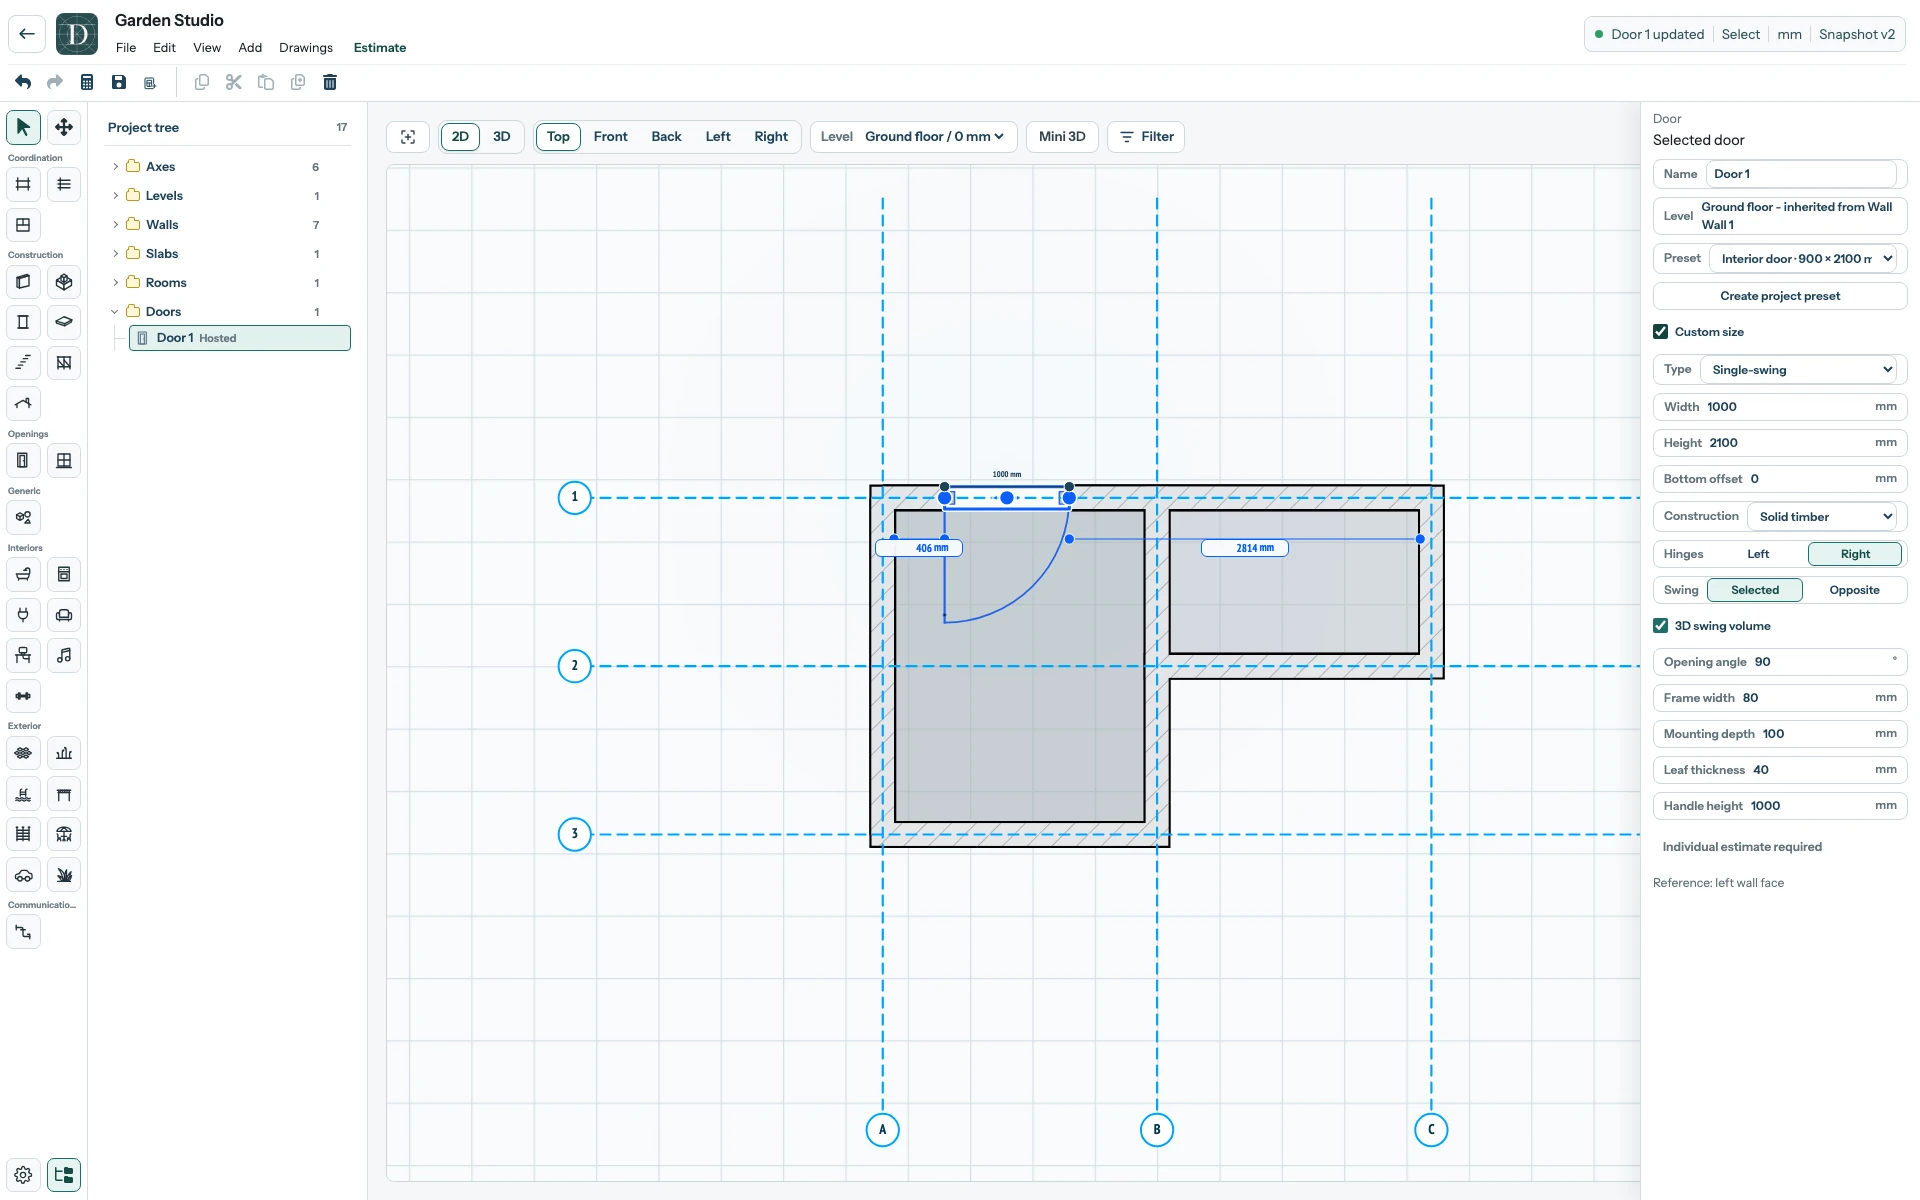
Inspect the full-size custom Door screenshot.
To reuse a configuration in this project, select Create project preset. Give it a name and description, choose a base preset, enter its dimensions and a complete supplied-and-installed item price with currency, then select Create preset. The filled values in the screenshot are illustrative project inputs, not a market rate to copy. Choose the new entry from Preset for another Door.
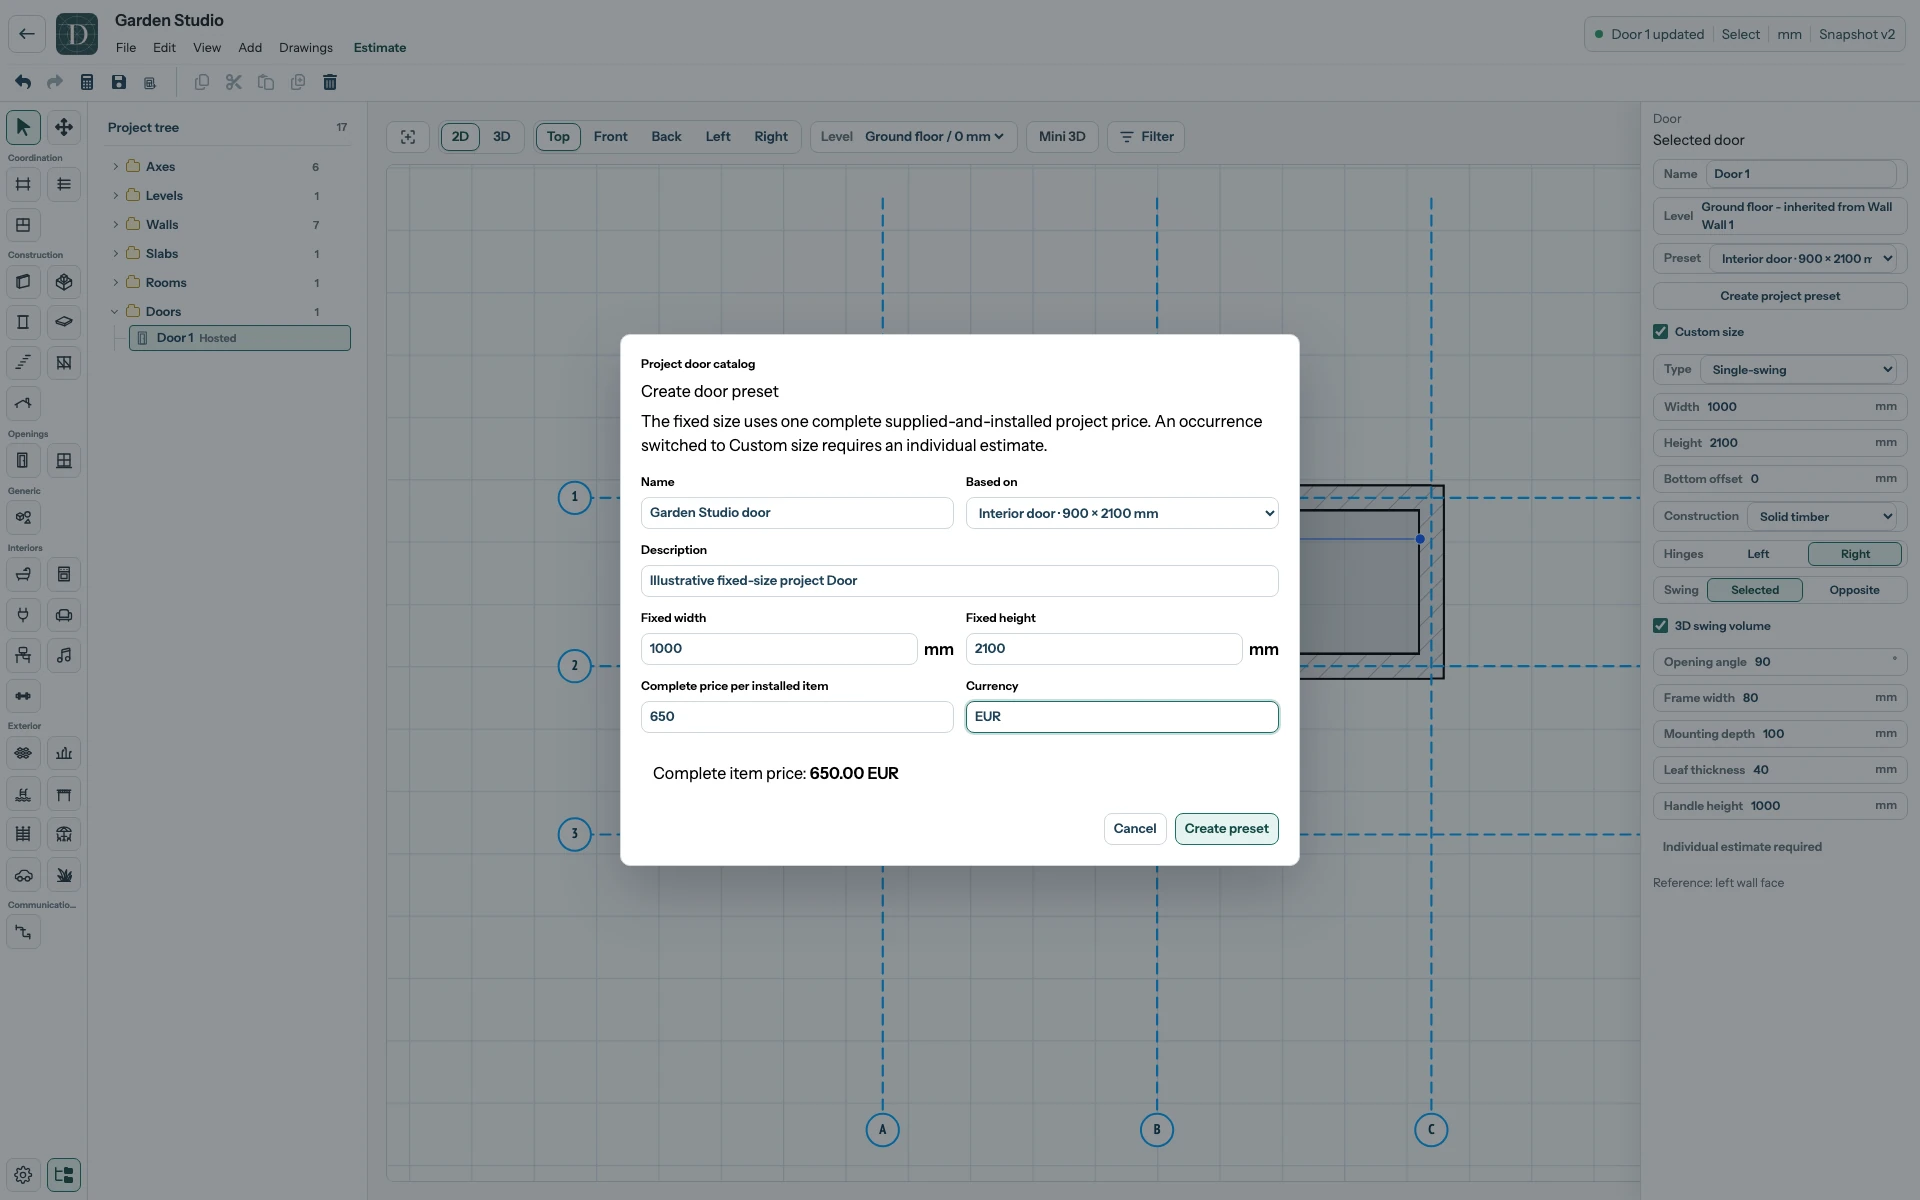
Inspect the full-size Door preset dialog.
Select Save, then reopen the project to check the Door and its settings. The present Door tool models the listed operations; it does not create an arbitrary leaf or opening shape.
Use the detailed guide for door configurations, opening direction and materials.