
Continue from the Door exercise. A Window cuts an opening in a host Wall and takes its Level from that Wall.
- In Top 2D, choose Window under Openings. Choose a Preset in the right panel, then click the host Wall where the Window should go.
- Select the Window in the plan or Project tree. The right panel shows its preset, Width, Height, Sill height, Columns, Rows, frame and mounting settings. The Exterior control identifies the outside face; use Flip if that face is wrong.
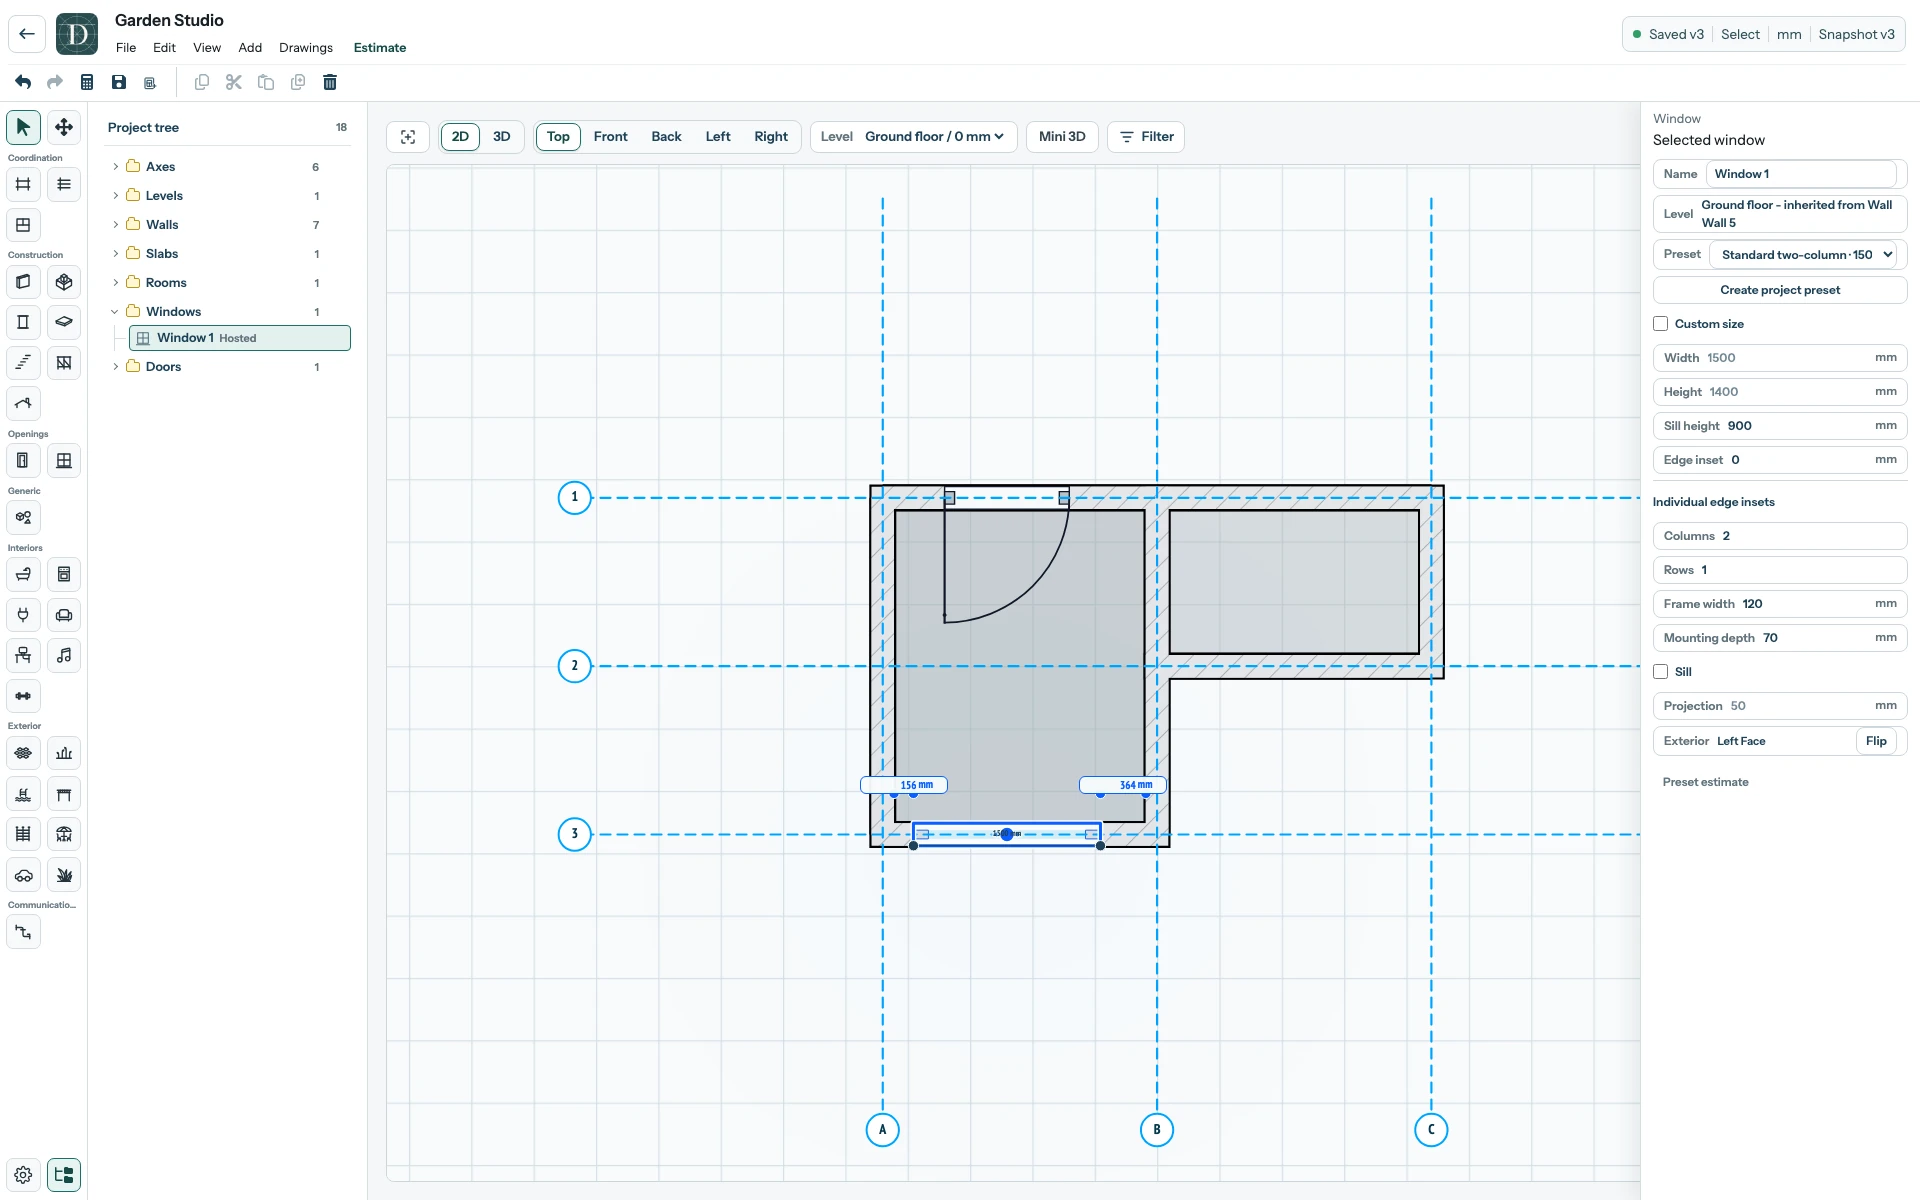
Inspect the full-size Window screenshot.
Adjust this Window or make a project preset
Select Custom size to edit this Window's Width and Height. Set Sill height for its vertical position, and use Columns and Rows for the visible subdivision. A custom-sized occurrence needs its own estimate price; it does not inherit the fixed preset's price. Check the Wall opening in 2D and 3D after changing the settings. Any numbers in the example screenshot describe Garden Studio only.
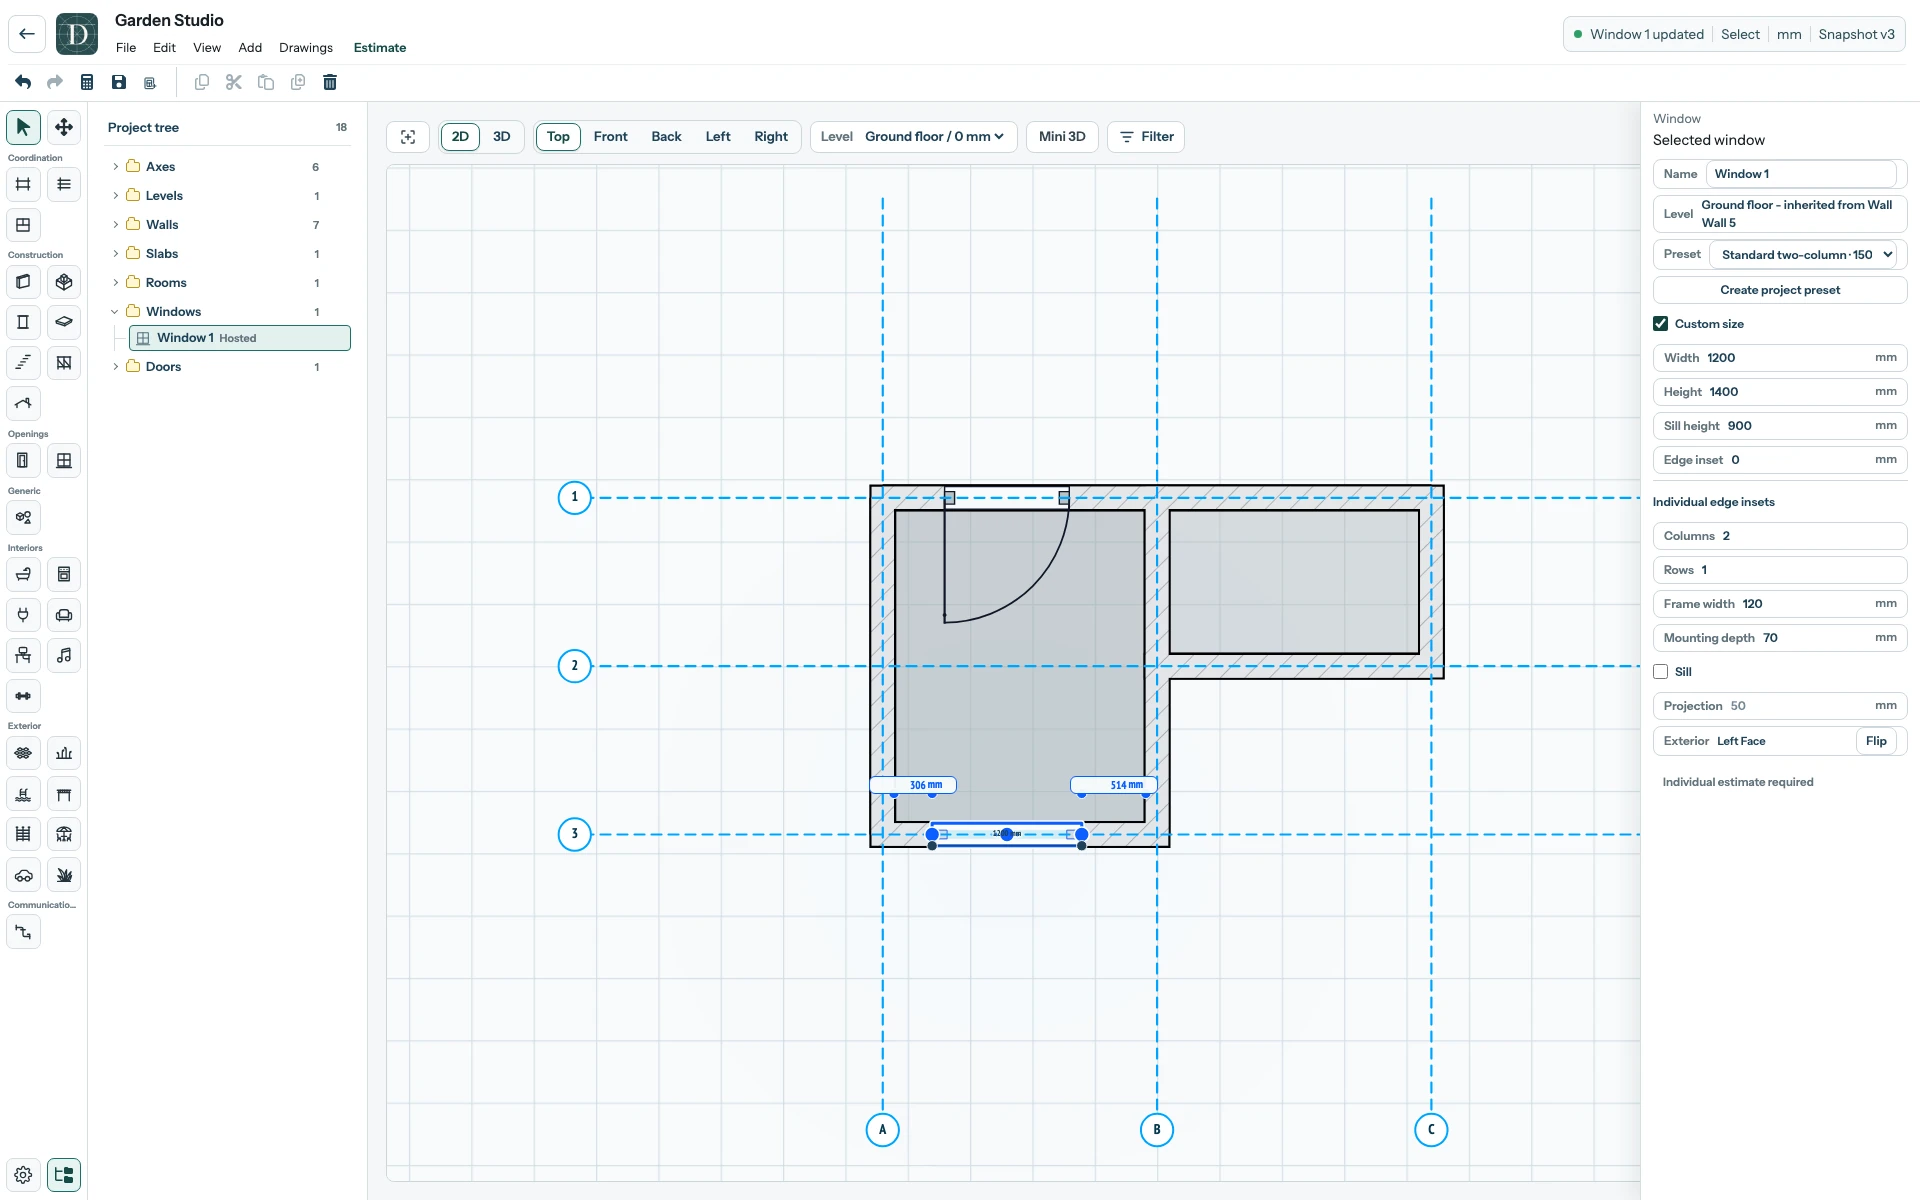
Inspect the full-size custom Window screenshot.
For a reusable size, select Create project preset. Enter a name, description, base preset, dimensions and a complete supplied-and-installed item price with currency, then select Create preset. The filled values in the screenshot are illustrative project inputs; use your own price. The new entry appears in Preset for other Windows in this project.
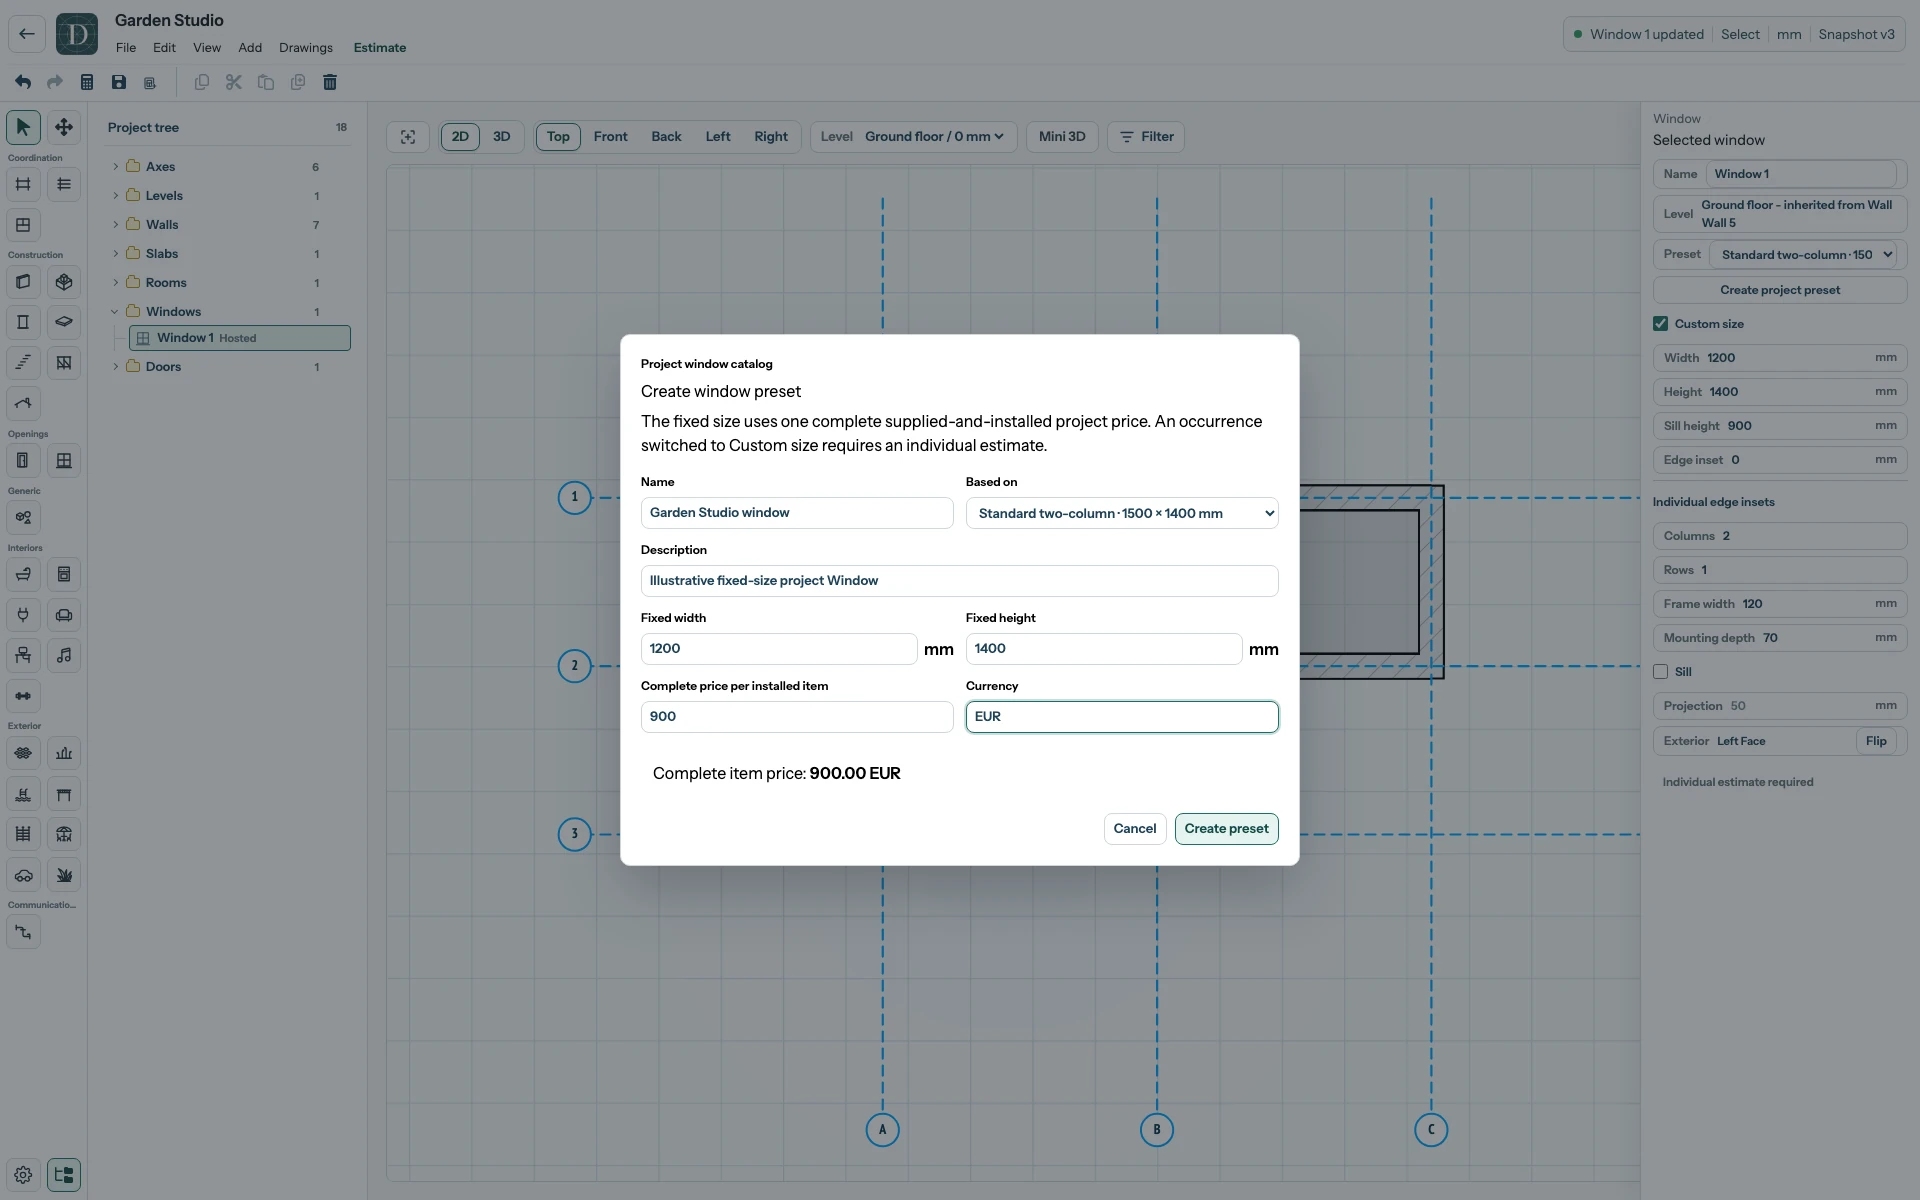
Inspect the full-size Window preset dialog.
Select Save and reopen the project to check the hosted Window. Custom size and project presets configure the supported rectangular Window; they do not create arbitrary opening shapes.
Use the detailed guide for pane divisions, sashes, materials and host constraints.