
Use the Ruler to check a distance between two points or measure an area you outline. Open a project in 2D and choose View → Ruler or click the ruler icon just after Delete in the top toolbar. The tool works in the Top view and all four side views. It measures in the plane of the current view.
The Ruler is also available when you open a shared project link. Switch to 2D and click the ruler icon in the toolbar above the drawing.
Measure a distance
- Click to set the first point. Release the mouse button and move toward the second point. The dashed line shows the current distance.
- Watch the marker as you approach a visible edge, corner or axis. A ring marks a snap point. A crosshair marks a free point.
- Click to set the second point. The distance stays on screen. Each further click adds another segment.
Straight edges and circular arcs can be snap targets. On elliptical or Bézier curves, place a free point if no other snap target is nearby.
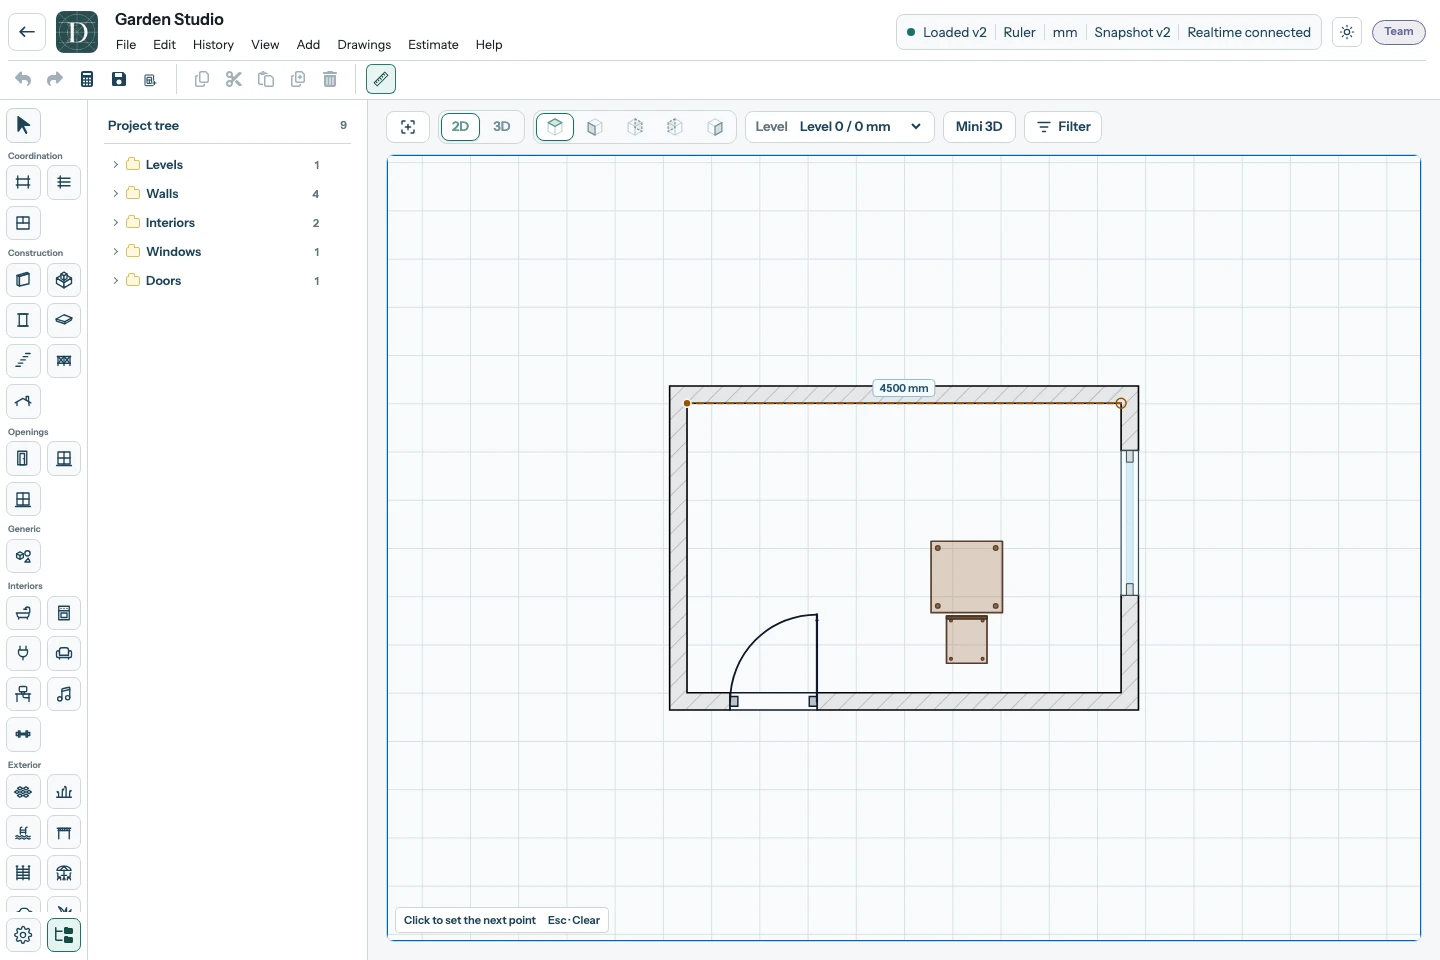
Open the distance screenshot at full size.
Measure an area
Click at least three points around the area, then click the first point when the closing ring appears. A valid outline shades the enclosed region and displays its area. If the outline crosses itself, remove the last point and correct the path.
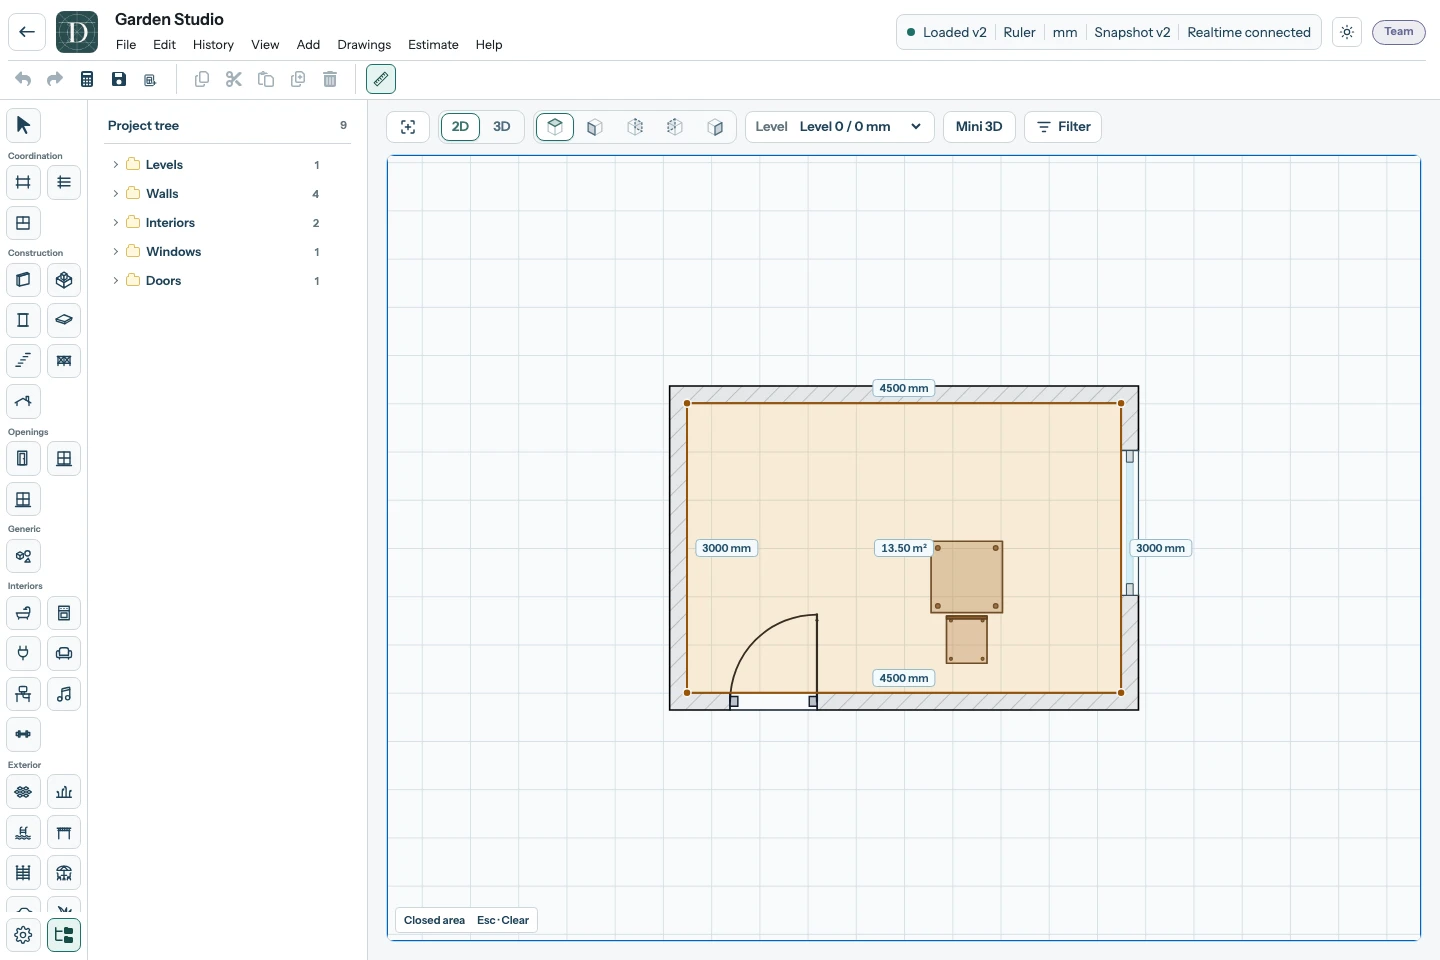
Open the area screenshot at full size.
Lengths use the project's length unit. Areas are shown in square metres for metric projects and square feet for imperial projects. Project settings.
Correct or clear the measurement
Right-click without dragging to remove the last point. If the outline was closed, this also removes the shading and area label. Right-drag pans the view. Press Esc to clear the whole measurement, or press Esc again from an empty measurement to return to Select. Measurements are temporary and disappear when you reopen the project.